Thursday, August 18, 2011

Fall Class Schedule Update


We are very excited to announce that the fall class schedule has been posted online!

We have done something a little different this year and divided up the class into different sections including:

Make it & Take It Workshops - These are project based workshops where you learn to make a specific things from start to finish and take it home with you after class.
Fashion Lab Series Classes - These are classes that usually take place over a series of classes that meet once or twice per week. Projects completed will depend on the pace that you work. These classes usually come with open lab time to work outside of class. 
Skills Classes - These are classes that focus on core sewing skills used in most sewing projects and range from beginner to advanced. 


We super excited about all the new classes including: button workshop, pattern workshop, dog jacket workshop, curtain workshop, zipper bag workshop, fabric flower workshop, to name just a few.

We have also brought back some requested classes including mini-quilt workshop, applique bunting/banner workshop & the draping lab.

If you'd like to take a look at the schedule with all the classes in one place, check out our Schedule at a glance. You can even print this one for your fridge.

Wednesday, August 17, 2011

Nursing Cover Tutorial

Mommy Sewing Lab - Sewing Project: Nursing Cover

Here is a quick tutorial of the project you will work on in the introductory Mommy Sewing Lab. It's a great way to get the hang of sewing and even if you're not currently nursing, they make great handmade baby shower shower gifts.

Supplies
* 1 yard fabric of your choice
* Two O or D rings
* 12" of boning

1. Cut a 35" x 30" piece from your fabric. This will be the main part of the cover. Set aside.

2. Cut a 4" wide strip along the length of the remaining fabric.

3. Fold the 4" piece in half lengthwise, right sides together, and pin.

4. Sew down the length on the side that is not folded with a 1/4" seam.

5. Turn the strip right-side out.

6. Flatten strip with the seam down the middle and press flat

7. Cut the strap into two pieces. One should be about 26" long. The other end should be about 8" long.

8. Thread one end of 8" piece through both D rings. Fold end over 1/4" and press. Fold over another 1/4" and press.

9. Stitch the hem along the edge, then again closer to the D rings to keep them in place.

10. Stitch side hem along outside of fold from top to bottom.

11. Repeat on opposite side, then along bottom. Leave the top unfinished.

12. Fold the top edge over 1/4" then a second time 3/4" and pin in place.

13. Stitch along the folded edge to creat a 3/4" tunnel to put the boning into.

14. Slide the boning to the middle of the cover and make a stitch on either side so it can't slide around.

15. Attach the straps on either side of the boning with a box stitch.

Anatomy of a Sewing Machine

Found this great, really basic "Anatomy of a Sewing Machine" resource Craftzine published back in April 2007. It was written by Christine Haynes and Kent Bell.

This handy little feature showcased the illustration below, done by Kent, and the corresponding descriptions below. Useful when you're just getting started working with sewing machines as well as when you're troubleshooting. 

I was drawn to it because of the graphic (adam thinks I should get a tattoo of it), but upon reading it, found it really really useful. So here it is. Can also be found online here.


1. Pedal -  The speed of the machine is controlled by the foot pedal.

2. Slide plate - Slides open to reveal the bobbin.

3. Bobbin - One of the two threads used to make a stitch is stored in the bobbin, which is located under the needle and throat plates.

4. Feed - These little metal teeth pull the fabric through so that it can be stitched.

5. Throat plate - Stays in place while the needle penetrates through a hole to pick up the bobbin thread underneath.

6. Presser foot - Interchangeable with other specialty feet, it holds the fabric in place.

7. Needle - Most projects will utilize one of four types of needles. The sharp point needle is used most often with woven fabrics. The ballpoint needle is ideal for knits; the wedge point needle is used for leather and vinyl; and twin or triple needles are
used for decorative topstitching.

8. Foot pressure dial - Correct foot pressure results in even feeding of the fabric. Some machines automatically adjust tension and pressure to the fabric. Always check tension and pressure on a scrap of fabric before starting to sew. Generally, the lighter the weight of fabric, the lighter the pressure needed.

9. Stitch tension dial - The stitch tension dial sets the amount of tension on the threads while sewing. Too much tension results in too little thread fed into the stitch, causing the fabric to pucker. Too little tension results in a loose stitch.

10. Bobbin winder thread guide - On a machine with an external bobbin winder, the thread loops around this guide between the spool and winder.

11. Stitch selection dial - This is where you choose between the many different stitches: straight, zigzag, and other decorative stitches. Can also be done digitally.

12. Needle position - If you are sewing a zipper or doing other specialty stitching, you might need to move the needle from the center position to a left or right position.

13. Spool pin - Spool of thread sits on the spool pin. Some machines have more than one for decorative stitching. 
14. Bobbin winder - The empty bobbin sits on this winder to be threaded. When winding bobbins, always start with an empty bobbin so the thread will wind evenly.

15. Flywheel - This wheel spins as you push down the pedal. Most machines disengage the flywheel when winding bobbins.

16. Stitch length dial - The stitch length dial is on a "per inch" scale from 0 to 20 per inch, a metric scale from 0 to 4mm, or a numerical scale from 0 to 9.

17. Stitch width dial - When you use decorative stitches and zigzag stitching, this dial can determine the width of the stitch.

18. Reverse stitch button - If you want to secure your stitch at the beginning and ending, sew a few stitches in reverse by pushing this button down.

Tuesday, August 16, 2011

Peter's 30 Sewing Dos and Don'ts - Borrowed from Burdastyle

I just came across this blog entry over at the Burdastyle Website and I cannot agree more. This list covers all the things that I've painstakingly learned in my 20+ years of sewing. If you're new to sewing, I suggest you heed this advice. It will save you loads of time and anguish! No need to have one of those "I feel like throwing my sewing machine out the window" moments that I used to have when I was first sewing.


When native New Yorker Peter Lappin bought his first sewing machine two years ago to hem a pair of thrift store jeans, little did he know he was initiating a journey that would bring him fame and fortune. While awaiting his fortune he stays busy writing “the world’s most popular men’s sewing blog,” Male Pattern Boldness, and now contributing to BurdaStyle.


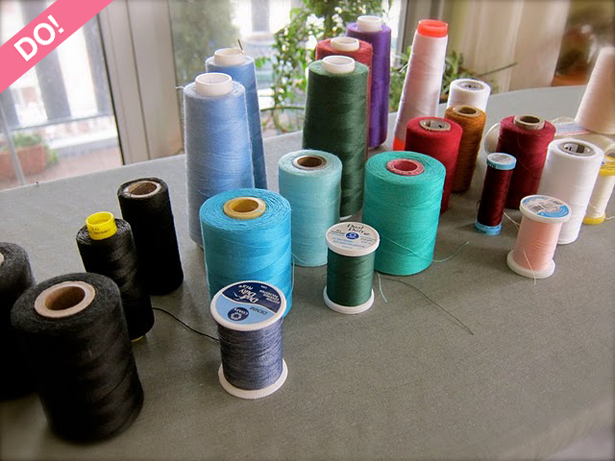
Peter’s SEWING DO's
1. DO sew only projects you’re excited about.
2. DO start an important project with a fresh sewing needle.
3. DO clean your sewing area and the bed of your sewing machine thoroughly (I use rubbing alcohol) before sewing with light-colored or white fabric.
4. DO give yourself a break between projects.
5. DO keep your sewing area clean — or cleanish.
6. DO consider sewing with a vintage sewing machine, if only for the experience (you might prefer it).
7. DO keep a spare sewing machine (you’ll stumble on a cheap one at a thrift store eventually).
8. DO pre-shrink your fabric if your fabric is apt to shrink in the wash.
9. DO press as you go.
10. DO learn how to maintain your sewing machine.
11. DO organize your sewing notions so you know where to find them next time you need them.
12. DO invest some time figuring out thread tension for your sewing machine. (It’s basically just two disks and a spring.)
13. DO create a dedicated sewing space.
14. DO learn from your mistakes.
15. DO share your sewing knowledge with others.
BONUS DO!
16. DO talk up sewing when you can — young people need to know it exists.


Peter’s SEWING DON’Ts
1. DON’T sew when you’re feeling exhausted.
2. DON’T rush. Another day won’t make a difference and you’ll be wearing your project (hopefully) a long time.
3. DON’T sew for others unless the idea brings you joy.
4. DON’T buy the cheapest new sewing machine you can find at Walmart, Kmart, etc.
5. DON’T use cheap interfacing.
6. DON’T fall for every bell and whistle available on a new sewing machine; you’ll never use most of them.
7. DON’T iron with a dirty faceplate.
8. DON’T beat yourself up is your garment doesn’t come out the way you’d hoped.
9. DON’T sew under poor light.
10. DON’T put water in your iron if you’re ironing a fabric that’s water-stainable (ask me how I know!).
11. DON’T keep every last fabric scrap for the fantastic quilt you will (never) make someday.
12. DON’T forget to clean out the fuzz beneath your throat plate periodically.
13. DON’T overlook refurbished machines; they’re just as good as new imo.
14. DON’T set unreasonable standards for yourself.
15. DON’T force yourself to finish a project you’ve lost passion for.
BONUS DON’T!
16. DON’T hoard sewing notions!

So what do you think? 
Is there anything you’d include on your do and don’t list Peter has missed here?
Feel free to add some of your own in the comments section below!


Thursday, June 23, 2011

Summer Camp, Summer Camp, Sum, Sum, Summer Camp

Our Fashion Lab Summer Camp is back for it's fourth summer in Hoboken. And while I am still getting back into the swing of teaching sewing to kids all day long, 5 days a week, we are having a blast so far!

I have two groups of amazing kids with me this week who have all dove into their sewing projects with so much excitement this week. It's hard to believe all have taken home at least one great project, along with some smaller projects in only 3 short days.


Here is Gabriella who finished her adorable (and reversible) shoulder strap tote. Look at the pride!

I have two of my youngest stitchers yet in my 12-2pm group. Both have picked up using the sewing machine like they were born to do it. It's hard to believe Isabel is going into 1st grade next year:


And Miss Cora is going to be in 2nd grade next year:


I will keep you updated with more blog postings, but in the mean time, here is the set of photos so far from this class:

Get the flash player here: http://www.adobe.com/flashplayer

Wednesday, May 18, 2011

Brimfield 2011

My friend Michelle and I were lucky enough to make it up to Brimfield for the big flea market last week. We got up at 5am on Friday and made the 3 hour trip, arriving at the site at 8am and things were in full swing.

We both did pretty well, in the way that we found what we set up to shop for. I scored big with some great vintage fabric that I will post soon. As well as about 200 vintage sewing patterns to add to my ever growing collection.

I took some great photos, because I am always so inspired by the color you can see walking around this flea market. Here are some of the shots that I took:


Monday, May 16, 2011