Showing posts with label Fashion Design. Show all posts

Thursday, February 23, 2012

Growing Old Stylishly

Cool blog alert! 


Ari Seth Cohen blog Advanced Stylefeatures both men and women, focusing on the elegance and individuality of his silver-haired subjects.


I do hope when I am that age, I look as good as these women to the left.


What I like about this blog most is the way the folks featured embrace getting older, rather than retreating.


80 Year Old Rita (left) Has Over 70 Pairs of Outrageous GlassesShe says that her tastes are usually pretty simple. She had lost her small vintage sunglasses somewhere in the neighborhood, so her friend Marty accompanied her to a local mall to buy another pair. Marty picked out a big, fun, over-sized pair of sunglasses for Rita to wear and she picked out a smaller, more simple pair. Rita decided to purchase them both and wore the big pair to a recovery meeting sometime that week. Everyone in the group went wild for Rita's big shades. People started sending her huge, outrageous pairs of sunglasses from all over the world, resulting in her collection of over 70 pairs. Rita told me that although she wouldn't normally dress outrageously, she feels that the sunglasses make me people happy. When I asked her how she felt about them she replied, " They aren't really my style, but now I don't want to hurt anyone's feelings by not wearing the pair they bought for me. Now I feel lost without them. They have become my trademark." 


About the bLogger: My name is Ari Seth Cohen. I roam the streets of New York looking for the most stylish and creative older folks. Respect your elders and let these ladies and gents teach you a thing or two about living life to the fullest. Advanced Style offers proof from the wise and silver-haired set that personal style advances with age.

Wednesday, August 31, 2011

What is Fashion Draping?

We are getting so excited about the return of our Beginners Fashion Draping Lab happening on Sunday afternoons starting on on September 11th! But it occurred to me recently that perhaps some people aren't exactly sure what "draping" is. So I thought I might take a second to clarify a bit.

In a nutshell, fashion draping is the process of taking a sketch of a clothing design and turning it into a pattern that can then be made into the actual garment. Because our bodies are in 3-D and patterns are created in 2-D, the process of draping is what you do on the dress form to create the flat pattern pieces that are eventually cut out of the fabric.

Maybe I am making this more confusing that it needs to be. It's actually a pretty simple process that our instructor, Alisha Forler is pretty darn good at. And she's excited about helping you learn how to do it too.

But before you take the class, take a second to read this excellent article from Designer Nexus explaining the process and why people who are interested in designing their own clothes should learn how to drape.


Check out the full article from their website here.

What is Fashion Draping and Why Should
Apparel Designers Learn How to Drape?

Posted on Apr 05, 2011
 
Fashion draping is an important part of fashion design. Draping for fashion design is the process of positioning and pinning fabric on a dress form to develop the structure of a garment design. A garment can be draped using a design sketch as a basis, or a fashion designer can play with the way fabric falls to create new designs at the start of the apparel design process. After draping, the fabric is removed from the dress form and used to create the sewing pattern for the garment.

Fashion draping and fitting are usually done with muslin (an inexpensive, unbleached, loosely woven cotton) to resolve any design and fitting issues of a garment before cutting the pattern in real fabric. However, it is important to drape using a fabric that has similar drape characteristics (the way it falls and folds) as the real fabric of the finished garment. Muslin comes in a variety of weights, and inexpensive synthetic fabrics can also be used in fitting and draping for apparel design.

Fashion designers drape garments in sections i.e.: front bodice, back bodice, front skirt, back skirt etc. and only the right side of the garment (when worn) is draped, unless the apparel design is asymmetrical.
The general process for how to drape for fashion is as follows:
  • Pieces of muslin are cut and prepared. This includes measuring, tearing, blocking, pressing, and marking grain lines and other important reference lines.
  • Now the actual “draping” begins. The fabric is pinned to the dress form and positioned to form various darts, tucks, gathers, etc., which give shape and fit to the garment.
  • Once the desired design is achieved, the muslin is marked while still on the dress form to indicate where the seam lines, darts, etc. are located on the fabric.
  • When marking is finished, the muslin is removed from the dress form and laid flat on a table for “truing”. Truing is the process of using rulers and design curves to connect, smooth out and finalize the markings.
  • Once truing is complete, seam lines are added and excess material is cut away.
  • The muslin is then pinned together (with all darts pinned) and placed back onto the dress form to check for fit accuracy and to drape any additional parts of the garment.
  • Once all pieces are the garment are draped, they are all pinned together and placed on the dress form to check for fit accuracy.
  • When the apparel designer is satisfied with the look and fit of the pinned garment, the muslin is removed from the dress form, pressed flat, and all seam lines, grain lines, markings, notches, etc. are transferred to paper, creating the sewing pattern for the garment.

Why Should Fashion Designers Learn How to Drape?

While the majority of companies in the fashion industry no longer use draping as part of the design process, draping is a key skill which allows apparel designers to understand what creates a great fit and how to achieve it. If a garment sample fits poorly, a designer who is familiar with how darts and seams give shape to garments can spot what is creating the fit issue and advise the factory how to correct the problem.

However, the art of draping isn’t completely lost; in high fashion, couture fashion houses, evening, and lingerie companies most garments are created through draping. When draping a garment, the designer can immediately see what her apparel design will look like on the body, and immediately correct any fit or design problems before putting anything down on paper. In addition, some apparel designs are just impossible to make via flat patternmaking and need to be draped first. And some fabrics need to be experimented with on a dress form to see how they behave.

While draping for apparel design may seem like a daunting and tedious approach to creating patterns, it’s actually one of the more creative parts of the fashion design process. Apparel designers can experiment with fabric, and decide where to place darts, tucks, and other design elements. Playing with the way fabric folds and hangs on the body is a fun way to create new fashion designs that you wouldn’t have thought of sitting in front of a sketchpad!

Wednesday, August 24, 2011

More Vintage Dress Lab Please

I don't know about you, but I can't get enough of these vintage patterns. The looks of the 60's, 70's & 80's just keep getting recycled in todays fashions. It's so easy to make wearable dresses today using the patterns for yesterday. I would have to say this is what makes our Vintage Dress Lab continue to be one of our most popular Fashion Lab Series Classes.


I went through the treasure trove of my vintage pattern collection today and picked out 4 fresh (so to speak) vintage patterns to be added to the upcoming Vintage Dress Lab that is happening on Tuesday nights in October. The dresses added to the line-up reflect the fall season a bit better, as well.

If you haven't already taken this class, fear not. If you've got some sewing experience under your belt (ie, you're comfortable on the sewing machine and you have some pattern reading experience) you can take this class easily. You may not complete four dresses in the 4-week course, but you'll have access to all four patterns and if you give it some extra time (open lab hours - which are free with this class!)four dresses are totally do-able.

If you have already taken this class, come take it again! Four new, never done before projects means that there is never a project repeat! No matter how many times you take this class, you'll always make new dresses and learn new skills. I promise!


The other really cool thing about this class you are forced to learn how to size patterns to fit your own body. Vintage patterns typically come in one size only. It's not like the patterns today that have multiple sizes in one envelope. So depending on the size of each of the patterns you choose to do in this class, part of what you will be learning is how to make adjustments to the patterns so they fit your body measurements. You'll see just how simple and un-intimidating this process really is.

Here is the link to all the details of the class.


Sunday, February 20, 2011

Vintage Hat Dinner Party

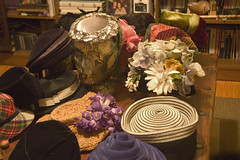
The ladies of Hat Lab had the opportunity for a little post-class reunion last week and I happily tagged along. Thanks to our Hat Lab instructor Irina for inviting us over to her spacious apartment for yummy treats, wine and a chance to check out her vast vintage hat collection.


Highlights included a delicious blackbean & sweet potato stew straight from the "Kickin' Kitchen" of Lynda Layng, Irina's boyfriends banana dessert with fresh whipped cream and of course, getting the chance to try on Irina's collection of vintage hats.

Here are some photos from our fun night.


Friday, February 18, 2011

Latest Collective Designer

It was such a pleasure meeting Jersey City handbag designer Lisa Best of pippiHEPBURN this morning!

Lisa is our latest designer in our little hoboken designer collective. Her non-leather handbags & purses are inspired by the necessity of fun and we totally agree! Her bags are roomy, yet chic and full of pockets on the inside. She's perfected the art of slouchy and we are truly digging these bags! Come see for yourself at the store.


And here is her Etsy Site.

Wednesday, February 9, 2011

Burda Style DIY Fashion Show in Austin


There's still time! Submission deadline is this Thursday, February 10th, at 9am EST! 

If you are, or plan to be, in the Austin area we would love you to participate in our fashion show!

This is your chance to take center stage with a dream audience: 500 guests, including influential fashion bloggers, DIY world influencers, and the BurdaStyle family.

Our fashion show is your chance to gain some great press and some wonderful networking. Each participant will be featured in a new BurdaStyle blog series, Meet the Designer. BurdaStyle will also be heavily promoting this event in a newsletter going out to 185,000+ world-wide subscribers and to a membership of near 500,000 members.
The BurdaStyle DIY Fashion show is also the official wrap up party for The Texas Style Council Conference, hosted by Indiana Adams from Adored Austin!

This event is open to the public, so please join us to celebrate the world of creative fashion and DIY ingenuity!

What: BurdaStyle Fashion Show
Who: BurdaStyle and 15 DIY Fashion Designers
Where:
Venue 222 hosting Etsy, Awesome in Austin
222 East 6th Street
Austin, Texas 78701
When: Sunday, March 13th at 8-10pm
Fashion show starts promptly at 9:00pm with cocktails

How to Enter:

1. Submit your entry via email to submissions[at]burdastyle[dot]com, with the subject: “BurdaStyle Fashion Show”
2. Submissions need to include: Link to your BurdaStyle profile or Etsy profile, one paragraph about yourself and high res photo of you or your model wearing the 1-3 piece(s) you would like to showcase. Please include information about what you do and why you want to be part of this event.
3. Submission deadline is Thursday, February 10th at 9am EST.
BurdaStyle will announce the 15 designers on February 15th via BurdaStyle blog and newsletter.

**All designers will need to provide their own hair styling, make-up and model. We would love the designers to wear their fashions but you may decide to have someone else model. All designers must provide their own transportation to and from the event.

Tuesday, January 18, 2011

Recycled Sweater -> Hat & Mitten Set

This past Saturday, we hosted the hat & mitten set workshop at the studio. Everybody brought inan old sweater they don't wear anymore (or in Colleen's case, and old sweater that her co-worker doesn't wear anymore). We then turned these old, unwearable sweaters into a much more wearable winter hat & mitten set.

Here is Colleen's before:


(I guess it's not technically her before, as the photo was shot after she cut the sleeves off to use for her project...)

What then happened was really pretty simple:

First make a pattern. You are going to trace one hand on a piece of paper with the thumb at a 30-degree angle from the fingers. Draw a mitten shape around the outline of the hand, adding 1/2 inch. 

Next, cut out the pattern and pin it onto both layers of the sweater. Cut out the pattern to create two mitten shapes.

Now, with right sides facing, pin the mitten cutouts together, then with a sewing machine, sew them together, leaving a 1/4-seam allowance. Begin sewing at the cuff along the outside edge of the mitten, making sure not to stretch the fabric. For smooth curves, pick up the foot, and rotate the mitten as you sew.

Finally, to prevent fraying, sew around the mitten again, leaving a 1/8-inch seam allowance. Turn the mitten right-side out, and press. Repeat these steps for the second mitten.


Now for the hat, we did use a pattern, but it's a super simple one that I wound up finding online. The hat uses four panels that look like this:


Here are the directions I found on craftstylish.com.  I used these instructions to make my pattern and my first hat. 

"To determine the width of your panels, divide the head circumference by 5, then add 1 inch for seam allowance (1/2 inch each side). My head measures 22 inches around, so dividing it by 5 gave me 4.4, which I rounded up to 4-1/2. Adding 1 inch gives me 5-1/2 inches. Add 1 inch to your length measurement. Mine was 8-1/2 inches, so I have 9-1/2 inches for my total length."
 
But what I found is that depending on how much stretch you have in your felted sweater, you may not need all five panels. I have a pretty big melon and only used 4 panels of this size, sewn together.
 
So that said, you are going to put your first two panels together with rights sides facing. Sew from the bottom edge up to the point using a 1/2" seam allowance. Do the same with two more panels. Now put your doubled panels together with right sides facing and sew half of the rainbow together. At this point, try it on and determine if four will suffice or if you need another panel. If it's big enough to fit your noggin, continue sewing the rainbow. If you need the 5th panel, sew that to the series of four and finally sew up the remaining seams so you have what looks like a hat.
 
As you can see from Colleens photo, she decided to fold up the edge of the hat and it fit her perfectly. A couple of other students (sorry I don't have photos)ended up folding the extra edge in and stitching it down. If you decide to do this, be careful not to stretch as you sew or it looks pretty stretched out once you are done. You could even try hand sewing the edge under to prevent this from happening, we found.

Wednesday, August 4, 2010

Tips for sewing Vintage Sewing Patterns

So we just wrapped up our Fashion Lab Vintage Dresses class this past month. We had such a blast teaching it and people had such a great time making all the vintage dress, we'll be offering it again right away on Wednesday nights on September. All four of the styles of dress (no matter which era they were from) were completely fashionable in today's standards and it was so fun to see how sewing patterns have changed since way back in the day.

In the class we learn how to make four different vintage dress styles based on the actual sewing patterns from the 1950's, 1960's & 1970's. There were certain things that rang true each week, no matter what we were making.  I wanted to share with you three major tips for using vintage sewing patterns to make garments.

1. Vintage pattern pieces are VERY fragile. In order to make them a little safer to copy and cut your fabric from them, before each class I would reinforce them. Usually this meant using packaging tape to tape the actual paper patterns onto interfacing and reinforce in the spots that needed it. I suppose if you have a fancy laminating machine that would work too. But I don't have one of those, so the tape worked for me. And actually by sewing it to a light weight interfacing, it made it sturdy, but also malleable enough to make it easy to cut the smaller sizes by folding the edges under.

2. Sizing can be tough! Vintage dress patterns came in only one size and the sizing is completley different from today's sizing standards depending on when the pattern came out. I found that it was easiest to make a version of the dress we were doing that week in the size that was stated on the package and then determine (based on today's sizing standards) what size it is in today's sizing. Or if you wanted to get a bit more technical about it, determine how big the waist, hip & bust measurements are for the size of the pattern and scale out (or in for the skinny minnies) based on how much bigger you need it to be. Or as we found in the class, when in doubt, make it too big and size it down to fit your measurements by adding darts and pleats.


3. Yardage Recommendations on the package of the pattern are different for older patterns. One the envelop you will find yardage recommendations that may be confusing.  The reason is that back in day, fabric came in narrower widths then they are today. It was commonplace to find fabric widths measuring 36" & 39". Now most fabric widths are 45, 55 or 60" wide

I hope this helps! I know it helped us in the class a ton.

You'll see that most pattern companies that are still around today have re-issued patterns based on their vintage styles from years ago. This will have taken care of many of the above issues. But isn't it more fun to not be afraid to tackle the genuine vintage patterns that you find at your neighbors garage sale, or that your grandmother has had in her attic since you were a baby! Happy Sewing!

Tuesday, June 8, 2010

We'll be doing the kid version of this in class on Saturday

I just found this adorable and super simple felt slipper project (well, I might be billing them as "flip flops") on the Purl Bee Blog. Not only are they completely adorable, there is not a lot of sewing involved, making them a perfect activity for the 5-7 year old craft class we do at the studio on Saturday mornings.

This class has been going great so far. This past Saturday class they decided they had graduated beyond the blue plastic needles they had been struggling to sew with. They're a great idea, but they don't really make for good sewing, unless you are using fabric that is woven super loosely and this can make sewing very frustrating for someone any age.

This week they all decided they were ready to try the real metal needles (super fat ones, with barely any point on them, of course) to do their hand sewing. I was soooo proud.

With this coming weeks flip-flop project, I foresee them sewing all kinds of buttons and silk flowers and even fabric scraps onto them. Oooooh this is going to be fun class!

Friday, April 30, 2010

The Black Skirt Challenge

Not too long ago, we had our latest Fashion Lab Meetup.


Our group got together in Hoboken at the Clinton Social, so we could get some food and drinks while we admire each others projects. 


The challenge was this: We all met about a month ago for part one of our meetup. This was the sew-along portion of the meeting where we all brought black fabric to sew a black a-line skirt together! Pretty simple, but super fun sewing with a group, as always! 
At the end of the meetup, everyone exchanged one yard of fabric of your choice. People brough their one yard of cotton trade fabric wrapped up so you couldn't tell what the print was. We all ended up with someone elses fabric to take home and embellish our black skirt with.

I have to say I was more than impressed with the results! 

Here are some photos from the event:


Laura rocked her skirt out with some adorable little ruffly flowers on the bottom right hand side. She was complaining about her awful fabric that she had to work with (okay, yes, it did have musical notes on it) but I think she used it in a way that was perfect to make her 
black skirt even more special


Andrea did this cool trim on the end of her skirt. You can quite see all the detail here, but the end was kind of folded and the edge of the fabric was left unfinished. Very cool!


This photo is horrible, but lauren did a similar thing with her fabric, as she added a cool border to the bottom edge of the skirt.


I was impressed with Kathy's design as she not only made all these really cool flowers for the skirt, she treated them all with a special potion of elmers glue and water to make them super stiff! Really added an awesome 3-D effect!


And the piece de resistence was from Roslyn! She turned her simple black skirt into a complete ensemble! She used the red fabric (from the trade to create a top that had this amazing corset back. Extra point go to her because she wore exactly this outfit to work that day! Be sure to check out her photos below to really see the workmanship that went into this project!


Wednesday, April 28, 2010

Vintage Dress Lab - Vote on Which Dresses you want to see as part of the class

We are trying to nail down our summer class schedule and we need YOUR help on deciding which projects to make part of the class.

We're very excited to hold our first "Vintage Dress Lab" sewing class this July! The problem is there are too many great vintage dress designs we'd love to be a part of the class. 

Can you help us and vote on your favorite dress designs out of the following 10 choices! We're looking to find out your top 4 choices. 

Please Use the comment section to voice your opinion. Tell us the names of your 4 favorite vintage dress designs.

Okay here goes. 

And the nominees are:

1. "Twiggy" - Sixties Inspired, Multi-Paneled Dress

Could be made with long, short or no sleeves. Cute little collar is an option as well.
2. "Dynasty" - Late 1960's/ Early 1970's Maxi

Could be made with funky collar or not.
3. "Flower Child" - Late 1960's/ Early 1970's inspired faux wrap with Empire Waist

Long or short, long sleeve, short sleeve or no sleeve always an option.
4. "Diamonds are a girls best friend" - 50's/60's shift with funky diamond detail.

Long or short, long sleeve, short sleeve or no sleeves.
5. "Go-go Scort"


Fabulous neck detail, the longer version is straight-up dress, the short version, you can add some shorts into the pattern.

6. "Radio Hour" - 40's/50's Dress


Cinched waist with divine neck collar detail.
7. "Ladies who Lunch" - Full skirted with the fabulous neck & chest tie detail


8. "C'est La Vie" - Simple 60's Shift with Peter Pan Collar.


9. "Mrs. Cleaver" - V-neck, Belted Waist


10. "Waist not, Want Not" - Strapless & Belted hi-waist dress


Option for sleeveless or tie straps

Tuesday, April 27, 2010

Wear your Sewing Projects to the Art & Music Fest on Sunday

Come out for the Hoboken Art & Music Festival on Sunday May 2nd dressed in your favorite duds YOU MADE YOURSELF!

Come visit our booth (in front of Cold Stone Creamery on Washington Street) wearing something you made at an M Avery Designs Sewing Class and get coupons for sewing class discounts.

For each article of clothing and/or accessory you wear (up to 3) to our booth on Sunday you will receive a coupon that can be used towards any of the classes we teach at the studio

These coupons will be able to be used in one of three ways:

-Take $5 off ANY 2 Hour Workshop (Priced $25-$45)

-Take $20 off ANY Four Week Class (Priced at $149)

-Take $45 off ANY Fashion Lab Beginner Sewing Boot Camp (Priced at $299)

(Please note, more than one coupon cannot be used together on any class!)

Wednesday, February 24, 2010

Sweet Tees & Crumpets

Time to have a Girls Night Out "Tee" Party !


Get your ladies together for a night of T-shirt Deconstruction.


In this private party each guest starts with a plain used t-shirt and turns it into any of our fabulous deconstructed styles.


Our instructors will teach your group the basic design & sewing skills needed to play fashion designer for the day!


Get a group of six or more ladies together and everyone will design and stitch their very own custom deconstructed t-shirt and leave with it after the party. Don't worry, there is absolutely no sewing experience required!

You do the leg work, our staff will do the finishing touches to make sure your finished product is sturdy and professional looking when you take it home after this two-hour private party.


Check out a few of the photos, taken by photographer Adam Gallagher, of our first "Tee" Party. 

Or head to the website to find out all the details. 


Tuesday, September 15, 2009

Metal Zipper Details

Don't you just love this?!

I have to get me some metal zippers and try this stuff!

Very cool!