This is what I woke up to this morning. I am a lucky girl and I have a super thoughtful boyfriend.
Over the weekend we headed out to Montclair to celebrate the 1 year anniversary of a friends Vintage Boutique called Garnish.
Talk about coveting everything in a store! I love my friend Lisa's taste and the way she had the store laid out so neat and adorable totally gave me shoppe envy! I could have walked around in there for hours just looking at every last little detail of every item.
I seemed to have recently begun this obsession with old mechanical clocks. I think it has something to do with my obsession with old mechanical sewing machines, but who knows. They're just pretty cute too.
Anyway - I saw this clock and fell in love. I totally couldn't justify my purchasing it cause I just don't need it. I kept shopping around to find a little something a little more practical to spend my money on that night. (HA - practical.) Not sure if I can call what bought practical, but I guess they are a bit more useful than the clock
I wound taking home a baking book from 1961 and a mechanical egg beater. Again - am loving anything mechanical that is not electric these days!
Here they are:
Saturday Morning, I immediately had to make something from my new book. (see - totally practical!)
I knew I had some poppy seeds in my pantry, so lemon poppy seed pound cake it is.
Oops, no recipe for that in my new cook book. But that's okay, I will happily make do.
I used the Basic Pound Cake recipe found on page 116 and added some lemon juice and poppy seeds and all was well and right in the world.
Here is the recipe in case you are interested:
Basic Pound Cake
A delicious, old-fashioned cake, especially good toasted (from the book, not me)
6 eggs
1 cup sugar
1 cup butter
2 cups sifted flour
1 teaspoon vanilla
(I added the juice of one lemon, some zest & half a bottle of poppy seeds)
Set oven to 350 degrees. Grease a deep, 9 inch tube pan and dust with flour.
In a large bowl, combine eggs and sugar and beat for a minute. Set bowl over a saucepan of hot water. Place saucepan over low heat for about 10 minutes, or until eggs are slightly warmer than lukewarm. Don not let water boil. Stir eggs occasionally while they are being heated to prevent them from cooking on the the bottom of the bowl.
While eggs are warming, cream butter and flour till light and fluffy. Add vanilla.
When eggs are lukewarm, beat them until cool, thick and tripled in bulk. Quickly stir 1/4 of beaten eggs into creamed mixture. Pour mixture over remaining beaten eggs. Fold in gently. Be careful not to overmix.
Pour batter into prepared pan. Bake about 50 minutes, or until cake is golden brown and pulls away from sides of pan.
Megan Side note: All that business about warming the mixture over the hot water was skipped in my version. I just made sure the eggs weren't cold when I mixed them with everything else. I did this by letting them sit under warm water coming out of the tap of the sink. I also didn't really beat the eggs as they said. I beat them with the sugar with my new beater, but then procedeed to add all the ingrediants and bake it.
The more I think about it, I really didn't follow the directions at all (suprise, suprise). But my turned out okay. I had to take it out of the oven a bit early cause I had to head to work so there was some oozing batter when I cut into it later that day when I tried a pice. This was because it wasn't quite cooked all the way through. But I have to say, I am a big fan of any cake just a little bit underdone. Is that gross?
Showing posts with label Clothing Project. Show all posts
Tuesday, February 14, 2012
Sunday, February 20, 2011
Beginner Sewing Boot Camp - Our longest running Sewing Class
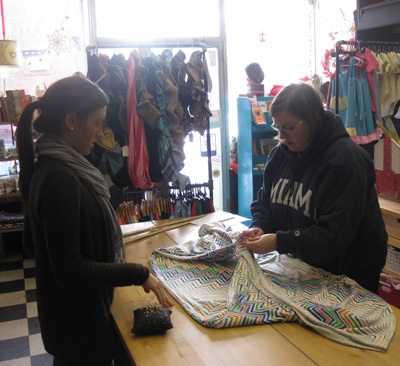
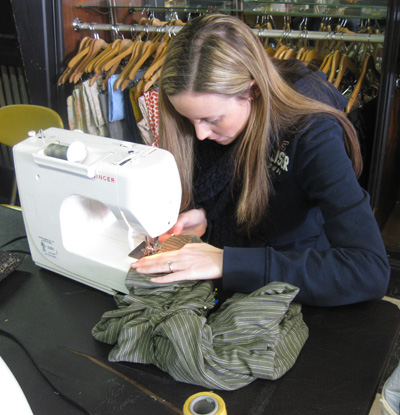
I have been going through many old class photos lately and I am realizing just how long our Fashion Lab Beginner Sewing Boot Camp class has been going on. It's fun to think about just how many people have we've taught how to sew over the last 3 years the class has been going on.
And as I go through these photos, I notice we've collected a rather nice collection of project photos from this class. Feeling the need to share it with y'all:
Thursday, January 27, 2011
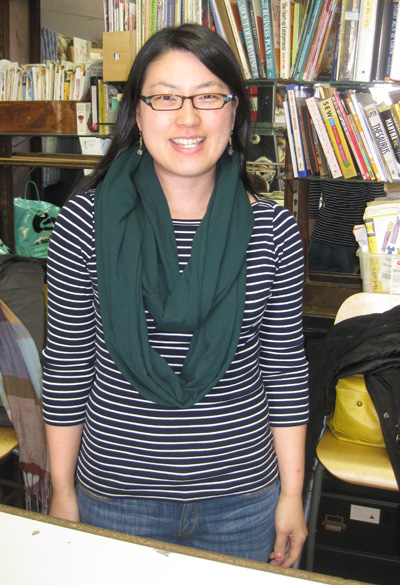
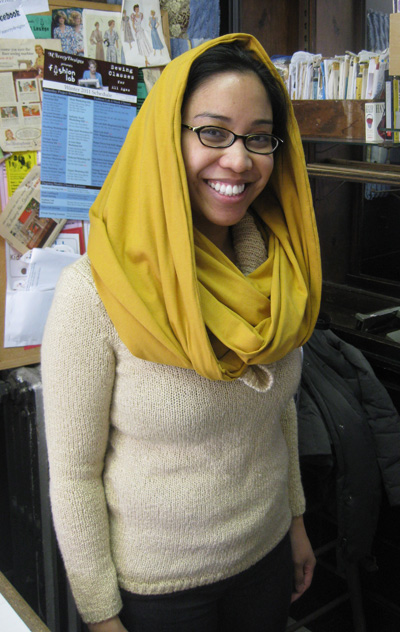
Seamless Infinity Scarf Tutorial
There are a bunch of how-to's out there on how to stitch an Infinity Scarf. But most of them require a big ol' visible seam where you sew the ends together. This is totally unnecessary and here is a quick easy way to make one without the unsightly seam.
Fabric: Use fabric that is pretty stretchy. If this is going to be a winter scarf, choose a fabric that is also fairly cozy. We have found that spandex fabric is totally fine, but it's just not as nice to wear cause it tends to lay pretty flat, although if you are a year round scarf wearer, spandex would be great! I personally love to use a fuzzy knit or a heavier jersey knit, but I am from the northeast and right now we are getting hit with a pretty brutal winter and my infinity scarves have been part of my winter uniform.
Using a flexible measuring tape, determine how long you want your scarf to be. Drape the tape around your neck to determine the length. Usually you would want it to double around your neck without choking you.
Once you have determined length, cut the fabric to the length you desire, but leave the width uncut for now.
Drape this piece of fabric around you as you would wear your infinity scarf. Does it seem too bulky? If so, cut the width to where it doesn't seem too bulky anymore?
Do you want it chunkier? That's fine too, you'll just need more yardage. You'll want to cut another piece of the same or contrasting fabric with the same stretchiness the same size as your original piece of fabric. Sew the two pieces of fabric together (right sides facing) along the length. Use a zig zag stitch if your machine does not have a stretch setting.
Now, once you have your length and width determine, fold the entire piece of fabric in half lengthwise with right sides facing and pin to secure it. Use LOTS of pins when working with stretchy fabric. Much easier!
Again, using either the stretch setting on your machine or the zig zag stitch, sew the side you pinned (the non-folded side) together using a 7/8" seam allowance. (You want to use a pretty big seam allowance with a stretch fabric because it tends to roll on the ends and it just makes thing easier) But leave 2" on each end un-sewn.
Turn the tube of fabric right side out and pin your ends together (right sides facing). Because you left 2" on each end un-sewn,(as described in the last step)it makes it easier to sew your ends together.
Next, sew the ends of the scarf together.
Turn the seam in, so that the right side is showing. You should have a 4" opening that is not sewn. You can either top-stitch this closed with a sewing machine (which will be more visible) or just hand stitch the 4" opening shut, which will be easier to hide.
That's it!
Need a little more direction?
Come to our 1-hour class on February 19th, 2011 from 3-4pm.
Here are all the details.
Tuesday, January 18, 2011
Recycled Sweater -> Hat & Mitten Set
This past Saturday, we hosted the hat & mitten set workshop at the studio. Everybody brought inan old sweater they don't wear anymore (or in Colleen's case, and old sweater that her co-worker doesn't wear anymore). We then turned these old, unwearable sweaters into a much more wearable winter hat & mitten set.
Here is Colleen's before:
(I guess it's not technically her before, as the photo was shot after she cut the sleeves off to use for her project...)
What then happened was really pretty simple:
First make a pattern. You are going to trace one hand on a piece of paper with the thumb at a 30-degree angle from the fingers. Draw a mitten shape around the outline of the hand, adding 1/2 inch.
Next, cut out the pattern and pin it onto both layers of the sweater. Cut out the pattern to create two mitten shapes.
Now, with right sides facing, pin the mitten cutouts together, then with a sewing machine, sew them together, leaving a 1/4-seam allowance. Begin sewing at the cuff along the outside edge of the mitten, making sure not to stretch the fabric. For smooth curves, pick up the foot, and rotate the mitten as you sew.
Finally, to prevent fraying, sew around the mitten again, leaving a 1/8-inch seam allowance. Turn the mitten right-side out, and press. Repeat these steps for the second mitten.
Now for the hat, we did use a pattern, but it's a super simple one that I wound up finding online. The hat uses four panels that look like this:
Here are the directions I found on craftstylish.com. I used these instructions to make my pattern and my first hat.
"To determine the width of your panels, divide the head circumference by 5, then add 1 inch for seam allowance (1/2 inch each side). My head measures 22 inches around, so dividing it by 5 gave me 4.4, which I rounded up to 4-1/2. Adding 1 inch gives me 5-1/2 inches. Add 1 inch to your length measurement. Mine was 8-1/2 inches, so I have 9-1/2 inches for my total length."
But what I found is that depending on how much stretch you have in your felted sweater, you may not need all five panels. I have a pretty big melon and only used 4 panels of this size, sewn together.
So that said, you are going to put your first two panels together with rights sides facing. Sew from the bottom edge up to the point using a 1/2" seam allowance. Do the same with two more panels. Now put your doubled panels together with right sides facing and sew half of the rainbow together. At this point, try it on and determine if four will suffice or if you need another panel. If it's big enough to fit your noggin, continue sewing the rainbow. If you need the 5th panel, sew that to the series of four and finally sew up the remaining seams so you have what looks like a hat.
As you can see from Colleens photo, she decided to fold up the edge of the hat and it fit her perfectly. A couple of other students (sorry I don't have photos)ended up folding the extra edge in and stitching it down. If you decide to do this, be careful not to stretch as you sew or it looks pretty stretched out once you are done. You could even try hand sewing the edge under to prevent this from happening, we found.
Tuesday, January 11, 2011
Hoboken Guide @ Design Sponge
A fellow business owner here in town passed along a link to a Hoboken City Guide on the Design Sponge Blog. I am soooo honored to be a part of this piece, as I absolutely love Design Sponge!
"Welcome to Hoboken. A vibrant New Jersey town just a hop, skip and jump over the river from Manhattan. Hoboken was made famous as the birthplace of Frank Sinatra, the filming location of the Marlon Brando movie On The Waterfront and the music venue “Maxwell’s” where Bruce Springsteen filmed the video for “Glory Days.”
Hoboken is also the town of many firsts, including inventions like freeze-dried coffee, bubble wrap and ice cream, as well as the first organized baseball game and the first brewery. It boasts the most bars and restaurants in one square mile of its town’s boundaries, and the indie/designer/art scene is on its way up due to many artists and musicians living here. It is also home of the infamous Cake Boss from the Lifetime show."
And here is what they had to say about us, under the category Art, Craft Supplies & Galleries:
"M. Avery Designs — Also home of the Hoboken Handmade Collective. If you love fabric, this is the place to visit. They also host classes and socials and offer open studios for use of their sewing machines. All items in the store are handmade and gorgeous. 266, 7th Street (at the corner of Willow Ave.)"
"Welcome to Hoboken. A vibrant New Jersey town just a hop, skip and jump over the river from Manhattan. Hoboken was made famous as the birthplace of Frank Sinatra, the filming location of the Marlon Brando movie On The Waterfront and the music venue “Maxwell’s” where Bruce Springsteen filmed the video for “Glory Days.”
Hoboken is also the town of many firsts, including inventions like freeze-dried coffee, bubble wrap and ice cream, as well as the first organized baseball game and the first brewery. It boasts the most bars and restaurants in one square mile of its town’s boundaries, and the indie/designer/art scene is on its way up due to many artists and musicians living here. It is also home of the infamous Cake Boss from the Lifetime show."
And here is what they had to say about us, under the category Art, Craft Supplies & Galleries:
"M. Avery Designs — Also home of the Hoboken Handmade Collective. If you love fabric, this is the place to visit. They also host classes and socials and offer open studios for use of their sewing machines. All items in the store are handmade and gorgeous. 266, 7th Street (at the corner of Willow Ave.)"
Read more at Design*Sponge
Wednesday, August 4, 2010
Tips for sewing Vintage Sewing Patterns
So we just wrapped up our Fashion Lab Vintage Dresses class this past month. We had such a blast teaching it and people had such a great time making all the vintage dress, we'll be offering it again right away on Wednesday nights on September. All four of the styles of dress (no matter which era they were from) were completely fashionable in today's standards and it was so fun to see how sewing patterns have changed since way back in the day.
In the class we learn how to make four different vintage dress styles based on the actual sewing patterns from the 1950's, 1960's & 1970's. There were certain things that rang true each week, no matter what we were making. I wanted to share with you three major tips for using vintage sewing patterns to make garments.
1. Vintage pattern pieces are VERY fragile. In order to make them a little safer to copy and cut your fabric from them, before each class I would reinforce them. Usually this meant using packaging tape to tape the actual paper patterns onto interfacing and reinforce in the spots that needed it. I suppose if you have a fancy laminating machine that would work too. But I don't have one of those, so the tape worked for me. And actually by sewing it to a light weight interfacing, it made it sturdy, but also malleable enough to make it easy to cut the smaller sizes by folding the edges under.
2. Sizing can be tough! Vintage dress patterns came in only one size and the sizing is completley different from today's sizing standards depending on when the pattern came out. I found that it was easiest to make a version of the dress we were doing that week in the size that was stated on the package and then determine (based on today's sizing standards) what size it is in today's sizing. Or if you wanted to get a bit more technical about it, determine how big the waist, hip & bust measurements are for the size of the pattern and scale out (or in for the skinny minnies) based on how much bigger you need it to be. Or as we found in the class, when in doubt, make it too big and size it down to fit your measurements by adding darts and pleats.
3. Yardage Recommendations on the package of the pattern are different for older patterns. One the envelop you will find yardage recommendations that may be confusing. The reason is that back in day, fabric came in narrower widths then they are today. It was commonplace to find fabric widths measuring 36" & 39". Now most fabric widths are 45, 55 or 60" wide
I hope this helps! I know it helped us in the class a ton.
You'll see that most pattern companies that are still around today have re-issued patterns based on their vintage styles from years ago. This will have taken care of many of the above issues. But isn't it more fun to not be afraid to tackle the genuine vintage patterns that you find at your neighbors garage sale, or that your grandmother has had in her attic since you were a baby! Happy Sewing!
In the class we learn how to make four different vintage dress styles based on the actual sewing patterns from the 1950's, 1960's & 1970's. There were certain things that rang true each week, no matter what we were making. I wanted to share with you three major tips for using vintage sewing patterns to make garments.
1. Vintage pattern pieces are VERY fragile. In order to make them a little safer to copy and cut your fabric from them, before each class I would reinforce them. Usually this meant using packaging tape to tape the actual paper patterns onto interfacing and reinforce in the spots that needed it. I suppose if you have a fancy laminating machine that would work too. But I don't have one of those, so the tape worked for me. And actually by sewing it to a light weight interfacing, it made it sturdy, but also malleable enough to make it easy to cut the smaller sizes by folding the edges under.
2. Sizing can be tough! Vintage dress patterns came in only one size and the sizing is completley different from today's sizing standards depending on when the pattern came out. I found that it was easiest to make a version of the dress we were doing that week in the size that was stated on the package and then determine (based on today's sizing standards) what size it is in today's sizing. Or if you wanted to get a bit more technical about it, determine how big the waist, hip & bust measurements are for the size of the pattern and scale out (or in for the skinny minnies) based on how much bigger you need it to be. Or as we found in the class, when in doubt, make it too big and size it down to fit your measurements by adding darts and pleats.
3. Yardage Recommendations on the package of the pattern are different for older patterns. One the envelop you will find yardage recommendations that may be confusing. The reason is that back in day, fabric came in narrower widths then they are today. It was commonplace to find fabric widths measuring 36" & 39". Now most fabric widths are 45, 55 or 60" wide
I hope this helps! I know it helped us in the class a ton.
You'll see that most pattern companies that are still around today have re-issued patterns based on their vintage styles from years ago. This will have taken care of many of the above issues. But isn't it more fun to not be afraid to tackle the genuine vintage patterns that you find at your neighbors garage sale, or that your grandmother has had in her attic since you were a baby! Happy Sewing!
Tuesday, June 8, 2010
We'll be doing the kid version of this in class on Saturday
I just found this adorable and super simple felt slipper project (well, I might be billing them as "flip flops") on the Purl Bee Blog. Not only are they completely adorable, there is not a lot of sewing involved, making them a perfect activity for the 5-7 year old craft class we do at the studio on Saturday mornings.
This class has been going great so far. This past Saturday class they decided they had graduated beyond the blue plastic needles they had been struggling to sew with. They're a great idea, but they don't really make for good sewing, unless you are using fabric that is woven super loosely and this can make sewing very frustrating for someone any age.
This week they all decided they were ready to try the real metal needles (super fat ones, with barely any point on them, of course) to do their hand sewing. I was soooo proud.
With this coming weeks flip-flop project, I foresee them sewing all kinds of buttons and silk flowers and even fabric scraps onto them. Oooooh this is going to be fun class!
This class has been going great so far. This past Saturday class they decided they had graduated beyond the blue plastic needles they had been struggling to sew with. They're a great idea, but they don't really make for good sewing, unless you are using fabric that is woven super loosely and this can make sewing very frustrating for someone any age.
This week they all decided they were ready to try the real metal needles (super fat ones, with barely any point on them, of course) to do their hand sewing. I was soooo proud.
With this coming weeks flip-flop project, I foresee them sewing all kinds of buttons and silk flowers and even fabric scraps onto them. Oooooh this is going to be fun class!
Friday, April 30, 2010
The Black Skirt Challenge
Our group got together in Hoboken at the Clinton Social, so we could get some food and drinks while we admire each others projects.
The challenge was this: We all met about a month ago for part one of our meetup. This was the sew-along portion of the meeting where we all brought black fabric to sew a black a-line skirt together! Pretty simple, but super fun sewing with a group, as always!
At the end of the meetup, everyone exchanged one yard of fabric of your choice. People brough their one yard of cotton trade fabric wrapped up so you couldn't tell what the print was. We all ended up with someone elses fabric to take home and embellish our black skirt with.
I have to say I was more than impressed with the results!
Laura rocked her skirt out with some adorable little ruffly flowers on the bottom right hand side. She was complaining about her awful fabric that she had to work with (okay, yes, it did have musical notes on it) but I think she used it in a way that was perfect to make her
black skirt even more special
Andrea did this cool trim on the end of her skirt. You can quite see all the detail here, but the end was kind of folded and the edge of the fabric was left unfinished. Very cool!
This photo is horrible, but lauren did a similar thing with her fabric, as she added a cool border to the bottom edge of the skirt.
Wednesday, April 28, 2010
Vintage Dress Lab - Vote on Which Dresses you want to see as part of the class
We are trying to nail down our summer class schedule and we need YOUR help on deciding which projects to make part of the class.
We're very excited to hold our first "Vintage Dress Lab" sewing class this July! The problem is there are too many great vintage dress designs we'd love to be a part of the class.
Can you help us and vote on your favorite dress designs out of the following 10 choices! We're looking to find out your top 4 choices.
Please Use the comment section to voice your opinion. Tell us the names of your 4 favorite vintage dress designs.
Okay here goes.
And the nominees are:
1. "Twiggy" - Sixties Inspired, Multi-Paneled Dress
2. "Dynasty" - Late 1960's/ Early 1970's Maxi
3. "Flower Child" - Late 1960's/ Early 1970's inspired faux wrap with Empire Waist
4. "Diamonds are a girls best friend" - 50's/60's shift with funky diamond detail.
Long or short, long sleeve, short sleeve or no sleeves.
5. "Go-go Scort"
Fabulous neck detail, the longer version is straight-up dress, the short version, you can add some shorts into the pattern.
6. "Radio Hour" - 40's/50's Dress
Cinched waist with divine neck collar detail.
7. "Ladies who Lunch" - Full skirted with the fabulous neck & chest tie detail
8. "C'est La Vie" - Simple 60's Shift with Peter Pan Collar.
9. "Mrs. Cleaver" - V-neck, Belted Waist
10. "Waist not, Want Not" - Strapless & Belted hi-waist dress
Option for sleeveless or tie straps
Tuesday, April 27, 2010
Wear your Sewing Projects to the Art & Music Fest on Sunday
Come out for the Hoboken Art & Music Festival on Sunday May 2nd dressed in your favorite duds YOU MADE YOURSELF!
Come visit our booth (in front of Cold Stone Creamery on Washington Street) wearing something you made at an M Avery Designs Sewing Class and get coupons for sewing class discounts.
For each article of clothing and/or accessory you wear (up to 3) to our booth on Sunday you will receive a coupon that can be used towards any of the classes we teach at the studio
These coupons will be able to be used in one of three ways:
-Take $5 off ANY 2 Hour Workshop (Priced $25-$45)
-Take $20 off ANY Four Week Class (Priced at $149)
-Take $45 off ANY Fashion Lab Beginner Sewing Boot Camp (Priced at $299)
(Please note, more than one coupon cannot be used together on any class!)
Come visit our booth (in front of Cold Stone Creamery on Washington Street) wearing something you made at an M Avery Designs Sewing Class and get coupons for sewing class discounts.
For each article of clothing and/or accessory you wear (up to 3) to our booth on Sunday you will receive a coupon that can be used towards any of the classes we teach at the studio
These coupons will be able to be used in one of three ways:
-Take $5 off ANY 2 Hour Workshop (Priced $25-$45)
-Take $20 off ANY Four Week Class (Priced at $149)
-Take $45 off ANY Fashion Lab Beginner Sewing Boot Camp (Priced at $299)
(Please note, more than one coupon cannot be used together on any class!)
Thursday, March 4, 2010
Turn A Mens Dress Shirt Into A Skirt
So we have just created a great new class here all about "Green" sewing! In this four week class you get to create clothing and accessories made from things you already have in your closet. One of the best things about the class is that you don't really need to buy any supplies! For example those old T-Shirts you have been keeping in the back of your closet for a while can be made into a cute T-Shirt shrug. The first Green Sewing four week class starts on April 7th.
So I was looking for some more fun "green" projects to share and saw these instructions for a skirt. Craftstylish shows you how to turn a mens dress shirt into a belted skirt. The instructions are pretty easy to follow and the finished skirt looks really cute.
*Project by Christine Haynes at CraftStylish
What you'll need:
2. Using other pieces from the shirt, cut two waistband pieces, about 5 inches tall by the width of your hips. Cutting from the rest of the shirt, cut pieces to combine together to make two belt straps. These pieces should be 5 inches tall by as wide as you can get.
3. Combine the belt pieces to form two strips that are roughly 24 inches long by 5 inches tall. Press the seams flat where they were connected. Fold one strip in half with right sides together and sew, forming a long tube. Stitch one end closed and repeat on the other strip. Turn the tubes right side out and press flat.
4. Lay out one waistband piece face up. Lay the two belt pieces on top of the waistband piece, on each of the two short ends, about an inch from the bottom. Lay the other waistband piece on top of the first one, matching sides. Pin the two short ends together, including the belt pieces. Stitch each side, capturing the belt in the side seam. Fold the waistband in half, wrong sides together, and press flat.
5. Baste the top of the skirt and gather to fit the width of the waistband. Pin the waistband to the skirt, right sides facing and with the belt pieces toward the front of the skirt, with the raw edge of the waistband lining up with the top raw edge of the skirt. Stitch together, being careful not to sew the belt pieces into the seam. Leave a 1-inch opening in the seam when connecting the waistband to the skirt.
6. Cut a piece of 1/2-inch elastic to a comfortable width for your waist, plus 1 inch for overlapping. Pin a large safety pin to the elastic and feed into the waistband casing. Once you've gone all the way around, pull the pin out the hole and overlap the two ends of elastic about 1/2 inch. Zigzag-stitch them together and release into the waistband. Stitch the hole closed in the skirt.
7. Press all your seams crisp, and slip on the skirt. Tie the belt pieces in front and go!
So I was looking for some more fun "green" projects to share and saw these instructions for a skirt. Craftstylish shows you how to turn a mens dress shirt into a belted skirt. The instructions are pretty easy to follow and the finished skirt looks really cute.
*Project by Christine Haynes at CraftStylish
What you'll need:
- One men's dress shirt with a straight hem, wide enough to be gathered at your waist, long enough from the armpit to the hem for the skirt
- Ruler
- Scissors
- Sewing machine and thread
- Pins
- 1/2-inch elastic about 30 inches long
- Large safety pin
2. Using other pieces from the shirt, cut two waistband pieces, about 5 inches tall by the width of your hips. Cutting from the rest of the shirt, cut pieces to combine together to make two belt straps. These pieces should be 5 inches tall by as wide as you can get.
3. Combine the belt pieces to form two strips that are roughly 24 inches long by 5 inches tall. Press the seams flat where they were connected. Fold one strip in half with right sides together and sew, forming a long tube. Stitch one end closed and repeat on the other strip. Turn the tubes right side out and press flat.
4. Lay out one waistband piece face up. Lay the two belt pieces on top of the waistband piece, on each of the two short ends, about an inch from the bottom. Lay the other waistband piece on top of the first one, matching sides. Pin the two short ends together, including the belt pieces. Stitch each side, capturing the belt in the side seam. Fold the waistband in half, wrong sides together, and press flat.
5. Baste the top of the skirt and gather to fit the width of the waistband. Pin the waistband to the skirt, right sides facing and with the belt pieces toward the front of the skirt, with the raw edge of the waistband lining up with the top raw edge of the skirt. Stitch together, being careful not to sew the belt pieces into the seam. Leave a 1-inch opening in the seam when connecting the waistband to the skirt.
6. Cut a piece of 1/2-inch elastic to a comfortable width for your waist, plus 1 inch for overlapping. Pin a large safety pin to the elastic and feed into the waistband casing. Once you've gone all the way around, pull the pin out the hole and overlap the two ends of elastic about 1/2 inch. Zigzag-stitch them together and release into the waistband. Stitch the hole closed in the skirt.
7. Press all your seams crisp, and slip on the skirt. Tie the belt pieces in front and go!
Monday, January 11, 2010
Make your Own Snuggie
A student of mine found this great "Snuggie" Tutorial online. It's been so cold here lately, I thought we have to make this!
So - we are going to be making the Snuggie in our next Meetup/Burda Style Sew Along on Wednesday. There are spots available for this meetup, if you would like to attend, here are the details:
http://www.meetup.com/fashionlab/calendar/12236329/
Please note: This is not a sewing lesson. I ask that you have some sewing experience before attending the Meetup/Burday Style SewAlongs.
And if you can't make it, but are interested in making it at home, here is the great How-to Lauren found (thanks Lauren!):
The Snuglet
A comfy, cozy, easy-to-make fleece blanket
that lets you keep your arms free
without sacrificing warmth!
a project by Welmoed Sisson
welmoed@sissonfamily.com
www.sissonfamily.com/Sewingroom
You will need:
3 yards polar fleece, 60” wide
Cutting
Cut 24” off one short end of the fleece and set it aside; this
piece will become the sleeves (fig. 1)
Fold the fleece in half longways.
Mark location of the armholes. (fig. 2) The armholes will be ovals
approximately 9” high and 6” wide. (fig. 3)
Sleeves
For the sleeves: take the 24” piece and cut in half to yield
two pieces, each 24” by 30”. Fold in half to make a tube
12” x 30”. Sew or serge the long edge. Finish one end of
the tube as desired to form a cuff.
Check sleeve for length; they’re supposed to be loose-
fitting but if you have very short arms you may want to
take a few inches off.
Pin the sleeve into the armhole, making sure to keep the
sleeve seam at the bottom of the armhole. Sew or serge.
Repeat for other sleeve.
Finishing
Since fleece doesn’t ravel, you have many options for
finishing the edges. You can:
• leave the edge plain
• Trim the edge with a decorative rotary cutter (such as a
scalloped or pinked edge)
• Fringe the edge
• Band with a strip of lycra
• Fold over and topstitch for a quick self-banding
You’re finished! Just slip your arms into the sleeves and
relax; you can stay warm all the way up to your chin and
still be able to use your hands!
So - we are going to be making the Snuggie in our next Meetup/Burda Style Sew Along on Wednesday. There are spots available for this meetup, if you would like to attend, here are the details:
http://www.meetup.com/fashionlab/calendar/12236329/
Please note: This is not a sewing lesson. I ask that you have some sewing experience before attending the Meetup/Burday Style SewAlongs.
And if you can't make it, but are interested in making it at home, here is the great How-to Lauren found (thanks Lauren!):
The Snuglet
A comfy, cozy, easy-to-make fleece blanket
that lets you keep your arms free
without sacrificing warmth!
a project by Welmoed Sisson
welmoed@sissonfamily.com
www.sissonfamily.com/Sewingroom
You will need:
3 yards polar fleece, 60” wide
Cutting
Cut 24” off one short end of the fleece and set it aside; this
piece will become the sleeves (fig. 1)
Fold the fleece in half longways.
Mark location of the armholes. (fig. 2) The armholes will be ovals
approximately 9” high and 6” wide. (fig. 3)
Sleeves
For the sleeves: take the 24” piece and cut in half to yield
two pieces, each 24” by 30”. Fold in half to make a tube
12” x 30”. Sew or serge the long edge. Finish one end of
the tube as desired to form a cuff.
Check sleeve for length; they’re supposed to be loose-
fitting but if you have very short arms you may want to
take a few inches off.
Pin the sleeve into the armhole, making sure to keep the
sleeve seam at the bottom of the armhole. Sew or serge.
Repeat for other sleeve.
Finishing
Since fleece doesn’t ravel, you have many options for
finishing the edges. You can:
• leave the edge plain
• Trim the edge with a decorative rotary cutter (such as a
scalloped or pinked edge)
• Fringe the edge
• Band with a strip of lycra
• Fold over and topstitch for a quick self-banding
You’re finished! Just slip your arms into the sleeves and
relax; you can stay warm all the way up to your chin and
still be able to use your hands!
Thursday, January 7, 2010
Hem Your Own Pants Video
This Saturday we'll be offering the Hem Your Own Pants Workshop from 1-2 at the studio. I found this great Makezine Video illustrating the way we'll be doing it in the workshop:
Tuesday, January 5, 2010
Today Project of the Day - Sewing a Zipper into a Dress
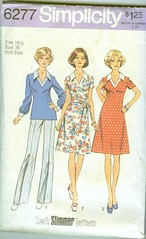
The Fashion Lab Dress Lab starts this evening and I am very excited to be teaching this class! We will be working on the pattern for the dress to the left. It's a fairly straightforward pattern, but the two challenging aspects of it will be learning how to do darts & zippers.
I found a great series of videos on Youtube demonstrating a super easy way to insert a zipper into a dress. Take a look here to check it out.
Step 1 Step 2 Step 3
People get really bogged down in the thought of inserting a zipper while sewing anything. It's really not difficult at all if you take your time and use a zipper foot. I think this video from Expert Village does a really good job of showing you just how easy it really is.
Subscribe to:
Posts (Atom)