Showing posts with label Sewing Accessories. Show all posts

Monday, October 3, 2011

Hat Lab Starts on Thursday

There's a chill in the air and I reached into my fall hat bin yesterday because I was ready. It's almost like the fall has come just for us to start our Hat Lab on Thursday.

I am not teaching the class, but will be staying and stitching for most classes because 1. I love hats! and 2. Because Irina is such an excellent teacher, I can always learn many things when I take her hat class.


Irina is the hat expert. Plain and simple. She's been doing this a long time and has learned from the best and now creates patterns and samples for the best. Coach.

Irina's passion for hats started with her first trip to London in 1994: inspired by Top Shop, upon return she made hats for the artists friends. Soon she became famous in her native Ukraine for her casual, understated creations. Innovative and resourceful, she was working with vintage and recycling materials producing original collections and fashion performances. 

Here are just a few of the adorable and highly functional designs we'll be working on in class: 


Driver


Equestrian


Newsboy


Beret

Wednesday, August 31, 2011

What is Fashion Draping?

We are getting so excited about the return of our Beginners Fashion Draping Lab happening on Sunday afternoons starting on on September 11th! But it occurred to me recently that perhaps some people aren't exactly sure what "draping" is. So I thought I might take a second to clarify a bit.

In a nutshell, fashion draping is the process of taking a sketch of a clothing design and turning it into a pattern that can then be made into the actual garment. Because our bodies are in 3-D and patterns are created in 2-D, the process of draping is what you do on the dress form to create the flat pattern pieces that are eventually cut out of the fabric.

Maybe I am making this more confusing that it needs to be. It's actually a pretty simple process that our instructor, Alisha Forler is pretty darn good at. And she's excited about helping you learn how to do it too.

But before you take the class, take a second to read this excellent article from Designer Nexus explaining the process and why people who are interested in designing their own clothes should learn how to drape.


Check out the full article from their website here.

What is Fashion Draping and Why Should
Apparel Designers Learn How to Drape?

Posted on Apr 05, 2011
 
Fashion draping is an important part of fashion design. Draping for fashion design is the process of positioning and pinning fabric on a dress form to develop the structure of a garment design. A garment can be draped using a design sketch as a basis, or a fashion designer can play with the way fabric falls to create new designs at the start of the apparel design process. After draping, the fabric is removed from the dress form and used to create the sewing pattern for the garment.

Fashion draping and fitting are usually done with muslin (an inexpensive, unbleached, loosely woven cotton) to resolve any design and fitting issues of a garment before cutting the pattern in real fabric. However, it is important to drape using a fabric that has similar drape characteristics (the way it falls and folds) as the real fabric of the finished garment. Muslin comes in a variety of weights, and inexpensive synthetic fabrics can also be used in fitting and draping for apparel design.

Fashion designers drape garments in sections i.e.: front bodice, back bodice, front skirt, back skirt etc. and only the right side of the garment (when worn) is draped, unless the apparel design is asymmetrical.
The general process for how to drape for fashion is as follows:
  • Pieces of muslin are cut and prepared. This includes measuring, tearing, blocking, pressing, and marking grain lines and other important reference lines.
  • Now the actual “draping” begins. The fabric is pinned to the dress form and positioned to form various darts, tucks, gathers, etc., which give shape and fit to the garment.
  • Once the desired design is achieved, the muslin is marked while still on the dress form to indicate where the seam lines, darts, etc. are located on the fabric.
  • When marking is finished, the muslin is removed from the dress form and laid flat on a table for “truing”. Truing is the process of using rulers and design curves to connect, smooth out and finalize the markings.
  • Once truing is complete, seam lines are added and excess material is cut away.
  • The muslin is then pinned together (with all darts pinned) and placed back onto the dress form to check for fit accuracy and to drape any additional parts of the garment.
  • Once all pieces are the garment are draped, they are all pinned together and placed on the dress form to check for fit accuracy.
  • When the apparel designer is satisfied with the look and fit of the pinned garment, the muslin is removed from the dress form, pressed flat, and all seam lines, grain lines, markings, notches, etc. are transferred to paper, creating the sewing pattern for the garment.

Why Should Fashion Designers Learn How to Drape?

While the majority of companies in the fashion industry no longer use draping as part of the design process, draping is a key skill which allows apparel designers to understand what creates a great fit and how to achieve it. If a garment sample fits poorly, a designer who is familiar with how darts and seams give shape to garments can spot what is creating the fit issue and advise the factory how to correct the problem.

However, the art of draping isn’t completely lost; in high fashion, couture fashion houses, evening, and lingerie companies most garments are created through draping. When draping a garment, the designer can immediately see what her apparel design will look like on the body, and immediately correct any fit or design problems before putting anything down on paper. In addition, some apparel designs are just impossible to make via flat patternmaking and need to be draped first. And some fabrics need to be experimented with on a dress form to see how they behave.

While draping for apparel design may seem like a daunting and tedious approach to creating patterns, it’s actually one of the more creative parts of the fashion design process. Apparel designers can experiment with fabric, and decide where to place darts, tucks, and other design elements. Playing with the way fabric folds and hangs on the body is a fun way to create new fashion designs that you wouldn’t have thought of sitting in front of a sketchpad!

Wednesday, August 24, 2011

More Vintage Dress Lab Please

I don't know about you, but I can't get enough of these vintage patterns. The looks of the 60's, 70's & 80's just keep getting recycled in todays fashions. It's so easy to make wearable dresses today using the patterns for yesterday. I would have to say this is what makes our Vintage Dress Lab continue to be one of our most popular Fashion Lab Series Classes.


I went through the treasure trove of my vintage pattern collection today and picked out 4 fresh (so to speak) vintage patterns to be added to the upcoming Vintage Dress Lab that is happening on Tuesday nights in October. The dresses added to the line-up reflect the fall season a bit better, as well.

If you haven't already taken this class, fear not. If you've got some sewing experience under your belt (ie, you're comfortable on the sewing machine and you have some pattern reading experience) you can take this class easily. You may not complete four dresses in the 4-week course, but you'll have access to all four patterns and if you give it some extra time (open lab hours - which are free with this class!)four dresses are totally do-able.

If you have already taken this class, come take it again! Four new, never done before projects means that there is never a project repeat! No matter how many times you take this class, you'll always make new dresses and learn new skills. I promise!


The other really cool thing about this class you are forced to learn how to size patterns to fit your own body. Vintage patterns typically come in one size only. It's not like the patterns today that have multiple sizes in one envelope. So depending on the size of each of the patterns you choose to do in this class, part of what you will be learning is how to make adjustments to the patterns so they fit your body measurements. You'll see just how simple and un-intimidating this process really is.

Here is the link to all the details of the class.


Wednesday, August 17, 2011

Nursing Cover Tutorial

Mommy Sewing Lab - Sewing Project: Nursing Cover

Here is a quick tutorial of the project you will work on in the introductory Mommy Sewing Lab. It's a great way to get the hang of sewing and even if you're not currently nursing, they make great handmade baby shower shower gifts.

Supplies
* 1 yard fabric of your choice
* Two O or D rings
* 12" of boning

1. Cut a 35" x 30" piece from your fabric. This will be the main part of the cover. Set aside.

2. Cut a 4" wide strip along the length of the remaining fabric.

3. Fold the 4" piece in half lengthwise, right sides together, and pin.

4. Sew down the length on the side that is not folded with a 1/4" seam.

5. Turn the strip right-side out.

6. Flatten strip with the seam down the middle and press flat

7. Cut the strap into two pieces. One should be about 26" long. The other end should be about 8" long.

8. Thread one end of 8" piece through both D rings. Fold end over 1/4" and press. Fold over another 1/4" and press.

9. Stitch the hem along the edge, then again closer to the D rings to keep them in place.

10. Stitch side hem along outside of fold from top to bottom.

11. Repeat on opposite side, then along bottom. Leave the top unfinished.

12. Fold the top edge over 1/4" then a second time 3/4" and pin in place.

13. Stitch along the folded edge to creat a 3/4" tunnel to put the boning into.

14. Slide the boning to the middle of the cover and make a stitch on either side so it can't slide around.

15. Attach the straps on either side of the boning with a box stitch.

Sunday, February 20, 2011

Vintage Hat Dinner Party

The ladies of Hat Lab had the opportunity for a little post-class reunion last week and I happily tagged along. Thanks to our Hat Lab instructor Irina for inviting us over to her spacious apartment for yummy treats, wine and a chance to check out her vast vintage hat collection.


Highlights included a delicious blackbean & sweet potato stew straight from the "Kickin' Kitchen" of Lynda Layng, Irina's boyfriends banana dessert with fresh whipped cream and of course, getting the chance to try on Irina's collection of vintage hats.

Here are some photos from our fun night.


Thursday, January 27, 2011

Seamless Infinity Scarf Tutorial

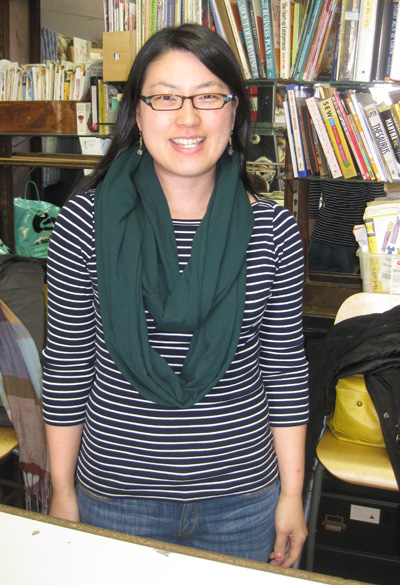
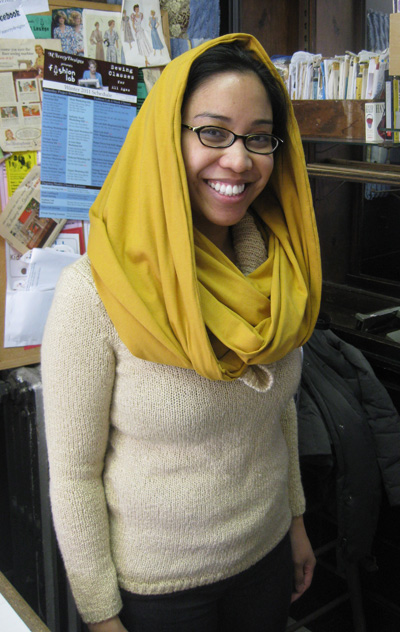
There are a bunch of how-to's out there on how to stitch an Infinity Scarf. But most of them require a big ol' visible seam where you sew the ends together. This is totally unnecessary and here is a quick easy way to make one without the unsightly seam. 


Fabric: Use fabric that is pretty stretchy. If this is going to be a winter scarf, choose a fabric that is also fairly cozy. We have found that spandex fabric is totally fine, but it's just not as nice to wear cause it tends to lay pretty flat, although if you are a year round scarf wearer, spandex would be great! I personally love to use a fuzzy knit or a heavier jersey knit, but I am from the northeast and right now we are getting hit with a pretty brutal winter and my infinity scarves have been part of my winter uniform.

Using a flexible measuring tape, determine how long you want your scarf to be. Drape the tape around your neck to determine the length. Usually you would want it to double around your neck without choking you. 

Once you have determined length, cut the fabric to the length you desire, but leave the width uncut for now. 

Drape this piece of fabric around you as you would wear your infinity scarf. Does it seem too bulky? If so, cut the width to where it doesn't seem too bulky anymore? 

Do you want it chunkier? That's fine too, you'll just need more yardage. You'll want to cut another piece of the same or contrasting fabric with the same stretchiness the same size as your original piece of fabric. Sew the two pieces of fabric together (right sides facing) along the length. Use a zig zag stitch if your machine does not have a stretch setting.

Now, once you have your length and width determine, fold the entire piece of fabric in half lengthwise with right sides facing and pin to secure it. Use LOTS of pins when working with stretchy fabric. Much easier! 
Again, using either the stretch setting on your machine or the zig zag stitch, sew the side you pinned (the non-folded side) together using a 7/8" seam allowance. (You want to use a pretty big seam allowance with a stretch fabric because it tends to roll on the ends and it just makes thing easier) But leave 2" on each end un-sewn.

Turn the tube of fabric right side out and pin your ends together (right sides facing). Because you left 2" on each end un-sewn,(as described in the last step)it makes it easier to sew your ends together. 


Next, sew the ends of the scarf together. 


Turn the seam in, so that the right side is showing. You should have a 4" opening that is not sewn. You can either top-stitch this closed with a sewing machine (which will be more visible) or just hand stitch the 4" opening shut, which will be easier to hide.

That's it! 


Need a little more direction?

Come to our 1-hour class on February 19th, 2011 from 3-4pm.

Here are all the details.

Tuesday, January 18, 2011

Recycled Sweater -> Hat & Mitten Set

This past Saturday, we hosted the hat & mitten set workshop at the studio. Everybody brought inan old sweater they don't wear anymore (or in Colleen's case, and old sweater that her co-worker doesn't wear anymore). We then turned these old, unwearable sweaters into a much more wearable winter hat & mitten set.

Here is Colleen's before:


(I guess it's not technically her before, as the photo was shot after she cut the sleeves off to use for her project...)

What then happened was really pretty simple:

First make a pattern. You are going to trace one hand on a piece of paper with the thumb at a 30-degree angle from the fingers. Draw a mitten shape around the outline of the hand, adding 1/2 inch. 

Next, cut out the pattern and pin it onto both layers of the sweater. Cut out the pattern to create two mitten shapes.

Now, with right sides facing, pin the mitten cutouts together, then with a sewing machine, sew them together, leaving a 1/4-seam allowance. Begin sewing at the cuff along the outside edge of the mitten, making sure not to stretch the fabric. For smooth curves, pick up the foot, and rotate the mitten as you sew.

Finally, to prevent fraying, sew around the mitten again, leaving a 1/8-inch seam allowance. Turn the mitten right-side out, and press. Repeat these steps for the second mitten.


Now for the hat, we did use a pattern, but it's a super simple one that I wound up finding online. The hat uses four panels that look like this:


Here are the directions I found on craftstylish.com.  I used these instructions to make my pattern and my first hat. 

"To determine the width of your panels, divide the head circumference by 5, then add 1 inch for seam allowance (1/2 inch each side). My head measures 22 inches around, so dividing it by 5 gave me 4.4, which I rounded up to 4-1/2. Adding 1 inch gives me 5-1/2 inches. Add 1 inch to your length measurement. Mine was 8-1/2 inches, so I have 9-1/2 inches for my total length."
 
But what I found is that depending on how much stretch you have in your felted sweater, you may not need all five panels. I have a pretty big melon and only used 4 panels of this size, sewn together.
 
So that said, you are going to put your first two panels together with rights sides facing. Sew from the bottom edge up to the point using a 1/2" seam allowance. Do the same with two more panels. Now put your doubled panels together with right sides facing and sew half of the rainbow together. At this point, try it on and determine if four will suffice or if you need another panel. If it's big enough to fit your noggin, continue sewing the rainbow. If you need the 5th panel, sew that to the series of four and finally sew up the remaining seams so you have what looks like a hat.
 
As you can see from Colleens photo, she decided to fold up the edge of the hat and it fit her perfectly. A couple of other students (sorry I don't have photos)ended up folding the extra edge in and stitching it down. If you decide to do this, be careful not to stretch as you sew or it looks pretty stretched out once you are done. You could even try hand sewing the edge under to prevent this from happening, we found.

Tuesday, January 11, 2011

Hoboken Guide @ Design Sponge

A fellow business owner here in town passed along a link to a Hoboken City Guide on the Design Sponge Blog. I am soooo honored to be a part of this piece, as I absolutely love Design Sponge!

"Welcome to Hoboken. A vibrant New Jersey town just a hop, skip and jump over the river from Manhattan. Hoboken was made famous as the birthplace of Frank Sinatra, the filming location of the Marlon Brando movie On The Waterfront and the music venue “Maxwell’s” where Bruce Springsteen filmed the video for “Glory Days.”

Hoboken is also the town of many firsts, including inventions like freeze-dried coffee, bubble wrap and ice cream, as well as the first organized baseball game and the first brewery. It boasts the most bars and restaurants in one square mile of its town’s boundaries, and the indie/designer/art scene is on its way up due to many artists and musicians living here. It is also home of the infamous Cake Boss from the Lifetime show."

And here is what they had to say about us, under the category Art, Craft Supplies & Galleries:

"M. Avery Designs — Also home of the Hoboken Handmade Collective. If you love fabric, this is the place to visit. They also host classes and socials and offer open studios for use of their sewing machines. All items in the store are handmade and gorgeous. 266, 7th Street (at the corner of Willow Ave.)"

Read more at Design*Sponge  

Monday, January 3, 2011

New Meetup - Fabric Flower Craft-Along

I know it's barely winter, but I am already dreaming of spring....

Let's all get together for our next Fashion Lab Meetup to make some fabric flowers. There are literlly hundreds of great tutorials out there for making adorable fabric flowers. For most of them all you need are fabric scraps & cool buttons.

Come learn how to make fabric flowers and share with fellow meetup members, your favorite techniques for crafting fabric flowers.

Bring all the fabric scraps you have laying around your house. I will provide all the tools and sewing machines (if we even need them) as well as snacks :)


Here is a great tutorial to get your inspired:

http://kindawonderful.typepad.com/pink_paper_peppermints/2008/05/31-crafty-flo-3.html

Where: M Avery Designs Studio 266 7th Street Hoboken NJ 07030
When: Saturday January 29th, 2011 2:30-4:30pm
RSVP and/or Join our Meetup Group:
http://www.meetup.com/fashionlab/calendar/15899558/?from=list&offset=0

Tuesday, June 8, 2010

We'll be doing the kid version of this in class on Saturday

I just found this adorable and super simple felt slipper project (well, I might be billing them as "flip flops") on the Purl Bee Blog. Not only are they completely adorable, there is not a lot of sewing involved, making them a perfect activity for the 5-7 year old craft class we do at the studio on Saturday mornings.

This class has been going great so far. This past Saturday class they decided they had graduated beyond the blue plastic needles they had been struggling to sew with. They're a great idea, but they don't really make for good sewing, unless you are using fabric that is woven super loosely and this can make sewing very frustrating for someone any age.

This week they all decided they were ready to try the real metal needles (super fat ones, with barely any point on them, of course) to do their hand sewing. I was soooo proud.

With this coming weeks flip-flop project, I foresee them sewing all kinds of buttons and silk flowers and even fabric scraps onto them. Oooooh this is going to be fun class!

Tuesday, April 27, 2010

Wear your Sewing Projects to the Art & Music Fest on Sunday

Come out for the Hoboken Art & Music Festival on Sunday May 2nd dressed in your favorite duds YOU MADE YOURSELF!

Come visit our booth (in front of Cold Stone Creamery on Washington Street) wearing something you made at an M Avery Designs Sewing Class and get coupons for sewing class discounts.

For each article of clothing and/or accessory you wear (up to 3) to our booth on Sunday you will receive a coupon that can be used towards any of the classes we teach at the studio

These coupons will be able to be used in one of three ways:

-Take $5 off ANY 2 Hour Workshop (Priced $25-$45)

-Take $20 off ANY Four Week Class (Priced at $149)

-Take $45 off ANY Fashion Lab Beginner Sewing Boot Camp (Priced at $299)

(Please note, more than one coupon cannot be used together on any class!)

Monday, April 26, 2010

Adorable Credit Card Guard Project from Readymade.com

I saw this project  by Erin Lewis on the Readymade.com website last week and immediately thought, Wow - What a useful little thing to make. It's adorable and would come in so handy if you consider yourself a super spender. This would come in super handy everytime I am on ebay browsing vintage sewing machines...

Anyway - here is how you make it:

    1. Decorate fabric or Tyvek with whatever message will keep you from spending. (Embroidery optional.)
    2. Press fabric with an iron.
    3. Place the credit card on top of your design, leave ⅛-inch seam allowance, and mark an outline with chalk.
    4. Trim fabric (should be approximately 56 inches), with your design in the top half.
    5. Fold the fabric in half around your credit card. With fabric held taut, pin all three sides.
    6. Carefully sew around the card through both layers of fabric, using your traced outline as a guide. Reinforce stitching at each end, adding a second line of hand stitching if the first isn’t snug enough.
    7. Pull threads to the inside of seams. Trim with pinking shears to prevent fraying.
    8. Insert the guarded card into your wallet. Remove all scissors and Swiss army knives from your handbag to prevent spontaneous spending.

Monday, April 19, 2010

Big Yarn Necklace Tutorial - It's kinda sewing...

I happen to think this necklace is awesome! Lucky for us, I just found the tutorial on the Burda Style Magazine website! Wooohooo! Who's gonna make one with me?

Step 1 You need: scissors, 2 balls of self-striping yarn, tubular silver lurex band, grosgrain/petersham ribbon, sewing thread, needle, straight pin, silver chain


Step 2 Pull layers of various thickness off each ball of yarn, lay them in loops, and cut them off – repeating until all of the yarn has been used up.

Step 3 Twist each loop until it twists back on itself in a tight bunch. Pin the twists on the back to prevent them from coming undone.


Step 4 Lay the twisted yarn bunches next to one another in the form of your necklace, then sew them together. Weave the silver chain in and out of the yarn bunches.


Saturday, February 27, 2010

Who wants a fabulous checkbook cover?!

I know I want one!
 
I found this cute checkbook cover tutorial linked to one of my favorite blogs Craftzine.  Since our meet up group challenge is in a few days I thought it would be perfect to show a project that again requires less than a pound of fabric.  There are several steps to the tutorial but Step 5 is optional so you can pretty much stop there!  It all depends on how detailed you want the checkbook cover to be.  Check out the tutorial and maybe you will be inspired to make one!


*A project by Kristine Tsai

Step 1: Cut the fabric

From the outer fabric, cut two 7×8-inch (WxL) pieces. Cut two pieces of interfacing the same size.
From the pocket fabric, cut two 7×7-inch pieces. Cut two 7×3.5-inch pieces of interfacing.
Cut two 2×4-inch strips of the outer fabric.
Cut a 7-inch piece of 1/4-inch elastic.
Step 2: Make the pockets
Take one pocket fabric piece and fold it in half wrong sides together. Press. Open the pocket up again and insert the interfacing between the layers and close the pocket again.

You should now have a nice 3.5×7-inch pocket. Baste along the open edge (the one across from the folded edge) together. If you’re a fan of top-stitching, top-stitch across the folded edge. You can also use some fancy stitches here if your machine has them.

If you want to embroider anything on the pockets, now is the time to do so. Keep in mind that you’ll lose about 1/2+1/8 inches around the sides due to the seams and top-stitching.Repeat for other pocket.
Step 3: Prep the Outer Cover and Lining

Take each outer fabric piece and baste the corresponding piece of interfacing to it.Now is a good time to decide which cut of the outer fabric you prefer to be on the outside of your checkbook. Place that one aside.
Step 4: Complete Lining (Pocket Placement)
Take the other outer fabric piece (this will be the lining of the checkbook) and place the pockets width-wise, lining up the raw edges. Make sure the folded edges of the pockets face each other and the center. Baste around all 4 sides.

From here, I’ll refer to the transaction register pocket as the “top” pocket, and the check pocket as the “bottom” pocket.
Step 5: Closures and Holding Pieces
This step is optional. Depending on how you like your checkbook, you can use these ideas or come up with completely different ones.

a) First, we’ll make some pieces to hold the used pages of your transaction register.
Take one of your two 2×4-inch strips. Fold in half length-wise (wrong sides together). Open up and then fold the long edges towards the crease you just made and fold it in half again (pretend you’re making a really tiny and skinny bag handle). Sew 1/8-inch across the open long edge. There should be no raw edges on the long sides now, and your strips should be 1/2×4-inches.
Repeat for the other strip. You can also use ribbon here if you prefer instead of making your own strips.Position these pieces on the top pocket at a 45-degree angle, approximately 1.5 to 2-inches from the corner in each direction. Baste in place and trim off excess.
b) Now we’ll add a piece of elastic to hold the checkbook closed.
Take your 7” piece of elastic. Place it about 1.5-inches up from the bottom of the bottom pocket. Baste in place.
Step 6: Putting it together
Take the outer piece you set aside earlier. Now you want to decide which part will be the “top” (the side you’ll see when the book is sitting on your desk) of the checkbook exterior once you fold it in half. Embroider as desired (I originally wanted to do initials, but I was too lazy to). Take care in accounting for the 1/2-inch seams and 1/8-inch top-stitching when positioning your embroidery.
Pin right sides together with the inside piece. Make sure you orient the exterior piece so that the top part of the exterior faces the transaction pocket part of the lining. Sew along all four sides with slightly more than 1/4-inch seam allowance to hide all the basting stitches. Don’t forget to leave a gap for turning! I usually put the gap at the one of the shorter edges. Turn right side out and press.This is what it should look like. You can see how our optional holding pieces from Step 5 will work.

Now is the time to check the fit of the cover with your checkbook stuff. Upon putting it in, you want at least 1/4-inch space of horizontal wiggle room to accommodate the top-stitching. If you have too much excess wiggle room, flip the cover inside out again and stitch around with a up to 1/2-inch seam allowance. I had some variation when I made mine—the first one used a 1/2-inch seam allowance and it turned out perfect. The second required a 1/4-inch seam allowance along the length (8-inch direction) but could still use a 1/2-inch seam allowance along the width (7-inch direction).Once you’re happy with the fit, clip the corners and trim the seams to reduce bulk.
Step 7: Finishing it off
For the last time, turn right side out, press, and then topstitch around the entire edge. We’ll be closing gap you left for turning with this topstitch.

Press again. Fold in half, and press the crease. Insert checks/transaction register and you’re done! HURRAH!

Thursday, February 25, 2010

New Ipod Case

So after posting yesterdays blog I am still thinking of fun projects to do with a pound or less of fabric.  I have been wanting to create a new ipod case so I came upon this tutorial from the Crafting A Green World website.
This site has tons of project ideas for creating something from less than a yard of fabric, as well as "green" sewing ideas.   You can make this ipod case unique by adding embellishments such as buttons or fabric cut outs.  You can even make a button closure using ribbon or a skinny piece of fabric.  If you want the case to be a bit thicker try using felt or a scrap of fleece for the back piece.  Its super easy to make!


Here are the instructions:

What you need to do is lay your iPod, mp3 player, or camera down on a piece of scrap.  Using a sewing pencil or a marker, draw an outline at least 1/2 inch away from what you’re making the cover for.  You’ll need two pieces of fabric, so be sure to have two sides.  Place your scraps with what you want to be the outside facing each other and the backs facing out.  From here you can either machine sew, or blanket stitch, them together.  Leave the top open.  If you want to hem the top, a simple way to do it is fold it over, iron it, and then machine sew it around.  For something so small, though, it may be easier to hand stitch.


*Photo taken from Claire's Crafty Blog
*Project instructions by Lenore MacLeod-Bickley from Crafting A Green World

Wednesday, February 24, 2010

Sweet Tees & Crumpets

Time to have a Girls Night Out "Tee" Party !


Get your ladies together for a night of T-shirt Deconstruction.


In this private party each guest starts with a plain used t-shirt and turns it into any of our fabulous deconstructed styles.


Our instructors will teach your group the basic design & sewing skills needed to play fashion designer for the day!


Get a group of six or more ladies together and everyone will design and stitch their very own custom deconstructed t-shirt and leave with it after the party. Don't worry, there is absolutely no sewing experience required!

You do the leg work, our staff will do the finishing touches to make sure your finished product is sturdy and professional looking when you take it home after this two-hour private party.


Check out a few of the photos, taken by photographer Adam Gallagher, of our first "Tee" Party. 

Or head to the website to find out all the details. 


Friday, January 15, 2010

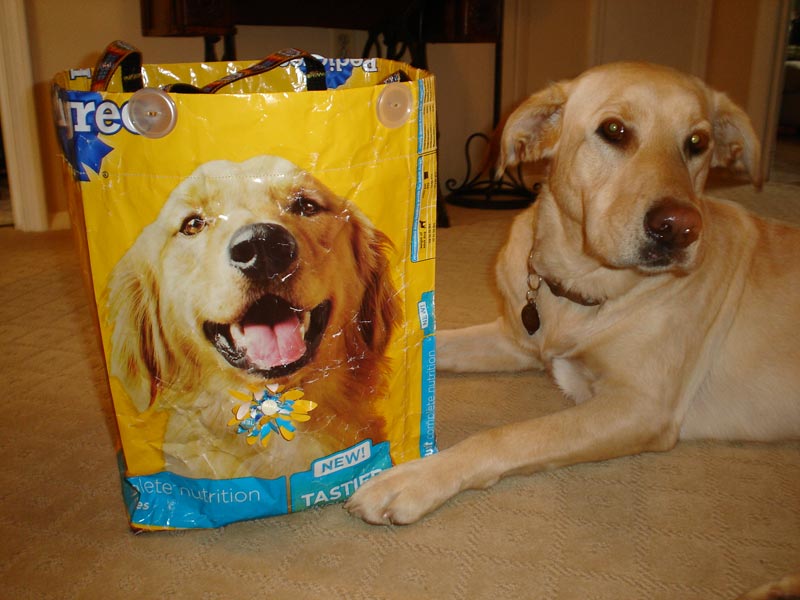
Eco-Friendly Shopping Tote for Dog Lovers


Today I started my day, taking Antonio, my pooch, for a walk. We headed over to the nearby Pathmark cause he was completely out of dog good. I tied him up in a pretty secure place in the back that not too many people know about at the Back Entrance of the Patchmark. I only do this when I know I can run in and run out and since it was about 8am, I knew he would be okay for the 8 minutes it would take me to run in and grab dog food and pay.

We walked back home, with a big bag of dog food in hand & Antonio happily anticipating his breakfast. As he ate and I checked my email, I came across this great tutorial for how to turn that bag of dog food (after it's empty) into an eco-friendly grocery shopper. And here it is, courtesy of the Sewing Savvy Newsletter.


Supplies

  • Dog-food bag -- 20 lbs or larger
  • 1 1/2 yards of nylon webbing
  • Four 1 1/2-inch buttons
  • Embroidery thread and needle
  • Rotary cutter, mat and ruler
  • Sewing machine and basic sewing supplies
  • Flower-shaped paper punch or die-cut machine and flower-shaped die (optional)
  • Washcloth and soapy water to wipe wrong side of bag
Instructions
  1. Remove as many crumbs from the bag as possible. Cut off the top and bottom of the bag using the rotary cutter, mat and ruler.
  2. Turn the bag wrong side out and use the washcloth and soapy water to wipe the wrong side of the bag; let dry.
  3. Open the side folds of the bag and sew the bottom edge of the bag closed.
  4. Fold up the bottom edge of the bag, centering the seam line, and box the corners of the bag by measuring in 3 inches from the corner of each point and marking the sewing line with the ruler and pencil. Sew along the marked line.
  5. Turn over the top edge of the bag 2 inches, and then again 3 inches and press using a press cloth and an iron set on the cotton setting. Sew next to the folded edge through all layers of the bag.
  6. Cut the webbing in two equal lengths and zigzag-stitch across the ends to prevent fraying.
  7. Mark the placement of the webbing handles along the inside edge of the bag approximately 2 inches down from the top edge of the bag.
  8. Use a zigzag stitch to attach each of the handle ends to the bag.
  9. Turn the bag right side out, carefully pushing out each of the bottom corners of the bag.
  10. Use the embroidery thread and needle to sew buttons through the bag and webbing, covering the stitching lines of the handles.
  11. Cut out a flower using the punch or the die cut machine and attach to the front of the bag with a button. This step is optional.