This is what I woke up to this morning. I am a lucky girl and I have a super thoughtful boyfriend.
Over the weekend we headed out to Montclair to celebrate the 1 year anniversary of a friends Vintage Boutique called Garnish.
Talk about coveting everything in a store! I love my friend Lisa's taste and the way she had the store laid out so neat and adorable totally gave me shoppe envy! I could have walked around in there for hours just looking at every last little detail of every item.
I seemed to have recently begun this obsession with old mechanical clocks. I think it has something to do with my obsession with old mechanical sewing machines, but who knows. They're just pretty cute too.
Anyway - I saw this clock and fell in love. I totally couldn't justify my purchasing it cause I just don't need it. I kept shopping around to find a little something a little more practical to spend my money on that night. (HA - practical.) Not sure if I can call what bought practical, but I guess they are a bit more useful than the clock
I wound taking home a baking book from 1961 and a mechanical egg beater. Again - am loving anything mechanical that is not electric these days!
Here they are:
Saturday Morning, I immediately had to make something from my new book. (see - totally practical!)
I knew I had some poppy seeds in my pantry, so lemon poppy seed pound cake it is.
Oops, no recipe for that in my new cook book. But that's okay, I will happily make do.
I used the Basic Pound Cake recipe found on page 116 and added some lemon juice and poppy seeds and all was well and right in the world.
Here is the recipe in case you are interested:
Basic Pound Cake
A delicious, old-fashioned cake, especially good toasted (from the book, not me)
6 eggs
1 cup sugar
1 cup butter
2 cups sifted flour
1 teaspoon vanilla
(I added the juice of one lemon, some zest & half a bottle of poppy seeds)
Set oven to 350 degrees. Grease a deep, 9 inch tube pan and dust with flour.
In a large bowl, combine eggs and sugar and beat for a minute. Set bowl over a saucepan of hot water. Place saucepan over low heat for about 10 minutes, or until eggs are slightly warmer than lukewarm. Don not let water boil. Stir eggs occasionally while they are being heated to prevent them from cooking on the the bottom of the bowl.
While eggs are warming, cream butter and flour till light and fluffy. Add vanilla.
When eggs are lukewarm, beat them until cool, thick and tripled in bulk. Quickly stir 1/4 of beaten eggs into creamed mixture. Pour mixture over remaining beaten eggs. Fold in gently. Be careful not to overmix.
Pour batter into prepared pan. Bake about 50 minutes, or until cake is golden brown and pulls away from sides of pan.
Megan Side note: All that business about warming the mixture over the hot water was skipped in my version. I just made sure the eggs weren't cold when I mixed them with everything else. I did this by letting them sit under warm water coming out of the tap of the sink. I also didn't really beat the eggs as they said. I beat them with the sugar with my new beater, but then procedeed to add all the ingrediants and bake it.
The more I think about it, I really didn't follow the directions at all (suprise, suprise). But my turned out okay. I had to take it out of the oven a bit early cause I had to head to work so there was some oozing batter when I cut into it later that day when I tried a pice. This was because it wasn't quite cooked all the way through. But I have to say, I am a big fan of any cake just a little bit underdone. Is that gross?
Showing posts with label Sewing Instruction. Show all posts
Tuesday, February 14, 2012
Tuesday, February 7, 2012
Love-ly Sewing Projects
We love hearts. Anytime of year, I can't seem to resist a sewing project that involves heart shapes in some way. So when Valentines day rolls around, we are in heaven. We have been working on heart themed sewing proejcts in classes for about the last two weeks now and we don't ever want it to end.
So I did some online investigating to find some new and different sewing projects involving hearts and and wanted to share with you the plethora of amazing projects out there for Valentines day:
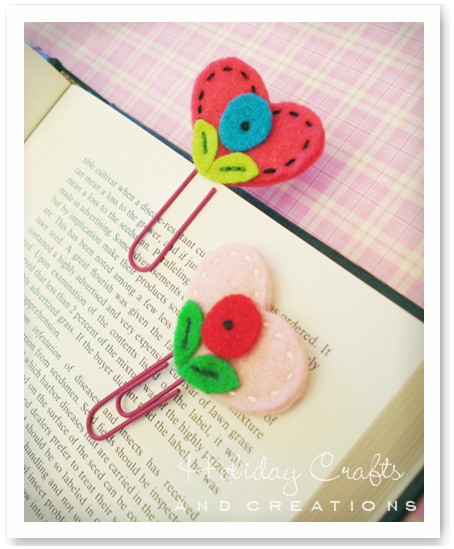
This bookmark project makes a really sweet kids hand sewing activity.
We did something similar to this project in our 6 & 7 year old sewing class yesterday. So mad at myself for not getting some photos!
The Purl Bee has a set of simple instructions for making felt valentine pins.
And from the Queen of Holiday crafting and sewing herself, here is a love-ly potholder tutorial from Martha Stewart.
Chris of "Pickup Some Creativity" offers a tutorial demonstrating how she made an inset heart motif with a nicely finished edge. Her technique makes it easier to sew than you’d think, and you can use this method with almost any shape your heart desires.
Tuesday, November 22, 2011
Sewing Knits - A primer from Threads Magazine
We have been using our downtime to update our class schedule. We're getting pretty excited about some new classes that we'll be offering in the new year!
One class will be Knits Lab and we cannot wait to share with you all our tips and tricks for sewing knits and jersey fabrics. It's really not that hard. We swear!
In our searching for class ideas we came across this great tutorial from Threads Magazine on sewing knits and thought we must share it with you.
By Ann Person
From Threads #73, pp. 42-45
Let me quickly dispel the apparent mystery about sewing with knits: there isn't any! Nonetheless, after 30 years of writing and teaching on the subject, I'm always surprised to find out that these supple fabrics still alarm many sewers. And nowadays there are so many new knit fabrics available, it's hard to know how to handle them all. So I'd like to present a basic primer of information every sewer needs to create knit garments that look like ready-to-wear. And believe me, it's easy— you don't have to be an expert.
The great fun of sewing with knits is the leeway they give you when fitting. A garment made from a stretchy fabric doesn't have to fit as perfectly as one made from a woven, so knits eliminate the pressure of exact measuring and altering of patterns. And they're so comfortable to wear!
When constructing knit garments, the first rule is that if the fabric stretches, the seams must stretch, too, so that the stitching won't pop as you bend and move in the garment. Whatever type of machine you have, I'll show you how you can achieve flat, stretchy seams.
One class will be Knits Lab and we cannot wait to share with you all our tips and tricks for sewing knits and jersey fabrics. It's really not that hard. We swear!
In our searching for class ideas we came across this great tutorial from Threads Magazine on sewing knits and thought we must share it with you.
By Ann Person
From Threads #73, pp. 42-45
Let me quickly dispel the apparent mystery about sewing with knits: there isn't any! Nonetheless, after 30 years of writing and teaching on the subject, I'm always surprised to find out that these supple fabrics still alarm many sewers. And nowadays there are so many new knit fabrics available, it's hard to know how to handle them all. So I'd like to present a basic primer of information every sewer needs to create knit garments that look like ready-to-wear. And believe me, it's easy— you don't have to be an expert.
The great fun of sewing with knits is the leeway they give you when fitting. A garment made from a stretchy fabric doesn't have to fit as perfectly as one made from a woven, so knits eliminate the pressure of exact measuring and altering of patterns. And they're so comfortable to wear!
When constructing knit garments, the first rule is that if the fabric stretches, the seams must stretch, too, so that the stitching won't pop as you bend and move in the garment. Whatever type of machine you have, I'll show you how you can achieve flat, stretchy seams.
Select patterns designed for knits when you sew these forgiving fabrics, available in an amazing variety of weaves, prints, and blends (including printed cotton interlock (1), silky rayon/metallic (2), mohair/wool jersey (3), striped acetate rib (4), and lacy linen/nylon jersey (5)).
Check out the fabrics!
Whether made of cotton, wool, linen, one of the new synthetics, or a blend, each knit falls into one of several construction categories: single knits (created on a commercial knitting machine with a single bed of needles); double knits (created on a double-bed machine with two back-to-back beds of needles); and rib knits (made by alternating stitches between two needle beds). Single-knit fabrics like jersey, velour, terry, and fleece look different on the reverse side, have cut edges that curl, and usually have about 25-percent stretch. Double knits like interlock (made with fine yarns) tend to be more stable than single knits, often look the same on both sides, have cut edges that don't curl, and stretch from 25 to 75 percent, depending on the fiber and construction. Rib knits, constructed from alternating knit and purl stitches in various combinations, may look the same or different on opposite sides, tend not to curl, and have up to 100-percent stretch.
My philosophy for fabric preparation is to always pretreat a fabric before you sew it exactly as you plan to care for the finished garment. This means that cotton, linen, and synthetic knits should be washed and dried (in the dryer if you plan to dry them this way later), and wool knits should be thoroughly steamed before cutting.
Smart pattern choices
When planning a knit garment, I recommend selecting a pattern specifically designed for knits, rather than for woven fabrics, because the pattern will have the correct amount of ease built into it. The amount of stretch in the fabric will determine the style and size pattern you choose. Check the pattern envelope for suggested fabrics and the amount of stretch required for the style. If you choose a fabric with less stretch, you'll need to add more ease.
Since knit fabric has built-in ease, you don't need as much ease in the pattern as you would for a woven fabric. A couple of inches of bust ease, for example, is plenty for a fairly fitted knit style, compared with the 5 in. of bust ease needed for many woven garments. And a double-knit skirt hangs nicely with 2 in. of ease, while a woven skirt would require at least 3 to 4 in.
Construction optionsYou can get successful results on knits whether you own a basic sewing machine or the latest high-tech serger. I began sewing on knits long before I owned a serger, and I still recommend my original technique of sewing with a long straight stitch of 9 sts/in. (3 mm), stretching the seam as I sew it (as much as the fabric stretches easily) to add elasticity. When the seam returns to its normal length, the stitches are closer together and the upper and lower thread tensions have loosened. As for using zigzag or stretch stitches to construct seams, I've simply never liked them.
For double knits that will stay pressed open, use a 5/8-in.-wide seam allowance. For single knits that tend to curl, I recommend a 1/4-in.-wide seam, which you can finish two ways: either press it to one side and topstitch for a professional look, or sew a second line of stitching 1/8 in. from the first and then press to one side. The double-sewn seam adds strength and helps keep the seam flat.
If you have a serger, you'll find serging a quick way to assemble knits with a finished, factory look, and the seams will have built-in elasticity, so you don't need to stretch them as you sew. Make sure your stitch is balanced, adjusting the thread tension so that the stitch doesn't bind or ruffle the seam. If your serger has differential feed, raise the setting if your test seam looks wavy. For hemming soft knits, I find that serging the edge, turning up a 1/4-in. hem, and topstitching twice gives a stable, nonslippery finish.
Check out the fabrics!
Whether made of cotton, wool, linen, one of the new synthetics, or a blend, each knit falls into one of several construction categories: single knits (created on a commercial knitting machine with a single bed of needles); double knits (created on a double-bed machine with two back-to-back beds of needles); and rib knits (made by alternating stitches between two needle beds). Single-knit fabrics like jersey, velour, terry, and fleece look different on the reverse side, have cut edges that curl, and usually have about 25-percent stretch. Double knits like interlock (made with fine yarns) tend to be more stable than single knits, often look the same on both sides, have cut edges that don't curl, and stretch from 25 to 75 percent, depending on the fiber and construction. Rib knits, constructed from alternating knit and purl stitches in various combinations, may look the same or different on opposite sides, tend not to curl, and have up to 100-percent stretch.
My philosophy for fabric preparation is to always pretreat a fabric before you sew it exactly as you plan to care for the finished garment. This means that cotton, linen, and synthetic knits should be washed and dried (in the dryer if you plan to dry them this way later), and wool knits should be thoroughly steamed before cutting.
Smart pattern choices
When planning a knit garment, I recommend selecting a pattern specifically designed for knits, rather than for woven fabrics, because the pattern will have the correct amount of ease built into it. The amount of stretch in the fabric will determine the style and size pattern you choose. Check the pattern envelope for suggested fabrics and the amount of stretch required for the style. If you choose a fabric with less stretch, you'll need to add more ease.
Since knit fabric has built-in ease, you don't need as much ease in the pattern as you would for a woven fabric. A couple of inches of bust ease, for example, is plenty for a fairly fitted knit style, compared with the 5 in. of bust ease needed for many woven garments. And a double-knit skirt hangs nicely with 2 in. of ease, while a woven skirt would require at least 3 to 4 in.
Construction optionsYou can get successful results on knits whether you own a basic sewing machine or the latest high-tech serger. I began sewing on knits long before I owned a serger, and I still recommend my original technique of sewing with a long straight stitch of 9 sts/in. (3 mm), stretching the seam as I sew it (as much as the fabric stretches easily) to add elasticity. When the seam returns to its normal length, the stitches are closer together and the upper and lower thread tensions have loosened. As for using zigzag or stretch stitches to construct seams, I've simply never liked them.
For double knits that will stay pressed open, use a 5/8-in.-wide seam allowance. For single knits that tend to curl, I recommend a 1/4-in.-wide seam, which you can finish two ways: either press it to one side and topstitch for a professional look, or sew a second line of stitching 1/8 in. from the first and then press to one side. The double-sewn seam adds strength and helps keep the seam flat.
If you have a serger, you'll find serging a quick way to assemble knits with a finished, factory look, and the seams will have built-in elasticity, so you don't need to stretch them as you sew. Make sure your stitch is balanced, adjusting the thread tension so that the stitch doesn't bind or ruffle the seam. If your serger has differential feed, raise the setting if your test seam looks wavy. For hemming soft knits, I find that serging the edge, turning up a 1/4-in. hem, and topstitching twice gives a stable, nonslippery finish.
Friday, September 23, 2011
Hoboken Art & Music Festival This Sunday
Sunday, Sept. 25, 2011
11am to 6pm
Takes place on Washington St.
between Observer Highway to 7th St.
Over 300 Artists, Crafters, Photographers,Sculptors, Local Businesses, Restaurants,
Food Vendors, local non-profits & more
Rain or shine • Admission is Free
With 3 Stages of live music
with performances by:
Skanatra, Swingadelic, Hello Radio, Buzz Universe,
The Romance Commandos, Specktrum, LiL Monstaz,
Frankie Morales & the Mambo of the Times Orchestra,
The Benson Ridge Project, Big Jeff & the Bouncy People,
Erin & the Up Past Bedtime Band & much more
Vendor applications are still available.
Volunteers are needed.
Contact
Geri Fallo, Division of Cultural Affairs
Send an Email
Phone: 201-420-2207
Fax: 201-420-2009
Performance Schedule TBA
Schedules are tentative and subject to change.
Observer Hwy (bet. Newark & Observer Hwy)
Noon - The Jersey Follettes
12:45 pm - Emily and the Turitones
2:00 pm - Swingadelic
3:30 pm - The Romance Commandos
4:45 pm - Skanatra
Sixth Street Stage
12:30 pm - Specktrum
1:00pm - LiL Monstaz
1:45 pm - The Benson Ridge Project
2:30 pm - Hello Radio
3:45 pm - Buzz Universe
5:00 pm - Frankie Morales and the Mambo of the Times Orchestra
Children’s Stage located in the Capital One Bank parking lot on 3rd Street
11:45 am - Garden Street Music
12:30 pm - Hudson Dance & Music
1:10pm - Big Jeff & the Bouncy People
2:00 pm - Big Jeff & the Bouncy People
3:00 pm - Erin Lee & the Up Past Bedtime Band
4:00 pm - Erin Lee & the Up Past Bedtime Band
Special features include
- Fine artists are located between 2nd & 3rd St., so if you are an art collector, this is the place to be. Oil paintings, watercolors, acrylics, sculpture, mixed media, etc.
- Children’s area on 3rd street with rides, games, creative activities, puppet show, face painting,
clowns, balloons, live performances and much, much more:
- Crafters display / sell handmade: pottery, metalwork, wood items, furniture, blown & fused glass, quilts, household items made from recycled materials, cementware, batik clothing, hand painted furniture, candles, jewelry, dried florals, soaps & lotions and much more
- Food: Lots of great food throughout the fair. Hoboken restaurants will set up street cafes offering an eclectic variety of international foods such as: Thai, Indian, Greek, French, Mexican, Cajun and Italian
Transportation
Located just 3 blocks from all public transportation:PATH, NJ Transit Trains & buses, NY Waterway Ferries & the Hudson Bergen Lightrail
Washington Street will be closed from 6am to 9pm
between Observer Highway and 7th Street
During this time, NJ TRANSIT Bus No. 22 (North Bergen-Union City-Hoboken),
No. 89 (North Bergen-Hoboken) and No. 126 (Hoboken-New York)
will operate on a detour.
Customers traveling toward North Bergen and New York
will board and alight along Bloomfield Street at customer’s request.
Customers traveling toward Hoboken Terminal
will board and alight along Willow Avenue at marked bus stop locations.
Sponsors
NY Waterway Ferries,
The Hoboken Reporter & The Midweek Reporter,
Capital One Bank, Walgreens, NY Waterway Ferries,
PATH, Port Authority of NY & NJ,
Anthony Davids, Dunkin Donuts, Starbucks, Crumbs, Luca Brasi,
Steaz Iced Teas, GuS Grown Up Sodas, Boylans Soda & Illy Coffee
Tuesday, September 20, 2011
What is Applique
We have an Intro to Applique class this weekend and I was just thinking, perhaps people don't even know what applique is. So I googled it to see if I could find a nice little definition and here is what I borrowed from the about.com site.
Answer: Appliqué is a kind of patch that is applied to clothing. While patches are used to repair clothing, appliqué's are used to decorate. Many patches are often put together to make an object or scene. Different fabrics are selected for the individual patches to add texture, contrast and style.
In the class, we are going to teach you easy techniques for learning how to cut out your own designs and add them to just about anything. You'll see just how easy it is to do. You just need to practice to make your designs look professional.
Question: What is Applique?
In the class, we are going to teach you easy techniques for learning how to cut out your own designs and add them to just about anything. You'll see just how easy it is to do. You just need to practice to make your designs look professional.
Wednesday, August 31, 2011
What is Fashion Draping?
We are getting so excited about the return of our Beginners Fashion Draping Lab happening on Sunday afternoons starting on on September 11th! But it occurred to me recently that perhaps some people aren't exactly sure what "draping" is. So I thought I might take a second to clarify a bit.
In a nutshell, fashion draping is the process of taking a sketch of a clothing design and turning it into a pattern that can then be made into the actual garment. Because our bodies are in 3-D and patterns are created in 2-D, the process of draping is what you do on the dress form to create the flat pattern pieces that are eventually cut out of the fabric.
Maybe I am making this more confusing that it needs to be. It's actually a pretty simple process that our instructor, Alisha Forler is pretty darn good at. And she's excited about helping you learn how to do it too.
But before you take the class, take a second to read this excellent article from Designer Nexus explaining the process and why people who are interested in designing their own clothes should learn how to drape.

Check out the full article from their website here.
What is Fashion Draping and Why Should
Fashion draping and fitting are usually done with muslin (an inexpensive, unbleached, loosely woven cotton) to resolve any design and fitting issues of a garment before cutting the pattern in real fabric. However, it is important to drape using a fabric that has similar drape characteristics (the way it falls and folds) as the real fabric of the finished garment. Muslin comes in a variety of weights, and inexpensive synthetic fabrics can also be used in fitting and draping for apparel design.
Fashion designers drape garments in sections i.e.: front bodice, back bodice, front skirt, back skirt etc. and only the right side of the garment (when worn) is draped, unless the apparel design is asymmetrical.
The general process for how to drape for fashion is as follows:
However, the art of draping isn’t completely lost; in high fashion, couture fashion houses, evening, and lingerie companies most garments are created through draping. When draping a garment, the designer can immediately see what her apparel design will look like on the body, and immediately correct any fit or design problems before putting anything down on paper. In addition, some apparel designs are just impossible to make via flat patternmaking and need to be draped first. And some fabrics need to be experimented with on a dress form to see how they behave.
While draping for apparel design may seem like a daunting and tedious approach to creating patterns, it’s actually one of the more creative parts of the fashion design process. Apparel designers can experiment with fabric, and decide where to place darts, tucks, and other design elements. Playing with the way fabric folds and hangs on the body is a fun way to create new fashion designs that you wouldn’t have thought of sitting in front of a sketchpad!
In a nutshell, fashion draping is the process of taking a sketch of a clothing design and turning it into a pattern that can then be made into the actual garment. Because our bodies are in 3-D and patterns are created in 2-D, the process of draping is what you do on the dress form to create the flat pattern pieces that are eventually cut out of the fabric.
Maybe I am making this more confusing that it needs to be. It's actually a pretty simple process that our instructor, Alisha Forler is pretty darn good at. And she's excited about helping you learn how to do it too.
But before you take the class, take a second to read this excellent article from Designer Nexus explaining the process and why people who are interested in designing their own clothes should learn how to drape.
Check out the full article from their website here.
What is Fashion Draping and Why Should
Apparel Designers Learn How to Drape?
Posted on Apr 05, 2011
Fashion draping is an important part of fashion design. Draping for fashion design is the process of positioning and pinning fabric on a dress form to develop the structure of a garment design. A garment can be draped using a design sketch as a basis, or a fashion designer can play with the way fabric falls to create new designs at the start of the apparel design process. After draping, the fabric is removed from the dress form and used to create the sewing pattern for the garment.
Fashion draping and fitting are usually done with muslin (an inexpensive, unbleached, loosely woven cotton) to resolve any design and fitting issues of a garment before cutting the pattern in real fabric. However, it is important to drape using a fabric that has similar drape characteristics (the way it falls and folds) as the real fabric of the finished garment. Muslin comes in a variety of weights, and inexpensive synthetic fabrics can also be used in fitting and draping for apparel design.
Fashion designers drape garments in sections i.e.: front bodice, back bodice, front skirt, back skirt etc. and only the right side of the garment (when worn) is draped, unless the apparel design is asymmetrical.
The general process for how to drape for fashion is as follows:
- Pieces of muslin are cut and prepared. This includes measuring, tearing, blocking, pressing, and marking grain lines and other important reference lines.
- Now the actual “draping” begins. The fabric is pinned to the dress form and positioned to form various darts, tucks, gathers, etc., which give shape and fit to the garment.
- Once the desired design is achieved, the muslin is marked while still on the dress form to indicate where the seam lines, darts, etc. are located on the fabric.
- When marking is finished, the muslin is removed from the dress form and laid flat on a table for “truing”. Truing is the process of using rulers and design curves to connect, smooth out and finalize the markings.
- Once truing is complete, seam lines are added and excess material is cut away.
- The muslin is then pinned together (with all darts pinned) and placed back onto the dress form to check for fit accuracy and to drape any additional parts of the garment.
- Once all pieces are the garment are draped, they are all pinned together and placed on the dress form to check for fit accuracy.
- When the apparel designer is satisfied with the look and fit of the pinned garment, the muslin is removed from the dress form, pressed flat, and all seam lines, grain lines, markings, notches, etc. are transferred to paper, creating the sewing pattern for the garment.
Why Should Fashion Designers Learn How to Drape?
While the majority of companies in the fashion industry no longer use draping as part of the design process, draping is a key skill which allows apparel designers to understand what creates a great fit and how to achieve it. If a garment sample fits poorly, a designer who is familiar with how darts and seams give shape to garments can spot what is creating the fit issue and advise the factory how to correct the problem.However, the art of draping isn’t completely lost; in high fashion, couture fashion houses, evening, and lingerie companies most garments are created through draping. When draping a garment, the designer can immediately see what her apparel design will look like on the body, and immediately correct any fit or design problems before putting anything down on paper. In addition, some apparel designs are just impossible to make via flat patternmaking and need to be draped first. And some fabrics need to be experimented with on a dress form to see how they behave.
While draping for apparel design may seem like a daunting and tedious approach to creating patterns, it’s actually one of the more creative parts of the fashion design process. Apparel designers can experiment with fabric, and decide where to place darts, tucks, and other design elements. Playing with the way fabric folds and hangs on the body is a fun way to create new fashion designs that you wouldn’t have thought of sitting in front of a sketchpad!
Wednesday, August 24, 2011
More Vintage Dress Lab Please
I don't know about you, but I can't get enough of these vintage patterns. The looks of the 60's, 70's & 80's just keep getting recycled in todays fashions. It's so easy to make wearable dresses today using the patterns for yesterday. I would have to say this is what makes our Vintage Dress Lab continue to be one of our most popular Fashion Lab Series Classes.
I went through the treasure trove of my vintage pattern collection today and picked out 4 fresh (so to speak) vintage patterns to be added to the upcoming Vintage Dress Lab that is happening on Tuesday nights in October. The dresses added to the line-up reflect the fall season a bit better, as well.
If you haven't already taken this class, fear not. If you've got some sewing experience under your belt (ie, you're comfortable on the sewing machine and you have some pattern reading experience) you can take this class easily. You may not complete four dresses in the 4-week course, but you'll have access to all four patterns and if you give it some extra time (open lab hours - which are free with this class!)four dresses are totally do-able.
If you have already taken this class, come take it again! Four new, never done before projects means that there is never a project repeat! No matter how many times you take this class, you'll always make new dresses and learn new skills. I promise!
The other really cool thing about this class you are forced to learn how to size patterns to fit your own body. Vintage patterns typically come in one size only. It's not like the patterns today that have multiple sizes in one envelope. So depending on the size of each of the patterns you choose to do in this class, part of what you will be learning is how to make adjustments to the patterns so they fit your body measurements. You'll see just how simple and un-intimidating this process really is.
Here is the link to all the details of the class.
I went through the treasure trove of my vintage pattern collection today and picked out 4 fresh (so to speak) vintage patterns to be added to the upcoming Vintage Dress Lab that is happening on Tuesday nights in October. The dresses added to the line-up reflect the fall season a bit better, as well.
If you haven't already taken this class, fear not. If you've got some sewing experience under your belt (ie, you're comfortable on the sewing machine and you have some pattern reading experience) you can take this class easily. You may not complete four dresses in the 4-week course, but you'll have access to all four patterns and if you give it some extra time (open lab hours - which are free with this class!)four dresses are totally do-able.
If you have already taken this class, come take it again! Four new, never done before projects means that there is never a project repeat! No matter how many times you take this class, you'll always make new dresses and learn new skills. I promise!
The other really cool thing about this class you are forced to learn how to size patterns to fit your own body. Vintage patterns typically come in one size only. It's not like the patterns today that have multiple sizes in one envelope. So depending on the size of each of the patterns you choose to do in this class, part of what you will be learning is how to make adjustments to the patterns so they fit your body measurements. You'll see just how simple and un-intimidating this process really is.
Here is the link to all the details of the class.
Wednesday, August 17, 2011
Nursing Cover Tutorial
Here is a quick tutorial of the project you will work on in the introductory Mommy Sewing Lab. It's a great way to get the hang of sewing and even if you're not currently nursing, they make great handmade baby shower shower gifts.
Supplies
* 1 yard fabric of your choice
* Two O or D rings
* 12" of boning
1. Cut a 35" x 30" piece from your fabric. This will be the main part of the cover. Set aside.
2. Cut a 4" wide strip along the length of the remaining fabric.
3. Fold the 4" piece in half lengthwise, right sides together, and pin.
4. Sew down the length on the side that is not folded with a 1/4" seam.
5. Turn the strip right-side out.
6. Flatten strip with the seam down the middle and press flat
7. Cut the strap into two pieces. One should be about 26" long. The other end should be about 8" long.
8. Thread one end of 8" piece through both D rings. Fold end over 1/4" and press. Fold over another 1/4" and press.
9. Stitch the hem along the edge, then again closer to the D rings to keep them in place.
10. Stitch side hem along outside of fold from top to bottom.
11. Repeat on opposite side, then along bottom. Leave the top unfinished.
12. Fold the top edge over 1/4" then a second time 3/4" and pin in place.
13. Stitch along the folded edge to creat a 3/4" tunnel to put the boning into.
14. Slide the boning to the middle of the cover and make a stitch on either side so it can't slide around.
15. Attach the straps on either side of the boning with a box stitch.
2. Cut a 4" wide strip along the length of the remaining fabric.
3. Fold the 4" piece in half lengthwise, right sides together, and pin.
4. Sew down the length on the side that is not folded with a 1/4" seam.
5. Turn the strip right-side out.
6. Flatten strip with the seam down the middle and press flat
7. Cut the strap into two pieces. One should be about 26" long. The other end should be about 8" long.
8. Thread one end of 8" piece through both D rings. Fold end over 1/4" and press. Fold over another 1/4" and press.
9. Stitch the hem along the edge, then again closer to the D rings to keep them in place.
10. Stitch side hem along outside of fold from top to bottom.
11. Repeat on opposite side, then along bottom. Leave the top unfinished.
12. Fold the top edge over 1/4" then a second time 3/4" and pin in place.
13. Stitch along the folded edge to creat a 3/4" tunnel to put the boning into.
14. Slide the boning to the middle of the cover and make a stitch on either side so it can't slide around.
15. Attach the straps on either side of the boning with a box stitch.
Anatomy of a Sewing Machine
Found this great, really basic "Anatomy of a Sewing Machine" resource Craftzine published back in April 2007. It was written by Christine Haynes and Kent Bell.
This handy little feature showcased the illustration below, done by Kent, and the corresponding descriptions below. Useful when you're just getting started working with sewing machines as well as when you're troubleshooting.
I was drawn to it because of the graphic (adam thinks I should get a tattoo of it), but upon reading it, found it really really useful. So here it is. Can also be found online here.
1. Pedal - The speed of the machine is controlled by the foot pedal.
2. Slide plate - Slides open to reveal the bobbin.
3. Bobbin - One of the two threads used to make a stitch is stored in the bobbin, which is located under the needle and throat plates.
4. Feed - These little metal teeth pull the fabric through so that it can be stitched.
5. Throat plate - Stays in place while the needle penetrates through a hole to pick up the bobbin thread underneath.
6. Presser foot - Interchangeable with other specialty feet, it holds the fabric in place.
7. Needle - Most projects will utilize one of four types of needles. The sharp point needle is used most often with woven fabrics. The ballpoint needle is ideal for knits; the wedge point needle is used for leather and vinyl; and twin or triple needles are
used for decorative topstitching.
8. Foot pressure dial - Correct foot pressure results in even feeding of the fabric. Some machines automatically adjust tension and pressure to the fabric. Always check tension and pressure on a scrap of fabric before starting to sew. Generally, the lighter the weight of fabric, the lighter the pressure needed.
9. Stitch tension dial - The stitch tension dial sets the amount of tension on the threads while sewing. Too much tension results in too little thread fed into the stitch, causing the fabric to pucker. Too little tension results in a loose stitch.
10. Bobbin winder thread guide - On a machine with an external bobbin winder, the thread loops around this guide between the spool and winder.
11. Stitch selection dial - This is where you choose between the many different stitches: straight, zigzag, and other decorative stitches. Can also be done digitally.
12. Needle position - If you are sewing a zipper or doing other specialty stitching, you might need to move the needle from the center position to a left or right position.
13. Spool pin - Spool of thread sits on the spool pin. Some machines have more than one for decorative stitching.
14. Bobbin winder - The empty bobbin sits on this winder to be threaded. When winding bobbins, always start with an empty bobbin so the thread will wind evenly.
15. Flywheel - This wheel spins as you push down the pedal. Most machines disengage the flywheel when winding bobbins.
16. Stitch length dial - The stitch length dial is on a "per inch" scale from 0 to 20 per inch, a metric scale from 0 to 4mm, or a numerical scale from 0 to 9.
17. Stitch width dial - When you use decorative stitches and zigzag stitching, this dial can determine the width of the stitch.
18. Reverse stitch button - If you want to secure your stitch at the beginning and ending, sew a few stitches in reverse by pushing this button down.
This handy little feature showcased the illustration below, done by Kent, and the corresponding descriptions below. Useful when you're just getting started working with sewing machines as well as when you're troubleshooting.
I was drawn to it because of the graphic (adam thinks I should get a tattoo of it), but upon reading it, found it really really useful. So here it is. Can also be found online here.
1. Pedal - The speed of the machine is controlled by the foot pedal.
2. Slide plate - Slides open to reveal the bobbin.
3. Bobbin - One of the two threads used to make a stitch is stored in the bobbin, which is located under the needle and throat plates.
4. Feed - These little metal teeth pull the fabric through so that it can be stitched.
5. Throat plate - Stays in place while the needle penetrates through a hole to pick up the bobbin thread underneath.
6. Presser foot - Interchangeable with other specialty feet, it holds the fabric in place.
7. Needle - Most projects will utilize one of four types of needles. The sharp point needle is used most often with woven fabrics. The ballpoint needle is ideal for knits; the wedge point needle is used for leather and vinyl; and twin or triple needles are
used for decorative topstitching.
8. Foot pressure dial - Correct foot pressure results in even feeding of the fabric. Some machines automatically adjust tension and pressure to the fabric. Always check tension and pressure on a scrap of fabric before starting to sew. Generally, the lighter the weight of fabric, the lighter the pressure needed.
9. Stitch tension dial - The stitch tension dial sets the amount of tension on the threads while sewing. Too much tension results in too little thread fed into the stitch, causing the fabric to pucker. Too little tension results in a loose stitch.
10. Bobbin winder thread guide - On a machine with an external bobbin winder, the thread loops around this guide between the spool and winder.
11. Stitch selection dial - This is where you choose between the many different stitches: straight, zigzag, and other decorative stitches. Can also be done digitally.
12. Needle position - If you are sewing a zipper or doing other specialty stitching, you might need to move the needle from the center position to a left or right position.
13. Spool pin - Spool of thread sits on the spool pin. Some machines have more than one for decorative stitching.
14. Bobbin winder - The empty bobbin sits on this winder to be threaded. When winding bobbins, always start with an empty bobbin so the thread will wind evenly.
15. Flywheel - This wheel spins as you push down the pedal. Most machines disengage the flywheel when winding bobbins.
16. Stitch length dial - The stitch length dial is on a "per inch" scale from 0 to 20 per inch, a metric scale from 0 to 4mm, or a numerical scale from 0 to 9.
17. Stitch width dial - When you use decorative stitches and zigzag stitching, this dial can determine the width of the stitch.
18. Reverse stitch button - If you want to secure your stitch at the beginning and ending, sew a few stitches in reverse by pushing this button down.
Tuesday, August 16, 2011
Peter's 30 Sewing Dos and Don'ts - Borrowed from Burdastyle
I just came across this blog entry over at the Burdastyle Website and I cannot agree more. This list covers all the things that I've painstakingly learned in my 20+ years of sewing. If you're new to sewing, I suggest you heed this advice. It will save you loads of time and anguish! No need to have one of those "I feel like throwing my sewing machine out the window" moments that I used to have when I was first sewing.
When native New Yorker Peter Lappin bought his first sewing machine two years ago to hem a pair of thrift store jeans, little did he know he was initiating a journey that would bring him fame and fortune. While awaiting his fortune he stays busy writing “the world’s most popular men’s sewing blog,” Male Pattern Boldness, and now contributing to BurdaStyle.
Peter’s SEWING DO's
1. DO sew only projects you’re excited about.
2. DO start an important project with a fresh sewing needle.
3. DO clean your sewing area and the bed of your sewing machine thoroughly (I use rubbing alcohol) before sewing with light-colored or white fabric.
4. DO give yourself a break between projects.
5. DO keep your sewing area clean — or cleanish.
6. DO consider sewing with a vintage sewing machine, if only for the experience (you might prefer it).
7. DO keep a spare sewing machine (you’ll stumble on a cheap one at a thrift store eventually).
8. DO pre-shrink your fabric if your fabric is apt to shrink in the wash.
9. DO press as you go.
10. DO learn how to maintain your sewing machine.
11. DO organize your sewing notions so you know where to find them next time you need them.
12. DO invest some time figuring out thread tension for your sewing machine. (It’s basically just two disks and a spring.)
13. DO create a dedicated sewing space.
14. DO learn from your mistakes.
15. DO share your sewing knowledge with others.
BONUS DO!
16. DO talk up sewing when you can — young people need to know it exists.
1. DON’T sew when you’re feeling exhausted.
2. DON’T rush. Another day won’t make a difference and you’ll be wearing your project (hopefully) a long time.
3. DON’T sew for others unless the idea brings you joy.
4. DON’T buy the cheapest new sewing machine you can find at Walmart, Kmart, etc.
5. DON’T use cheap interfacing.
6. DON’T fall for every bell and whistle available on a new sewing machine; you’ll never use most of them.
7. DON’T iron with a dirty faceplate.
8. DON’T beat yourself up is your garment doesn’t come out the way you’d hoped.
9. DON’T sew under poor light.
10. DON’T put water in your iron if you’re ironing a fabric that’s water-stainable (ask me how I know!).
11. DON’T keep every last fabric scrap for the fantastic quilt you will (never) make someday.
12. DON’T forget to clean out the fuzz beneath your throat plate periodically.
13. DON’T overlook refurbished machines; they’re just as good as new imo.
14. DON’T set unreasonable standards for yourself.
15. DON’T force yourself to finish a project you’ve lost passion for.
BONUS DON’T!
16. DON’T hoard sewing notions!
So what do you think?
Is there anything you’d include on your do and don’t list Peter has missed here?
Feel free to add some of your own in the comments section below!
When native New Yorker Peter Lappin bought his first sewing machine two years ago to hem a pair of thrift store jeans, little did he know he was initiating a journey that would bring him fame and fortune. While awaiting his fortune he stays busy writing “the world’s most popular men’s sewing blog,” Male Pattern Boldness, and now contributing to BurdaStyle.
Peter’s SEWING DO's
1. DO sew only projects you’re excited about.
2. DO start an important project with a fresh sewing needle.
3. DO clean your sewing area and the bed of your sewing machine thoroughly (I use rubbing alcohol) before sewing with light-colored or white fabric.
4. DO give yourself a break between projects.
5. DO keep your sewing area clean — or cleanish.
6. DO consider sewing with a vintage sewing machine, if only for the experience (you might prefer it).
7. DO keep a spare sewing machine (you’ll stumble on a cheap one at a thrift store eventually).
8. DO pre-shrink your fabric if your fabric is apt to shrink in the wash.
9. DO press as you go.
10. DO learn how to maintain your sewing machine.
11. DO organize your sewing notions so you know where to find them next time you need them.
12. DO invest some time figuring out thread tension for your sewing machine. (It’s basically just two disks and a spring.)
13. DO create a dedicated sewing space.
14. DO learn from your mistakes.
15. DO share your sewing knowledge with others.
BONUS DO!
16. DO talk up sewing when you can — young people need to know it exists.
Peter’s SEWING DON’Ts
2. DON’T rush. Another day won’t make a difference and you’ll be wearing your project (hopefully) a long time.
3. DON’T sew for others unless the idea brings you joy.
4. DON’T buy the cheapest new sewing machine you can find at Walmart, Kmart, etc.
5. DON’T use cheap interfacing.
6. DON’T fall for every bell and whistle available on a new sewing machine; you’ll never use most of them.
7. DON’T iron with a dirty faceplate.
8. DON’T beat yourself up is your garment doesn’t come out the way you’d hoped.
9. DON’T sew under poor light.
10. DON’T put water in your iron if you’re ironing a fabric that’s water-stainable (ask me how I know!).
11. DON’T keep every last fabric scrap for the fantastic quilt you will (never) make someday.
12. DON’T forget to clean out the fuzz beneath your throat plate periodically.
13. DON’T overlook refurbished machines; they’re just as good as new imo.
14. DON’T set unreasonable standards for yourself.
15. DON’T force yourself to finish a project you’ve lost passion for.
BONUS DON’T!
16. DON’T hoard sewing notions!
So what do you think?
Is there anything you’d include on your do and don’t list Peter has missed here?
Feel free to add some of your own in the comments section below!
Thursday, January 27, 2011
Seamless Infinity Scarf Tutorial
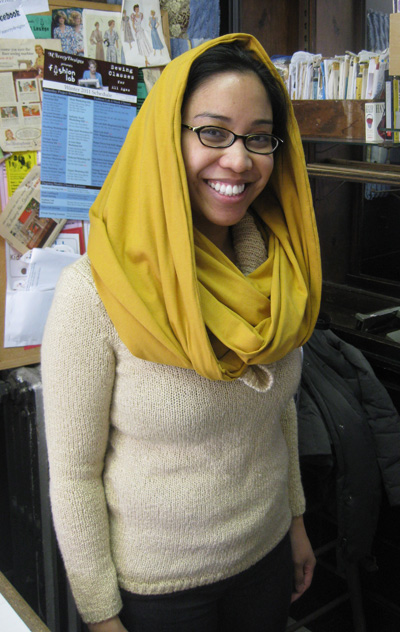
There are a bunch of how-to's out there on how to stitch an Infinity Scarf. But most of them require a big ol' visible seam where you sew the ends together. This is totally unnecessary and here is a quick easy way to make one without the unsightly seam.
Fabric: Use fabric that is pretty stretchy. If this is going to be a winter scarf, choose a fabric that is also fairly cozy. We have found that spandex fabric is totally fine, but it's just not as nice to wear cause it tends to lay pretty flat, although if you are a year round scarf wearer, spandex would be great! I personally love to use a fuzzy knit or a heavier jersey knit, but I am from the northeast and right now we are getting hit with a pretty brutal winter and my infinity scarves have been part of my winter uniform.
Using a flexible measuring tape, determine how long you want your scarf to be. Drape the tape around your neck to determine the length. Usually you would want it to double around your neck without choking you.
Once you have determined length, cut the fabric to the length you desire, but leave the width uncut for now.
Drape this piece of fabric around you as you would wear your infinity scarf. Does it seem too bulky? If so, cut the width to where it doesn't seem too bulky anymore?
Do you want it chunkier? That's fine too, you'll just need more yardage. You'll want to cut another piece of the same or contrasting fabric with the same stretchiness the same size as your original piece of fabric. Sew the two pieces of fabric together (right sides facing) along the length. Use a zig zag stitch if your machine does not have a stretch setting.
Now, once you have your length and width determine, fold the entire piece of fabric in half lengthwise with right sides facing and pin to secure it. Use LOTS of pins when working with stretchy fabric. Much easier!
Again, using either the stretch setting on your machine or the zig zag stitch, sew the side you pinned (the non-folded side) together using a 7/8" seam allowance. (You want to use a pretty big seam allowance with a stretch fabric because it tends to roll on the ends and it just makes thing easier) But leave 2" on each end un-sewn.
Turn the tube of fabric right side out and pin your ends together (right sides facing). Because you left 2" on each end un-sewn,(as described in the last step)it makes it easier to sew your ends together.
Next, sew the ends of the scarf together.
Turn the seam in, so that the right side is showing. You should have a 4" opening that is not sewn. You can either top-stitch this closed with a sewing machine (which will be more visible) or just hand stitch the 4" opening shut, which will be easier to hide.
That's it!
Need a little more direction?
Come to our 1-hour class on February 19th, 2011 from 3-4pm.
Here are all the details.
Tuesday, January 18, 2011
Recycled Sweater -> Hat & Mitten Set
This past Saturday, we hosted the hat & mitten set workshop at the studio. Everybody brought inan old sweater they don't wear anymore (or in Colleen's case, and old sweater that her co-worker doesn't wear anymore). We then turned these old, unwearable sweaters into a much more wearable winter hat & mitten set.
Here is Colleen's before:
(I guess it's not technically her before, as the photo was shot after she cut the sleeves off to use for her project...)
What then happened was really pretty simple:
First make a pattern. You are going to trace one hand on a piece of paper with the thumb at a 30-degree angle from the fingers. Draw a mitten shape around the outline of the hand, adding 1/2 inch.
Next, cut out the pattern and pin it onto both layers of the sweater. Cut out the pattern to create two mitten shapes.
Now, with right sides facing, pin the mitten cutouts together, then with a sewing machine, sew them together, leaving a 1/4-seam allowance. Begin sewing at the cuff along the outside edge of the mitten, making sure not to stretch the fabric. For smooth curves, pick up the foot, and rotate the mitten as you sew.
Finally, to prevent fraying, sew around the mitten again, leaving a 1/8-inch seam allowance. Turn the mitten right-side out, and press. Repeat these steps for the second mitten.
Now for the hat, we did use a pattern, but it's a super simple one that I wound up finding online. The hat uses four panels that look like this:
Here are the directions I found on craftstylish.com. I used these instructions to make my pattern and my first hat.
"To determine the width of your panels, divide the head circumference by 5, then add 1 inch for seam allowance (1/2 inch each side). My head measures 22 inches around, so dividing it by 5 gave me 4.4, which I rounded up to 4-1/2. Adding 1 inch gives me 5-1/2 inches. Add 1 inch to your length measurement. Mine was 8-1/2 inches, so I have 9-1/2 inches for my total length."
But what I found is that depending on how much stretch you have in your felted sweater, you may not need all five panels. I have a pretty big melon and only used 4 panels of this size, sewn together.
So that said, you are going to put your first two panels together with rights sides facing. Sew from the bottom edge up to the point using a 1/2" seam allowance. Do the same with two more panels. Now put your doubled panels together with right sides facing and sew half of the rainbow together. At this point, try it on and determine if four will suffice or if you need another panel. If it's big enough to fit your noggin, continue sewing the rainbow. If you need the 5th panel, sew that to the series of four and finally sew up the remaining seams so you have what looks like a hat.
As you can see from Colleens photo, she decided to fold up the edge of the hat and it fit her perfectly. A couple of other students (sorry I don't have photos)ended up folding the extra edge in and stitching it down. If you decide to do this, be careful not to stretch as you sew or it looks pretty stretched out once you are done. You could even try hand sewing the edge under to prevent this from happening, we found.
Tuesday, January 11, 2011
Hoboken Guide @ Design Sponge
A fellow business owner here in town passed along a link to a Hoboken City Guide on the Design Sponge Blog. I am soooo honored to be a part of this piece, as I absolutely love Design Sponge!
"Welcome to Hoboken. A vibrant New Jersey town just a hop, skip and jump over the river from Manhattan. Hoboken was made famous as the birthplace of Frank Sinatra, the filming location of the Marlon Brando movie On The Waterfront and the music venue “Maxwell’s” where Bruce Springsteen filmed the video for “Glory Days.”
Hoboken is also the town of many firsts, including inventions like freeze-dried coffee, bubble wrap and ice cream, as well as the first organized baseball game and the first brewery. It boasts the most bars and restaurants in one square mile of its town’s boundaries, and the indie/designer/art scene is on its way up due to many artists and musicians living here. It is also home of the infamous Cake Boss from the Lifetime show."
And here is what they had to say about us, under the category Art, Craft Supplies & Galleries:
"M. Avery Designs — Also home of the Hoboken Handmade Collective. If you love fabric, this is the place to visit. They also host classes and socials and offer open studios for use of their sewing machines. All items in the store are handmade and gorgeous. 266, 7th Street (at the corner of Willow Ave.)"
"Welcome to Hoboken. A vibrant New Jersey town just a hop, skip and jump over the river from Manhattan. Hoboken was made famous as the birthplace of Frank Sinatra, the filming location of the Marlon Brando movie On The Waterfront and the music venue “Maxwell’s” where Bruce Springsteen filmed the video for “Glory Days.”
Hoboken is also the town of many firsts, including inventions like freeze-dried coffee, bubble wrap and ice cream, as well as the first organized baseball game and the first brewery. It boasts the most bars and restaurants in one square mile of its town’s boundaries, and the indie/designer/art scene is on its way up due to many artists and musicians living here. It is also home of the infamous Cake Boss from the Lifetime show."
And here is what they had to say about us, under the category Art, Craft Supplies & Galleries:
"M. Avery Designs — Also home of the Hoboken Handmade Collective. If you love fabric, this is the place to visit. They also host classes and socials and offer open studios for use of their sewing machines. All items in the store are handmade and gorgeous. 266, 7th Street (at the corner of Willow Ave.)"
Read more at Design*Sponge
Sunday, January 9, 2011
Friday, January 7, 2011
Adorable Kids Sewing Project
I am always looking for fun ways to teach kids to sew in our Fashion Lab Kids Hand Sewing & Crafting classes. Today I came across these super cute animal sewing cards on a blog written by a graphic designer in California and she made it beyond easy! She's got PDF's of all four of these adorable animal designs that you can print out onto sturdy paper and get the kids stitching lickety-split!
Guess what we'll be doing in class on Tuesday?!?
Wednesday, August 4, 2010
Tips for sewing Vintage Sewing Patterns
So we just wrapped up our Fashion Lab Vintage Dresses class this past month. We had such a blast teaching it and people had such a great time making all the vintage dress, we'll be offering it again right away on Wednesday nights on September. All four of the styles of dress (no matter which era they were from) were completely fashionable in today's standards and it was so fun to see how sewing patterns have changed since way back in the day.
In the class we learn how to make four different vintage dress styles based on the actual sewing patterns from the 1950's, 1960's & 1970's. There were certain things that rang true each week, no matter what we were making. I wanted to share with you three major tips for using vintage sewing patterns to make garments.
1. Vintage pattern pieces are VERY fragile. In order to make them a little safer to copy and cut your fabric from them, before each class I would reinforce them. Usually this meant using packaging tape to tape the actual paper patterns onto interfacing and reinforce in the spots that needed it. I suppose if you have a fancy laminating machine that would work too. But I don't have one of those, so the tape worked for me. And actually by sewing it to a light weight interfacing, it made it sturdy, but also malleable enough to make it easy to cut the smaller sizes by folding the edges under.
2. Sizing can be tough! Vintage dress patterns came in only one size and the sizing is completley different from today's sizing standards depending on when the pattern came out. I found that it was easiest to make a version of the dress we were doing that week in the size that was stated on the package and then determine (based on today's sizing standards) what size it is in today's sizing. Or if you wanted to get a bit more technical about it, determine how big the waist, hip & bust measurements are for the size of the pattern and scale out (or in for the skinny minnies) based on how much bigger you need it to be. Or as we found in the class, when in doubt, make it too big and size it down to fit your measurements by adding darts and pleats.
3. Yardage Recommendations on the package of the pattern are different for older patterns. One the envelop you will find yardage recommendations that may be confusing. The reason is that back in day, fabric came in narrower widths then they are today. It was commonplace to find fabric widths measuring 36" & 39". Now most fabric widths are 45, 55 or 60" wide
I hope this helps! I know it helped us in the class a ton.
You'll see that most pattern companies that are still around today have re-issued patterns based on their vintage styles from years ago. This will have taken care of many of the above issues. But isn't it more fun to not be afraid to tackle the genuine vintage patterns that you find at your neighbors garage sale, or that your grandmother has had in her attic since you were a baby! Happy Sewing!
In the class we learn how to make four different vintage dress styles based on the actual sewing patterns from the 1950's, 1960's & 1970's. There were certain things that rang true each week, no matter what we were making. I wanted to share with you three major tips for using vintage sewing patterns to make garments.
1. Vintage pattern pieces are VERY fragile. In order to make them a little safer to copy and cut your fabric from them, before each class I would reinforce them. Usually this meant using packaging tape to tape the actual paper patterns onto interfacing and reinforce in the spots that needed it. I suppose if you have a fancy laminating machine that would work too. But I don't have one of those, so the tape worked for me. And actually by sewing it to a light weight interfacing, it made it sturdy, but also malleable enough to make it easy to cut the smaller sizes by folding the edges under.
2. Sizing can be tough! Vintage dress patterns came in only one size and the sizing is completley different from today's sizing standards depending on when the pattern came out. I found that it was easiest to make a version of the dress we were doing that week in the size that was stated on the package and then determine (based on today's sizing standards) what size it is in today's sizing. Or if you wanted to get a bit more technical about it, determine how big the waist, hip & bust measurements are for the size of the pattern and scale out (or in for the skinny minnies) based on how much bigger you need it to be. Or as we found in the class, when in doubt, make it too big and size it down to fit your measurements by adding darts and pleats.
3. Yardage Recommendations on the package of the pattern are different for older patterns. One the envelop you will find yardage recommendations that may be confusing. The reason is that back in day, fabric came in narrower widths then they are today. It was commonplace to find fabric widths measuring 36" & 39". Now most fabric widths are 45, 55 or 60" wide
I hope this helps! I know it helped us in the class a ton.
You'll see that most pattern companies that are still around today have re-issued patterns based on their vintage styles from years ago. This will have taken care of many of the above issues. But isn't it more fun to not be afraid to tackle the genuine vintage patterns that you find at your neighbors garage sale, or that your grandmother has had in her attic since you were a baby! Happy Sewing!
Thursday, April 15, 2010
Teacher First, Small Business Owner Second.
Things have been a little hectic lately around the shop because we are trying to promote our summer camp program that begins on June 21st. It's starting to feel a little more urgent, as our camp was waaaay more full at this time of year last year. This is WAY stressful to someone that doesn't get a weekly pay check...
Obviously there are probably a lot factors are contributing to this. I am sure the economy is a huge part of it and people are feeling a little more strapped then they felt at this time last year. But what I am thinking (and hoping) it may be just that parents haven't yet started thinking about what is going to go on in their kids lives over the summer, as they just returned to school from spring break.
But in this frantic-ness of these last couple of weeks, promoting the heck out of our summer camp and trying to get the word out in every possible way, I was able to step back and reflect on the summer camp itself.
This little card helped me to remember that even though I am a business owner and one of my major goals has to be making money so I can stay in business. The other major and more important goal of my job is being the best teacher and educator I possibly can. I am able to teach kids my passion of sewing. I get paid to inspire and create and for that I am the luckiest girl on the planet.
I am good at what I do and kids LOVE coming and creating with me. This camp is going to fill itself, as it does every year and I am not going to stress about it anymore!
Obviously there are probably a lot factors are contributing to this. I am sure the economy is a huge part of it and people are feeling a little more strapped then they felt at this time last year. But what I am thinking (and hoping) it may be just that parents haven't yet started thinking about what is going to go on in their kids lives over the summer, as they just returned to school from spring break.
But in this frantic-ness of these last couple of weeks, promoting the heck out of our summer camp and trying to get the word out in every possible way, I was able to step back and reflect on the summer camp itself.
This little card helped me to remember that even though I am a business owner and one of my major goals has to be making money so I can stay in business. The other major and more important goal of my job is being the best teacher and educator I possibly can. I am able to teach kids my passion of sewing. I get paid to inspire and create and for that I am the luckiest girl on the planet.
I am good at what I do and kids LOVE coming and creating with me. This camp is going to fill itself, as it does every year and I am not going to stress about it anymore!
Thursday, April 8, 2010
Tuesday, March 23, 2010
Thursday, March 4, 2010
Turn A Mens Dress Shirt Into A Skirt
So we have just created a great new class here all about "Green" sewing! In this four week class you get to create clothing and accessories made from things you already have in your closet. One of the best things about the class is that you don't really need to buy any supplies! For example those old T-Shirts you have been keeping in the back of your closet for a while can be made into a cute T-Shirt shrug. The first Green Sewing four week class starts on April 7th.
So I was looking for some more fun "green" projects to share and saw these instructions for a skirt. Craftstylish shows you how to turn a mens dress shirt into a belted skirt. The instructions are pretty easy to follow and the finished skirt looks really cute.
*Project by Christine Haynes at CraftStylish
What you'll need:
2. Using other pieces from the shirt, cut two waistband pieces, about 5 inches tall by the width of your hips. Cutting from the rest of the shirt, cut pieces to combine together to make two belt straps. These pieces should be 5 inches tall by as wide as you can get.
3. Combine the belt pieces to form two strips that are roughly 24 inches long by 5 inches tall. Press the seams flat where they were connected. Fold one strip in half with right sides together and sew, forming a long tube. Stitch one end closed and repeat on the other strip. Turn the tubes right side out and press flat.
4. Lay out one waistband piece face up. Lay the two belt pieces on top of the waistband piece, on each of the two short ends, about an inch from the bottom. Lay the other waistband piece on top of the first one, matching sides. Pin the two short ends together, including the belt pieces. Stitch each side, capturing the belt in the side seam. Fold the waistband in half, wrong sides together, and press flat.
5. Baste the top of the skirt and gather to fit the width of the waistband. Pin the waistband to the skirt, right sides facing and with the belt pieces toward the front of the skirt, with the raw edge of the waistband lining up with the top raw edge of the skirt. Stitch together, being careful not to sew the belt pieces into the seam. Leave a 1-inch opening in the seam when connecting the waistband to the skirt.
6. Cut a piece of 1/2-inch elastic to a comfortable width for your waist, plus 1 inch for overlapping. Pin a large safety pin to the elastic and feed into the waistband casing. Once you've gone all the way around, pull the pin out the hole and overlap the two ends of elastic about 1/2 inch. Zigzag-stitch them together and release into the waistband. Stitch the hole closed in the skirt.
7. Press all your seams crisp, and slip on the skirt. Tie the belt pieces in front and go!
So I was looking for some more fun "green" projects to share and saw these instructions for a skirt. Craftstylish shows you how to turn a mens dress shirt into a belted skirt. The instructions are pretty easy to follow and the finished skirt looks really cute.
*Project by Christine Haynes at CraftStylish
What you'll need:
- One men's dress shirt with a straight hem, wide enough to be gathered at your waist, long enough from the armpit to the hem for the skirt
- Ruler
- Scissors
- Sewing machine and thread
- Pins
- 1/2-inch elastic about 30 inches long
- Large safety pin
2. Using other pieces from the shirt, cut two waistband pieces, about 5 inches tall by the width of your hips. Cutting from the rest of the shirt, cut pieces to combine together to make two belt straps. These pieces should be 5 inches tall by as wide as you can get.
3. Combine the belt pieces to form two strips that are roughly 24 inches long by 5 inches tall. Press the seams flat where they were connected. Fold one strip in half with right sides together and sew, forming a long tube. Stitch one end closed and repeat on the other strip. Turn the tubes right side out and press flat.
4. Lay out one waistband piece face up. Lay the two belt pieces on top of the waistband piece, on each of the two short ends, about an inch from the bottom. Lay the other waistband piece on top of the first one, matching sides. Pin the two short ends together, including the belt pieces. Stitch each side, capturing the belt in the side seam. Fold the waistband in half, wrong sides together, and press flat.
5. Baste the top of the skirt and gather to fit the width of the waistband. Pin the waistband to the skirt, right sides facing and with the belt pieces toward the front of the skirt, with the raw edge of the waistband lining up with the top raw edge of the skirt. Stitch together, being careful not to sew the belt pieces into the seam. Leave a 1-inch opening in the seam when connecting the waistband to the skirt.
6. Cut a piece of 1/2-inch elastic to a comfortable width for your waist, plus 1 inch for overlapping. Pin a large safety pin to the elastic and feed into the waistband casing. Once you've gone all the way around, pull the pin out the hole and overlap the two ends of elastic about 1/2 inch. Zigzag-stitch them together and release into the waistband. Stitch the hole closed in the skirt.
7. Press all your seams crisp, and slip on the skirt. Tie the belt pieces in front and go!
Subscribe to:
Posts (Atom)