Finally a place to see all our classes in one place:
Adult Classes Calendar
Kids Classes Calendar
Wednesday, May 30, 2012
Thursday, May 3, 2012
Wednesday, April 25, 2012
Top 5 - Sewing Products I'm using this week
I see a lot of top 5 this and top 5 that on other blogs and thought it might be a fun theme to try on our blog.
I am totally not a gadget person and don't fall for a lot of the crazy notions out there one can purchase for sewing. There are sooooo many and if we tried them all we'd go broke. And more than half the time, there's no need for the gadget because the job can be done just as well with something common place you already have. (I have never crocheted in my life, but you can find a huge assortment of crochet hooks in my studio because they make the best pokers when turning something skinny right side out!)
That said - there is still a nice collection of things we use regularly while making our many sewing projects and teaching others to stitch. Some would be just plain hard to live without.
So here they are in no particular order:
Number 5:
Pellon Wonder Under
Paper-backed fusible web that turns any fabric into a fusible fabric. Fuses fabric to fabric or to a porous surface such as wood or cardboard. This is the stuff you use when you have to applique fabric to anything! It can be tricky to use for beginners so here are some instructions I found from Ask the Crafter.
1. PRESS & CUT
* Place rough side of Wonder-Under against wrong side of fabric. Press for 5-8 seconds with hot, dry iron. Let cool, draw desired shape onto paper backing, then cut
* Alternative method: Trace shape onto paper backing, cut to size, then press, rough side down, onto fabric. (Note: To avoid backward letters and numbers, draw on rough side of Wonder-Under with ballpoint pen. For dark fabrics, redraw shape on paper side.)
2. Step 2: PEEL & FUSE
* Gently peel off paper backing. Position fusible fabric, web side down, on the project. Cover with DAMP press cloth.
* With iron at wool setting, press FIRMLY for 10-15 seconds. (Heavier fabrics = more time.) Repeat, lifting and overlapping iron until all fabric is fused.
* Remove press cloth and iron fabric to eliminate excess moisture.
* Tip: Use your damp press cloth as a temperature and timing guide. After 10 seconds, press cloth should be dry. If not, raise iron temperature or hold iron in place a few seconds longer.
* Tips: With “fat/thin" or "heavy/light" fabric combinations, fuse from thinner or lighter side. If necessary, "baste" first by ironing on the right side.
Number 4:
Omni Grid 6.5 x 24" Ruler
Omnigrid Rulers are the number one selling quilting ruler in the world. They are preferred by professional quilters & teachers all over the world. They are guaranteed to last longer than other rulers. They are the only ruler to maintain +/- .002 inch accuracy. Omnigrid's patented and trademarked (black and yellow) double sight line make for easy reading and measuring on light and dark fabrics. Markings make right or left handed use easy. Omnigrid Rulers have grid markings throughout. These rulers are made of heavy-duty, premium quality acrylic and laser cut for a smooth edge. Designed and manufactured in the USA. Love them!
I am totally not a gadget person and don't fall for a lot of the crazy notions out there one can purchase for sewing. There are sooooo many and if we tried them all we'd go broke. And more than half the time, there's no need for the gadget because the job can be done just as well with something common place you already have. (I have never crocheted in my life, but you can find a huge assortment of crochet hooks in my studio because they make the best pokers when turning something skinny right side out!)
That said - there is still a nice collection of things we use regularly while making our many sewing projects and teaching others to stitch. Some would be just plain hard to live without.
So here they are in no particular order:
Number 5:
Pellon Wonder Under
Paper-backed fusible web that turns any fabric into a fusible fabric. Fuses fabric to fabric or to a porous surface such as wood or cardboard. This is the stuff you use when you have to applique fabric to anything! It can be tricky to use for beginners so here are some instructions I found from Ask the Crafter.
1. PRESS & CUT
* Place rough side of Wonder-Under against wrong side of fabric. Press for 5-8 seconds with hot, dry iron. Let cool, draw desired shape onto paper backing, then cut
* Alternative method: Trace shape onto paper backing, cut to size, then press, rough side down, onto fabric. (Note: To avoid backward letters and numbers, draw on rough side of Wonder-Under with ballpoint pen. For dark fabrics, redraw shape on paper side.)
2. Step 2: PEEL & FUSE
* Gently peel off paper backing. Position fusible fabric, web side down, on the project. Cover with DAMP press cloth.
* With iron at wool setting, press FIRMLY for 10-15 seconds. (Heavier fabrics = more time.) Repeat, lifting and overlapping iron until all fabric is fused.
* Remove press cloth and iron fabric to eliminate excess moisture.
* Tip: Use your damp press cloth as a temperature and timing guide. After 10 seconds, press cloth should be dry. If not, raise iron temperature or hold iron in place a few seconds longer.
* Tips: With “fat/thin" or "heavy/light" fabric combinations, fuse from thinner or lighter side. If necessary, "baste" first by ironing on the right side.
Number 4:
Omni Grid 6.5 x 24" Ruler
Omnigrid Rulers are the number one selling quilting ruler in the world. They are preferred by professional quilters & teachers all over the world. They are guaranteed to last longer than other rulers. They are the only ruler to maintain +/- .002 inch accuracy. Omnigrid's patented and trademarked (black and yellow) double sight line make for easy reading and measuring on light and dark fabrics. Markings make right or left handed use easy. Omnigrid Rulers have grid markings throughout. These rulers are made of heavy-duty, premium quality acrylic and laser cut for a smooth edge. Designed and manufactured in the USA. Love them!
Number 3:
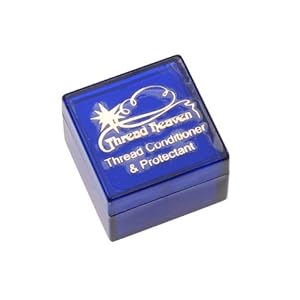
Thread Heaven - Protectant and Conditioner
Thread Heaven is better than beeswax because it's developed specifically for delicate thread, it prevents fraying and makes hand sewing just about anything a lot easier. It produces a static charge, which helps reduce tangling & will not stick to your needle. To use, simply press thread against Thread Heaven and draw it across. Pull between fingers to remove excess and to produce the static charge. Your thread will be ready for use! Once you have used it, hand sewing without it becomes unbearable.
Number 2: Pinking shears
Pinking shears are scissors, the blades of which are sawtoothed instead of straight. They leave a zigzag pattern instead of a straight edge.
Pinking shears have a utilitarian function for cutting woven cloth. Cloth edges that are unfinished will easily fray, the weave becoming undone and threads pulling out easily. The sawtooth pattern does not prevent the fraying but limits the length of the frayed thread and thus minimizes damage.
These scissors can also be used for decorative cuts and a number of patterns (arches, sawtooth of different aspect ratios, or asymmetric teeth) are available. True dressmaker's pinking shears, however, are not used for paper decoration because paper dulls the cutting edge. Source Wikipedia
Number 2: Tracing PaperI never used to use this stuff. I always marked darts and pattern marking on my fabric with chalk or a pencil. Then I watched someone use this and realized how much easier it was to get the markings just right. It allows you to transfer sewing, quilting, or embroidery patterns. Does not smear, always washes out and leaves a stronger line than other tracing papers. And the best part is that it can be used over and over again.
Just place the tracing paper under the spot on the pattern you have to trace so the color is facing the fabric. Roll over it with a tracing wheel with some pressure and voila! So easy!
Thursday, March 8, 2012
Our First Silkscreen Workshop
We recently had our first Intro to Silkscreening Workshop at the studio. (In fact, it was our very last workshop at our 7th & Willow location.)
What a great end to being in that space. Nicole Poko is a talented silkscreener, as well as a fantastic teacher.
I was fortunate enough to be a student in the class and had so much fun learning the techniques of creating my own screens, as well as using the fun colored inks to silkscreen fabric & clothing.
Nicole had brought along three really cool unique screen designs and we were all able to take turns trying the different screens in layers on our practice paper and fabric.
People how had brought along t-shirts, onesies or totes had the opportunity to screen their items, once they got the hang of it.
What a great end to being in that space. Nicole Poko is a talented silkscreener, as well as a fantastic teacher.
I was fortunate enough to be a student in the class and had so much fun learning the techniques of creating my own screens, as well as using the fun colored inks to silkscreen fabric & clothing.
Nicole had brought along three really cool unique screen designs and we were all able to take turns trying the different screens in layers on our practice paper and fabric.
People how had brought along t-shirts, onesies or totes had the opportunity to screen their items, once they got the hang of it.
We had so much fun, Nicole will be offering the class again on Saturday April 28th from 12-2pm.
The last one filled up quickly, so don't miss out!
Thursday, February 23, 2012
Growing Old Stylishly
Cool blog alert!
Ari Seth Cohen blog Advanced Style, features both men and women, focusing on the elegance and individuality of his silver-haired subjects.
What I like about this blog most is the way the folks featured embrace getting older, rather than retreating.
80 Year Old Rita (left) Has Over 70 Pairs of Outrageous Glasses. She says that her tastes are usually pretty simple. She had lost her small vintage sunglasses somewhere in the neighborhood, so her friend Marty accompanied her to a local mall to buy another pair. Marty picked out a big, fun, over-sized pair of sunglasses for Rita to wear and she picked out a smaller, more simple pair. Rita decided to purchase them both and wore the big pair to a recovery meeting sometime that week. Everyone in the group went wild for Rita's big shades. People started sending her huge, outrageous pairs of sunglasses from all over the world, resulting in her collection of over 70 pairs. Rita told me that although she wouldn't normally dress outrageously, she feels that the sunglasses make me people happy. When I asked her how she felt about them she replied, " They aren't really my style, but now I don't want to hurt anyone's feelings by not wearing the pair they bought for me. Now I feel lost without them. They have become my trademark."
About the bLogger: My name is Ari Seth Cohen. I roam the streets of New York looking for the most stylish and creative older folks. Respect your elders and let these ladies and gents teach you a thing or two about living life to the fullest. Advanced Style offers proof from the wise and silver-haired set that personal style advances with age.
Ari Seth Cohen blog Advanced Style, features both men and women, focusing on the elegance and individuality of his silver-haired subjects.
I do hope when I am that age, I look as good as these women to the left.
What I like about this blog most is the way the folks featured embrace getting older, rather than retreating.
80 Year Old Rita (left) Has Over 70 Pairs of Outrageous Glasses. She says that her tastes are usually pretty simple. She had lost her small vintage sunglasses somewhere in the neighborhood, so her friend Marty accompanied her to a local mall to buy another pair. Marty picked out a big, fun, over-sized pair of sunglasses for Rita to wear and she picked out a smaller, more simple pair. Rita decided to purchase them both and wore the big pair to a recovery meeting sometime that week. Everyone in the group went wild for Rita's big shades. People started sending her huge, outrageous pairs of sunglasses from all over the world, resulting in her collection of over 70 pairs. Rita told me that although she wouldn't normally dress outrageously, she feels that the sunglasses make me people happy. When I asked her how she felt about them she replied, " They aren't really my style, but now I don't want to hurt anyone's feelings by not wearing the pair they bought for me. Now I feel lost without them. They have become my trademark."
About the bLogger: My name is Ari Seth Cohen. I roam the streets of New York looking for the most stylish and creative older folks. Respect your elders and let these ladies and gents teach you a thing or two about living life to the fullest. Advanced Style offers proof from the wise and silver-haired set that personal style advances with age.
Tuesday, February 21, 2012
Vintage Sewing Sew-Along Challenge: Pin-up Lingerie
I love this!
Had to re-post this awesome sew-along/contest I found over at Oh Lulu.
Here is the pattern of choice.
Once you get your pattern - choose from either the single Pattern, or the Sew Along Kit (which comes with both patterns, and a vintage lingerie sewing booklet pdf) - there are a few things you will need:
1. Garter Clips - you can find these easily online, or in larger fabric shops
2. Eyelets and Eyelet punch, or 1/2 yard of hook and eye tape
3. Boning (optional)
4. 2 1/2 yards of fabric will do your corset & bra
5. 3 yards of bias binding OR 1 yard of contrast fabric for contrasting bone channels and bias binding
6. 2 yards of ribbon or cord for lacing (eyelet version only)
7. 1/2 yard of ribbon or elastic for attaching garter clips
8. Lace, Bows, Appliqués and embellishments of your choice (optional)
Tuesday, February 14, 2012
Valentines Day Vintage
This is what I woke up to this morning. I am a lucky girl and I have a super thoughtful boyfriend.
Over the weekend we headed out to Montclair to celebrate the 1 year anniversary of a friends Vintage Boutique called Garnish.
Talk about coveting everything in a store! I love my friend Lisa's taste and the way she had the store laid out so neat and adorable totally gave me shoppe envy! I could have walked around in there for hours just looking at every last little detail of every item.
I seemed to have recently begun this obsession with old mechanical clocks. I think it has something to do with my obsession with old mechanical sewing machines, but who knows. They're just pretty cute too.
Anyway - I saw this clock and fell in love. I totally couldn't justify my purchasing it cause I just don't need it. I kept shopping around to find a little something a little more practical to spend my money on that night. (HA - practical.) Not sure if I can call what bought practical, but I guess they are a bit more useful than the clock
I wound taking home a baking book from 1961 and a mechanical egg beater. Again - am loving anything mechanical that is not electric these days!
Here they are:
Saturday Morning, I immediately had to make something from my new book. (see - totally practical!)
I knew I had some poppy seeds in my pantry, so lemon poppy seed pound cake it is.
Oops, no recipe for that in my new cook book. But that's okay, I will happily make do.
I used the Basic Pound Cake recipe found on page 116 and added some lemon juice and poppy seeds and all was well and right in the world.
Here is the recipe in case you are interested:
Basic Pound Cake
A delicious, old-fashioned cake, especially good toasted (from the book, not me)
6 eggs
1 cup sugar
1 cup butter
2 cups sifted flour
1 teaspoon vanilla
(I added the juice of one lemon, some zest & half a bottle of poppy seeds)
Set oven to 350 degrees. Grease a deep, 9 inch tube pan and dust with flour.
In a large bowl, combine eggs and sugar and beat for a minute. Set bowl over a saucepan of hot water. Place saucepan over low heat for about 10 minutes, or until eggs are slightly warmer than lukewarm. Don not let water boil. Stir eggs occasionally while they are being heated to prevent them from cooking on the the bottom of the bowl.
While eggs are warming, cream butter and flour till light and fluffy. Add vanilla.
When eggs are lukewarm, beat them until cool, thick and tripled in bulk. Quickly stir 1/4 of beaten eggs into creamed mixture. Pour mixture over remaining beaten eggs. Fold in gently. Be careful not to overmix.
Pour batter into prepared pan. Bake about 50 minutes, or until cake is golden brown and pulls away from sides of pan.
Megan Side note: All that business about warming the mixture over the hot water was skipped in my version. I just made sure the eggs weren't cold when I mixed them with everything else. I did this by letting them sit under warm water coming out of the tap of the sink. I also didn't really beat the eggs as they said. I beat them with the sugar with my new beater, but then procedeed to add all the ingrediants and bake it.
The more I think about it, I really didn't follow the directions at all (suprise, suprise). But my turned out okay. I had to take it out of the oven a bit early cause I had to head to work so there was some oozing batter when I cut into it later that day when I tried a pice. This was because it wasn't quite cooked all the way through. But I have to say, I am a big fan of any cake just a little bit underdone. Is that gross?
Over the weekend we headed out to Montclair to celebrate the 1 year anniversary of a friends Vintage Boutique called Garnish.
Talk about coveting everything in a store! I love my friend Lisa's taste and the way she had the store laid out so neat and adorable totally gave me shoppe envy! I could have walked around in there for hours just looking at every last little detail of every item.
I seemed to have recently begun this obsession with old mechanical clocks. I think it has something to do with my obsession with old mechanical sewing machines, but who knows. They're just pretty cute too.
Anyway - I saw this clock and fell in love. I totally couldn't justify my purchasing it cause I just don't need it. I kept shopping around to find a little something a little more practical to spend my money on that night. (HA - practical.) Not sure if I can call what bought practical, but I guess they are a bit more useful than the clock
I wound taking home a baking book from 1961 and a mechanical egg beater. Again - am loving anything mechanical that is not electric these days!
Here they are:
Saturday Morning, I immediately had to make something from my new book. (see - totally practical!)
I knew I had some poppy seeds in my pantry, so lemon poppy seed pound cake it is.
Oops, no recipe for that in my new cook book. But that's okay, I will happily make do.
I used the Basic Pound Cake recipe found on page 116 and added some lemon juice and poppy seeds and all was well and right in the world.
Here is the recipe in case you are interested:
Basic Pound Cake
A delicious, old-fashioned cake, especially good toasted (from the book, not me)
6 eggs
1 cup sugar
1 cup butter
2 cups sifted flour
1 teaspoon vanilla
(I added the juice of one lemon, some zest & half a bottle of poppy seeds)
Set oven to 350 degrees. Grease a deep, 9 inch tube pan and dust with flour.
In a large bowl, combine eggs and sugar and beat for a minute. Set bowl over a saucepan of hot water. Place saucepan over low heat for about 10 minutes, or until eggs are slightly warmer than lukewarm. Don not let water boil. Stir eggs occasionally while they are being heated to prevent them from cooking on the the bottom of the bowl.
While eggs are warming, cream butter and flour till light and fluffy. Add vanilla.
When eggs are lukewarm, beat them until cool, thick and tripled in bulk. Quickly stir 1/4 of beaten eggs into creamed mixture. Pour mixture over remaining beaten eggs. Fold in gently. Be careful not to overmix.
Pour batter into prepared pan. Bake about 50 minutes, or until cake is golden brown and pulls away from sides of pan.
Megan Side note: All that business about warming the mixture over the hot water was skipped in my version. I just made sure the eggs weren't cold when I mixed them with everything else. I did this by letting them sit under warm water coming out of the tap of the sink. I also didn't really beat the eggs as they said. I beat them with the sugar with my new beater, but then procedeed to add all the ingrediants and bake it.
The more I think about it, I really didn't follow the directions at all (suprise, suprise). But my turned out okay. I had to take it out of the oven a bit early cause I had to head to work so there was some oozing batter when I cut into it later that day when I tried a pice. This was because it wasn't quite cooked all the way through. But I have to say, I am a big fan of any cake just a little bit underdone. Is that gross?
Tuesday, February 7, 2012
Love-ly Sewing Projects
We love hearts. Anytime of year, I can't seem to resist a sewing project that involves heart shapes in some way. So when Valentines day rolls around, we are in heaven. We have been working on heart themed sewing proejcts in classes for about the last two weeks now and we don't ever want it to end.
So I did some online investigating to find some new and different sewing projects involving hearts and and wanted to share with you the plethora of amazing projects out there for Valentines day:
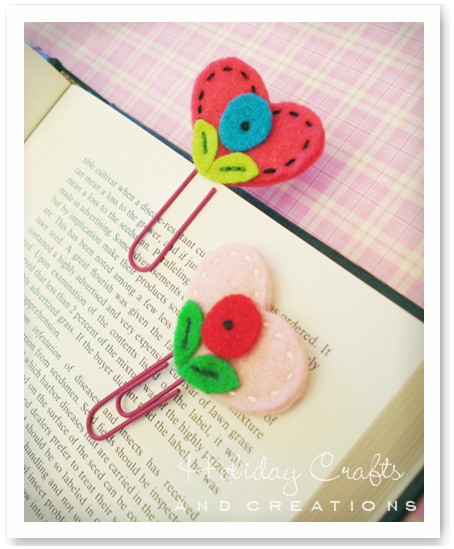
This bookmark project makes a really sweet kids hand sewing activity.
We did something similar to this project in our 6 & 7 year old sewing class yesterday. So mad at myself for not getting some photos!
The Purl Bee has a set of simple instructions for making felt valentine pins.
And from the Queen of Holiday crafting and sewing herself, here is a love-ly potholder tutorial from Martha Stewart.
Chris of "Pickup Some Creativity" offers a tutorial demonstrating how she made an inset heart motif with a nicely finished edge. Her technique makes it easier to sew than you’d think, and you can use this method with almost any shape your heart desires.
Wednesday, January 11, 2012
Monday, January 9, 2012
The stuff dreams are made of... when you're six.
We had to share some photos with you with a project we finished up for Christmas. This pink, dreamy canopy was commissioned for one of our favorite 6 year old sewing students by her mom. In all our holiday frenzy to get orders finished up, we did not have a chance to photograph the finished project. But luckily her mom sent me these photos of the canopy hanging in Ruby's room.
Gosh, I wish I had one of these when I was six.
Wednesday, December 14, 2011
Open Lab now $5 Per Hour
We all love to sew and create, but who has the space to do at home?
Now your can bring your projects to the M Avery Designs Studio and work on them here in a supervised environment, with all the right tools at your disposal for $5/Hour. It's not a lesson, but feel free to ask questions if we're not already teaching a class.
Open lab time is your chance to rent out workspace here at our studio to work on any sewing or crafting project you might have.
The time you rent is always supervised by a knowledgeable stitcher and comes equipped with just about anything you might need to complete your project including:
Sewing Machines
Irons & Ironing Boards
Scissors, Rulers, Seam Rippers, Thread, Tape Measurers, Pins, Needles
Pin Cushions, Tailors Chalk, Hand Sewing Needles, Three Large Cutting Tables,
Adjustable Dress Forms, Patterns, Sewing & Crafting Reference Books & More.
Fabrics, Trim, Bag Making Supplies and other notions are always available to purchase.
Sewing Machines
Irons & Ironing Boards
Scissors, Rulers, Seam Rippers, Thread, Tape Measurers, Pins, Needles
Pin Cushions, Tailors Chalk, Hand Sewing Needles, Three Large Cutting Tables,
Adjustable Dress Forms, Patterns, Sewing & Crafting Reference Books & More.
Fabrics, Trim, Bag Making Supplies and other notions are always available to purchase.
Monday: 2-6pm
Tuesday 3-7pm
Wednesday 2-6pm
Thursday 3-7pm
Friday by appointment
Saturday 12-5pm
Please note: We'll be closed from Saturday Dec. 24th, 2011 - January 8th, 2012 for vacation. No open lab hours or private lessons during this time.
On weeknights we have classes from 7-9pm, if the class is not too big, we may have room for open lab. Shoot us an email to find out.
Really need some open lab during hours that aren't posted? Send us an email. We might be able to accomodate. There's a change someone will be there teaching a private sewing lesson or just working in the studio. Shoot us an email to find out.
Tuesday 3-7pm
Wednesday 2-6pm
Thursday 3-7pm
Friday by appointment
Saturday 12-5pm
Please note: We'll be closed from Saturday Dec. 24th, 2011 - January 8th, 2012 for vacation. No open lab hours or private lessons during this time.
On weeknights we have classes from 7-9pm, if the class is not too big, we may have room for open lab. Shoot us an email to find out.
Really need some open lab during hours that aren't posted? Send us an email. We might be able to accomodate. There's a change someone will be there teaching a private sewing lesson or just working in the studio. Shoot us an email to find out.
This schedule is subject to change based on our ever changing class & private workshop schedule.
Be sure to check this page from time to time as it updates. When in doubt, call ahead.
Please note: Anyone utilizing our open lab time must either have some sewing experience, have taken our Intro to the Sewing Machine Class or one of our Private Sewing Lessons prior to using our sewing machines.
Be sure to check this page from time to time as it updates. When in doubt, call ahead.
Please note: Anyone utilizing our open lab time must either have some sewing experience, have taken our Intro to the Sewing Machine Class or one of our Private Sewing Lessons prior to using our sewing machines.
Friday, November 25, 2011
Huge Gift Certificate Sale
There are so many reasons for a SALE this weekend!
How can we not participate?!?
SO - Call it what you want:
-Black Friday Sale
-Small Business Saturday Sale
-Cyber Monday Sale
Doesn't matter what you celebrate, the details of our deal are the same:
- Starts Midnight after Thanksgiving (Nov. 24th, 2011)
- Ends midnight after Cyber Monday (Nov. 28th, 2011)
- 10% Off All Singer Sewing Machine Models in our Online Store - Use Code: "turkeysinger"
- Up to 30% Off ALL Gift Certificates
GC's under $100 - 20% OFF - Use Code: "under100gc"
GC's under $200 - 25% OFF - Use Code: "under200gc"
GC's under $300 - 30% OFF - Use Code: "under300gc"
These Gift Certificates will never expire so stock up!
All credits purchased will be added to the M Avery Designs account of your choice.
Use them for you or buy them for a friend or family member.
Use the credits to purchase M Avery Designs classes and workshops whenever you want.
We are grateful for each and every one of you. This is our way to say "Thanks".
xo, megan
Tuesday, November 22, 2011
Sewing Knits - A primer from Threads Magazine
We have been using our downtime to update our class schedule. We're getting pretty excited about some new classes that we'll be offering in the new year!
One class will be Knits Lab and we cannot wait to share with you all our tips and tricks for sewing knits and jersey fabrics. It's really not that hard. We swear!
In our searching for class ideas we came across this great tutorial from Threads Magazine on sewing knits and thought we must share it with you.
By Ann Person
From Threads #73, pp. 42-45
Let me quickly dispel the apparent mystery about sewing with knits: there isn't any! Nonetheless, after 30 years of writing and teaching on the subject, I'm always surprised to find out that these supple fabrics still alarm many sewers. And nowadays there are so many new knit fabrics available, it's hard to know how to handle them all. So I'd like to present a basic primer of information every sewer needs to create knit garments that look like ready-to-wear. And believe me, it's easy— you don't have to be an expert.
The great fun of sewing with knits is the leeway they give you when fitting. A garment made from a stretchy fabric doesn't have to fit as perfectly as one made from a woven, so knits eliminate the pressure of exact measuring and altering of patterns. And they're so comfortable to wear!
When constructing knit garments, the first rule is that if the fabric stretches, the seams must stretch, too, so that the stitching won't pop as you bend and move in the garment. Whatever type of machine you have, I'll show you how you can achieve flat, stretchy seams.
One class will be Knits Lab and we cannot wait to share with you all our tips and tricks for sewing knits and jersey fabrics. It's really not that hard. We swear!
In our searching for class ideas we came across this great tutorial from Threads Magazine on sewing knits and thought we must share it with you.
By Ann Person
From Threads #73, pp. 42-45
Let me quickly dispel the apparent mystery about sewing with knits: there isn't any! Nonetheless, after 30 years of writing and teaching on the subject, I'm always surprised to find out that these supple fabrics still alarm many sewers. And nowadays there are so many new knit fabrics available, it's hard to know how to handle them all. So I'd like to present a basic primer of information every sewer needs to create knit garments that look like ready-to-wear. And believe me, it's easy— you don't have to be an expert.
The great fun of sewing with knits is the leeway they give you when fitting. A garment made from a stretchy fabric doesn't have to fit as perfectly as one made from a woven, so knits eliminate the pressure of exact measuring and altering of patterns. And they're so comfortable to wear!
When constructing knit garments, the first rule is that if the fabric stretches, the seams must stretch, too, so that the stitching won't pop as you bend and move in the garment. Whatever type of machine you have, I'll show you how you can achieve flat, stretchy seams.
Select patterns designed for knits when you sew these forgiving fabrics, available in an amazing variety of weaves, prints, and blends (including printed cotton interlock (1), silky rayon/metallic (2), mohair/wool jersey (3), striped acetate rib (4), and lacy linen/nylon jersey (5)).
Check out the fabrics!
Whether made of cotton, wool, linen, one of the new synthetics, or a blend, each knit falls into one of several construction categories: single knits (created on a commercial knitting machine with a single bed of needles); double knits (created on a double-bed machine with two back-to-back beds of needles); and rib knits (made by alternating stitches between two needle beds). Single-knit fabrics like jersey, velour, terry, and fleece look different on the reverse side, have cut edges that curl, and usually have about 25-percent stretch. Double knits like interlock (made with fine yarns) tend to be more stable than single knits, often look the same on both sides, have cut edges that don't curl, and stretch from 25 to 75 percent, depending on the fiber and construction. Rib knits, constructed from alternating knit and purl stitches in various combinations, may look the same or different on opposite sides, tend not to curl, and have up to 100-percent stretch.
My philosophy for fabric preparation is to always pretreat a fabric before you sew it exactly as you plan to care for the finished garment. This means that cotton, linen, and synthetic knits should be washed and dried (in the dryer if you plan to dry them this way later), and wool knits should be thoroughly steamed before cutting.
Smart pattern choices
When planning a knit garment, I recommend selecting a pattern specifically designed for knits, rather than for woven fabrics, because the pattern will have the correct amount of ease built into it. The amount of stretch in the fabric will determine the style and size pattern you choose. Check the pattern envelope for suggested fabrics and the amount of stretch required for the style. If you choose a fabric with less stretch, you'll need to add more ease.
Since knit fabric has built-in ease, you don't need as much ease in the pattern as you would for a woven fabric. A couple of inches of bust ease, for example, is plenty for a fairly fitted knit style, compared with the 5 in. of bust ease needed for many woven garments. And a double-knit skirt hangs nicely with 2 in. of ease, while a woven skirt would require at least 3 to 4 in.
Construction optionsYou can get successful results on knits whether you own a basic sewing machine or the latest high-tech serger. I began sewing on knits long before I owned a serger, and I still recommend my original technique of sewing with a long straight stitch of 9 sts/in. (3 mm), stretching the seam as I sew it (as much as the fabric stretches easily) to add elasticity. When the seam returns to its normal length, the stitches are closer together and the upper and lower thread tensions have loosened. As for using zigzag or stretch stitches to construct seams, I've simply never liked them.
For double knits that will stay pressed open, use a 5/8-in.-wide seam allowance. For single knits that tend to curl, I recommend a 1/4-in.-wide seam, which you can finish two ways: either press it to one side and topstitch for a professional look, or sew a second line of stitching 1/8 in. from the first and then press to one side. The double-sewn seam adds strength and helps keep the seam flat.
If you have a serger, you'll find serging a quick way to assemble knits with a finished, factory look, and the seams will have built-in elasticity, so you don't need to stretch them as you sew. Make sure your stitch is balanced, adjusting the thread tension so that the stitch doesn't bind or ruffle the seam. If your serger has differential feed, raise the setting if your test seam looks wavy. For hemming soft knits, I find that serging the edge, turning up a 1/4-in. hem, and topstitching twice gives a stable, nonslippery finish.
Check out the fabrics!
Whether made of cotton, wool, linen, one of the new synthetics, or a blend, each knit falls into one of several construction categories: single knits (created on a commercial knitting machine with a single bed of needles); double knits (created on a double-bed machine with two back-to-back beds of needles); and rib knits (made by alternating stitches between two needle beds). Single-knit fabrics like jersey, velour, terry, and fleece look different on the reverse side, have cut edges that curl, and usually have about 25-percent stretch. Double knits like interlock (made with fine yarns) tend to be more stable than single knits, often look the same on both sides, have cut edges that don't curl, and stretch from 25 to 75 percent, depending on the fiber and construction. Rib knits, constructed from alternating knit and purl stitches in various combinations, may look the same or different on opposite sides, tend not to curl, and have up to 100-percent stretch.
My philosophy for fabric preparation is to always pretreat a fabric before you sew it exactly as you plan to care for the finished garment. This means that cotton, linen, and synthetic knits should be washed and dried (in the dryer if you plan to dry them this way later), and wool knits should be thoroughly steamed before cutting.
Smart pattern choices
When planning a knit garment, I recommend selecting a pattern specifically designed for knits, rather than for woven fabrics, because the pattern will have the correct amount of ease built into it. The amount of stretch in the fabric will determine the style and size pattern you choose. Check the pattern envelope for suggested fabrics and the amount of stretch required for the style. If you choose a fabric with less stretch, you'll need to add more ease.
Since knit fabric has built-in ease, you don't need as much ease in the pattern as you would for a woven fabric. A couple of inches of bust ease, for example, is plenty for a fairly fitted knit style, compared with the 5 in. of bust ease needed for many woven garments. And a double-knit skirt hangs nicely with 2 in. of ease, while a woven skirt would require at least 3 to 4 in.
Construction optionsYou can get successful results on knits whether you own a basic sewing machine or the latest high-tech serger. I began sewing on knits long before I owned a serger, and I still recommend my original technique of sewing with a long straight stitch of 9 sts/in. (3 mm), stretching the seam as I sew it (as much as the fabric stretches easily) to add elasticity. When the seam returns to its normal length, the stitches are closer together and the upper and lower thread tensions have loosened. As for using zigzag or stretch stitches to construct seams, I've simply never liked them.
For double knits that will stay pressed open, use a 5/8-in.-wide seam allowance. For single knits that tend to curl, I recommend a 1/4-in.-wide seam, which you can finish two ways: either press it to one side and topstitch for a professional look, or sew a second line of stitching 1/8 in. from the first and then press to one side. The double-sewn seam adds strength and helps keep the seam flat.
If you have a serger, you'll find serging a quick way to assemble knits with a finished, factory look, and the seams will have built-in elasticity, so you don't need to stretch them as you sew. Make sure your stitch is balanced, adjusting the thread tension so that the stitch doesn't bind or ruffle the seam. If your serger has differential feed, raise the setting if your test seam looks wavy. For hemming soft knits, I find that serging the edge, turning up a 1/4-in. hem, and topstitching twice gives a stable, nonslippery finish.
Monday, November 14, 2011
Mini Quilt Inspiration
We'll be offering the Mini-quilt workshop again this Saturday from 11am-1pm. This workshop is a classic in our studio so I have added some inspirational photos to this slideshow to show you just what you can do in a 2-hour workshop.
The quilts may be small, but they are oh-so adorable. And making one in this class gives you such a sense of accomplishment. Take a look and feel free to sign up here. There are only 3 spots left.
Monday, October 17, 2011
NEW - Community Sewing Workshops
Wanted to give you all a heads up on our new Community Sewing Workshops that will be happening once a month to give you all a taste of what our classes are like.
We have just added two classes that will be happening both in October and in November. Guess what's the best part? They are only $5 each and you'll walk away truly having learned a brand new skill. How to Sew a Button:
Community Class - Beginner Level - 1/2 Hour Workshop
If we had a nickel for everytime we talk to people who want to learn how to sew and they tell us "I don't even know how to sew a button" we'd be gazillionaires. This class is for those that just want to learn how to do some mending and replace some buttons that have fallen off of favorite clothing pieces. Don't throw that shirt away, learn how to fix it!
In this workshop students will learn:
*How to thread and prepare a hand sewing needle
*How to sew a standard flat button the proper way
Community Class = $5
All Supplies Included
*How to sew a standard flat button the proper way
Community Class = $5
All Supplies Included
Upcoming Dates
Sunday October 30th, 2011 12 - 12:30pm
Sunday November 13th, 2011 12 - 12:30pm
Hand Sew Your Hem Workshop:
Community Class - Beginner Level - 1/2 Hour Workshop
Are you tired of paying the tailor way to much money to hem your pants? Do you have a pile of pants, jeans and/or skirts that could totally be worn, if only you could get the hem fixed or shortened? In this M Avery Designs Comunity class, we'll teach how to hem your own pants or skirt at home using just a needle and thread. You'll learn a skill that you can do at home without a sewing machine. Bring a practice pair of pants to hem if you want.
Community Class = $5
All Supplies Included
Upcoming Dates
Sunday October 30th, 2011 11am-11:30am
Sunday November 13th, 2011 11am - 11:30am
Community Class - Beginner Level - 1/2 Hour Workshop
Are you tired of paying the tailor way to much money to hem your pants? Do you have a pile of pants, jeans and/or skirts that could totally be worn, if only you could get the hem fixed or shortened? In this M Avery Designs Comunity class, we'll teach how to hem your own pants or skirt at home using just a needle and thread. You'll learn a skill that you can do at home without a sewing machine. Bring a practice pair of pants to hem if you want.
Community Class = $5
All Supplies Included
Upcoming Dates
Sunday October 30th, 2011 11am-11:30am
Sunday November 13th, 2011 11am - 11:30am
Monday, October 3, 2011
Hat Lab Starts on Thursday
There's a chill in the air and I reached into my fall hat bin yesterday because I was ready. It's almost like the fall has come just for us to start our Hat Lab on Thursday.
I am not teaching the class, but will be staying and stitching for most classes because 1. I love hats! and 2. Because Irina is such an excellent teacher, I can always learn many things when I take her hat class.
Irina is the hat expert. Plain and simple. She's been doing this a long time and has learned from the best and now creates patterns and samples for the best. Coach.
Irina's passion for hats started with her first trip to London in 1994: inspired by Top Shop, upon return she made hats for the artists friends. Soon she became famous in her native Ukraine for her casual, understated creations. Innovative and resourceful, she was working with vintage and recycling materials producing original collections and fashion performances.
Here are just a few of the adorable and highly functional designs we'll be working on in class:
Driver
Equestrian
Newsboy
Beret
I am not teaching the class, but will be staying and stitching for most classes because 1. I love hats! and 2. Because Irina is such an excellent teacher, I can always learn many things when I take her hat class.
Irina is the hat expert. Plain and simple. She's been doing this a long time and has learned from the best and now creates patterns and samples for the best. Coach.
Irina's passion for hats started with her first trip to London in 1994: inspired by Top Shop, upon return she made hats for the artists friends. Soon she became famous in her native Ukraine for her casual, understated creations. Innovative and resourceful, she was working with vintage and recycling materials producing original collections and fashion performances.
Here are just a few of the adorable and highly functional designs we'll be working on in class:
Driver
Equestrian
Newsboy
Beret
Monday, September 26, 2011
Sewing TV for Kids - Martha & Friends
Just came across this new production from AOL kids. It's cartoon webisodes of a new show called Martha & Friends that consists of a 10 year old Martha Stewart and her friends hanging out, cooking & crafting in their clubhouse.
I, of course love the idea of any show promoting kids crafting and sewing. I just watched the episode where they all made some changes and embellishments to their favorite jeans. It was pretty basic stuff that most adults would know how to do to add some pizazz to your boring jeans, but I love the idea that it's cartoon, 10 year old Martha showing you how to do it. And I especially got a kick out of her discouraging her friend from drawing in pen ink on her jeans. She immediately got out the stain fighting kit to help her friend try to get the ink out. How responsible of 10 year old Martha. But come on, even her cartoon hair cut is "responsible".
Friday, September 23, 2011
Hoboken Art & Music Festival This Sunday
Sunday, Sept. 25, 2011
11am to 6pm
Takes place on Washington St.
between Observer Highway to 7th St.
Over 300 Artists, Crafters, Photographers,Sculptors, Local Businesses, Restaurants,
Food Vendors, local non-profits & more
Rain or shine • Admission is Free
With 3 Stages of live music
with performances by:
Skanatra, Swingadelic, Hello Radio, Buzz Universe,
The Romance Commandos, Specktrum, LiL Monstaz,
Frankie Morales & the Mambo of the Times Orchestra,
The Benson Ridge Project, Big Jeff & the Bouncy People,
Erin & the Up Past Bedtime Band & much more
Vendor applications are still available.
Volunteers are needed.
Contact
Geri Fallo, Division of Cultural Affairs
Send an Email
Phone: 201-420-2207
Fax: 201-420-2009
Performance Schedule TBA
Schedules are tentative and subject to change.
Observer Hwy (bet. Newark & Observer Hwy)
Noon - The Jersey Follettes
12:45 pm - Emily and the Turitones
2:00 pm - Swingadelic
3:30 pm - The Romance Commandos
4:45 pm - Skanatra
Sixth Street Stage
12:30 pm - Specktrum
1:00pm - LiL Monstaz
1:45 pm - The Benson Ridge Project
2:30 pm - Hello Radio
3:45 pm - Buzz Universe
5:00 pm - Frankie Morales and the Mambo of the Times Orchestra
Children’s Stage located in the Capital One Bank parking lot on 3rd Street
11:45 am - Garden Street Music
12:30 pm - Hudson Dance & Music
1:10pm - Big Jeff & the Bouncy People
2:00 pm - Big Jeff & the Bouncy People
3:00 pm - Erin Lee & the Up Past Bedtime Band
4:00 pm - Erin Lee & the Up Past Bedtime Band
Special features include
- Fine artists are located between 2nd & 3rd St., so if you are an art collector, this is the place to be. Oil paintings, watercolors, acrylics, sculpture, mixed media, etc.
- Children’s area on 3rd street with rides, games, creative activities, puppet show, face painting,
clowns, balloons, live performances and much, much more:
- Crafters display / sell handmade: pottery, metalwork, wood items, furniture, blown & fused glass, quilts, household items made from recycled materials, cementware, batik clothing, hand painted furniture, candles, jewelry, dried florals, soaps & lotions and much more
- Food: Lots of great food throughout the fair. Hoboken restaurants will set up street cafes offering an eclectic variety of international foods such as: Thai, Indian, Greek, French, Mexican, Cajun and Italian
Transportation
Located just 3 blocks from all public transportation:PATH, NJ Transit Trains & buses, NY Waterway Ferries & the Hudson Bergen Lightrail
Washington Street will be closed from 6am to 9pm
between Observer Highway and 7th Street
During this time, NJ TRANSIT Bus No. 22 (North Bergen-Union City-Hoboken),
No. 89 (North Bergen-Hoboken) and No. 126 (Hoboken-New York)
will operate on a detour.
Customers traveling toward North Bergen and New York
will board and alight along Bloomfield Street at customer’s request.
Customers traveling toward Hoboken Terminal
will board and alight along Willow Avenue at marked bus stop locations.
Sponsors
NY Waterway Ferries,
The Hoboken Reporter & The Midweek Reporter,
Capital One Bank, Walgreens, NY Waterway Ferries,
PATH, Port Authority of NY & NJ,
Anthony Davids, Dunkin Donuts, Starbucks, Crumbs, Luca Brasi,
Steaz Iced Teas, GuS Grown Up Sodas, Boylans Soda & Illy Coffee
Subscribe to:
Posts (Atom)