Tuesday, April 26, 2011

Applique Inspriration

Due to a little communication misunderstanding, I will be teaching the applique classes this Saturday and not the lovely and talented Vera. Don't get me wrong, I LOVE to teach sewing and I do it fairly well, but I will admit, applique and quilting are not my specialty. Luckily both of these classes are fairly beginner level, I think I can handle it. ;)


In fact the more I think about it, the more excited I am to be teaching this new class on Saturday and to get myself a little more inspired & excited for the class, I did a little image searching on Google this morning. You would not believe how many adorable and inspiring applique designs there are out there on the interwebs.

I have to say all this cuteness is causing me to want to drive down to studio immediately and begin some new applique projects. Luckily I have the perfect excuse to get creating. My friend & former room mate Angela gave birth to a gorgeous baby girl yesterday and I can make her some goodies!

I really have to share with you all the ridiculously adorable applique ideas I found in literally a 10 minute search:

Bunting seems to be all the rage lately in the applique world. I love it! 

Talk about ridiculously adorable and oh so simple to make! 


And then of course there is also the Matryoshka Russian Doll applique trend which I am totally loving!


Sunday, February 20, 2011

Beginner Sewing Boot Camp - Our longest running Sewing Class

I have been going through many old class photos lately and I am realizing just how long our Fashion Lab Beginner Sewing Boot Camp class has been going on.  It's fun to think about just how many people have we've taught how to sew over the last 3 years the class has been going on.

And as I go through these photos, I notice we've collected a rather nice collection of project photos from this class. Feeling the need to share it with y'all:

Vintage Hat Dinner Party

The ladies of Hat Lab had the opportunity for a little post-class reunion last week and I happily tagged along. Thanks to our Hat Lab instructor Irina for inviting us over to her spacious apartment for yummy treats, wine and a chance to check out her vast vintage hat collection.


Highlights included a delicious blackbean & sweet potato stew straight from the "Kickin' Kitchen" of Lynda Layng, Irina's boyfriends banana dessert with fresh whipped cream and of course, getting the chance to try on Irina's collection of vintage hats.

Here are some photos from our fun night.


Friday, February 18, 2011

Latest Collective Designer

It was such a pleasure meeting Jersey City handbag designer Lisa Best of pippiHEPBURN this morning!

Lisa is our latest designer in our little hoboken designer collective. Her non-leather handbags & purses are inspired by the necessity of fun and we totally agree! Her bags are roomy, yet chic and full of pockets on the inside. She's perfected the art of slouchy and we are truly digging these bags! Come see for yourself at the store.


And here is her Etsy Site.

Wednesday, February 9, 2011

Burda Style DIY Fashion Show in Austin


There's still time! Submission deadline is this Thursday, February 10th, at 9am EST! 

If you are, or plan to be, in the Austin area we would love you to participate in our fashion show!

This is your chance to take center stage with a dream audience: 500 guests, including influential fashion bloggers, DIY world influencers, and the BurdaStyle family.

Our fashion show is your chance to gain some great press and some wonderful networking. Each participant will be featured in a new BurdaStyle blog series, Meet the Designer. BurdaStyle will also be heavily promoting this event in a newsletter going out to 185,000+ world-wide subscribers and to a membership of near 500,000 members.
The BurdaStyle DIY Fashion show is also the official wrap up party for The Texas Style Council Conference, hosted by Indiana Adams from Adored Austin!

This event is open to the public, so please join us to celebrate the world of creative fashion and DIY ingenuity!

What: BurdaStyle Fashion Show
Who: BurdaStyle and 15 DIY Fashion Designers
Where:
Venue 222 hosting Etsy, Awesome in Austin
222 East 6th Street
Austin, Texas 78701
When: Sunday, March 13th at 8-10pm
Fashion show starts promptly at 9:00pm with cocktails

How to Enter:

1. Submit your entry via email to submissions[at]burdastyle[dot]com, with the subject: “BurdaStyle Fashion Show”
2. Submissions need to include: Link to your BurdaStyle profile or Etsy profile, one paragraph about yourself and high res photo of you or your model wearing the 1-3 piece(s) you would like to showcase. Please include information about what you do and why you want to be part of this event.
3. Submission deadline is Thursday, February 10th at 9am EST.
BurdaStyle will announce the 15 designers on February 15th via BurdaStyle blog and newsletter.

**All designers will need to provide their own hair styling, make-up and model. We would love the designers to wear their fashions but you may decide to have someone else model. All designers must provide their own transportation to and from the event.

Thursday, January 27, 2011

Seamless Infinity Scarf Tutorial

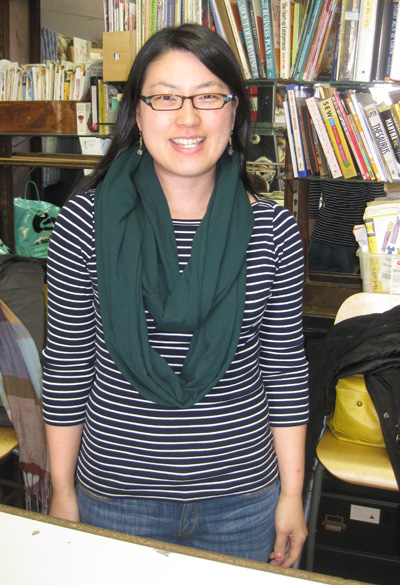
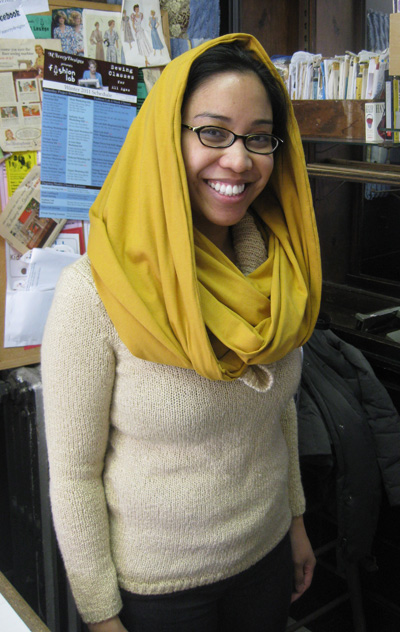
There are a bunch of how-to's out there on how to stitch an Infinity Scarf. But most of them require a big ol' visible seam where you sew the ends together. This is totally unnecessary and here is a quick easy way to make one without the unsightly seam. 


Fabric: Use fabric that is pretty stretchy. If this is going to be a winter scarf, choose a fabric that is also fairly cozy. We have found that spandex fabric is totally fine, but it's just not as nice to wear cause it tends to lay pretty flat, although if you are a year round scarf wearer, spandex would be great! I personally love to use a fuzzy knit or a heavier jersey knit, but I am from the northeast and right now we are getting hit with a pretty brutal winter and my infinity scarves have been part of my winter uniform.

Using a flexible measuring tape, determine how long you want your scarf to be. Drape the tape around your neck to determine the length. Usually you would want it to double around your neck without choking you. 

Once you have determined length, cut the fabric to the length you desire, but leave the width uncut for now. 

Drape this piece of fabric around you as you would wear your infinity scarf. Does it seem too bulky? If so, cut the width to where it doesn't seem too bulky anymore? 

Do you want it chunkier? That's fine too, you'll just need more yardage. You'll want to cut another piece of the same or contrasting fabric with the same stretchiness the same size as your original piece of fabric. Sew the two pieces of fabric together (right sides facing) along the length. Use a zig zag stitch if your machine does not have a stretch setting.

Now, once you have your length and width determine, fold the entire piece of fabric in half lengthwise with right sides facing and pin to secure it. Use LOTS of pins when working with stretchy fabric. Much easier! 
Again, using either the stretch setting on your machine or the zig zag stitch, sew the side you pinned (the non-folded side) together using a 7/8" seam allowance. (You want to use a pretty big seam allowance with a stretch fabric because it tends to roll on the ends and it just makes thing easier) But leave 2" on each end un-sewn.

Turn the tube of fabric right side out and pin your ends together (right sides facing). Because you left 2" on each end un-sewn,(as described in the last step)it makes it easier to sew your ends together. 


Next, sew the ends of the scarf together. 


Turn the seam in, so that the right side is showing. You should have a 4" opening that is not sewn. You can either top-stitch this closed with a sewing machine (which will be more visible) or just hand stitch the 4" opening shut, which will be easier to hide.

That's it! 


Need a little more direction?

Come to our 1-hour class on February 19th, 2011 from 3-4pm.

Here are all the details.

Tuesday, January 18, 2011

Recycled Sweater -> Hat & Mitten Set

This past Saturday, we hosted the hat & mitten set workshop at the studio. Everybody brought inan old sweater they don't wear anymore (or in Colleen's case, and old sweater that her co-worker doesn't wear anymore). We then turned these old, unwearable sweaters into a much more wearable winter hat & mitten set.

Here is Colleen's before:


(I guess it's not technically her before, as the photo was shot after she cut the sleeves off to use for her project...)

What then happened was really pretty simple:

First make a pattern. You are going to trace one hand on a piece of paper with the thumb at a 30-degree angle from the fingers. Draw a mitten shape around the outline of the hand, adding 1/2 inch. 

Next, cut out the pattern and pin it onto both layers of the sweater. Cut out the pattern to create two mitten shapes.

Now, with right sides facing, pin the mitten cutouts together, then with a sewing machine, sew them together, leaving a 1/4-seam allowance. Begin sewing at the cuff along the outside edge of the mitten, making sure not to stretch the fabric. For smooth curves, pick up the foot, and rotate the mitten as you sew.

Finally, to prevent fraying, sew around the mitten again, leaving a 1/8-inch seam allowance. Turn the mitten right-side out, and press. Repeat these steps for the second mitten.


Now for the hat, we did use a pattern, but it's a super simple one that I wound up finding online. The hat uses four panels that look like this:


Here are the directions I found on craftstylish.com.  I used these instructions to make my pattern and my first hat. 

"To determine the width of your panels, divide the head circumference by 5, then add 1 inch for seam allowance (1/2 inch each side). My head measures 22 inches around, so dividing it by 5 gave me 4.4, which I rounded up to 4-1/2. Adding 1 inch gives me 5-1/2 inches. Add 1 inch to your length measurement. Mine was 8-1/2 inches, so I have 9-1/2 inches for my total length."
 
But what I found is that depending on how much stretch you have in your felted sweater, you may not need all five panels. I have a pretty big melon and only used 4 panels of this size, sewn together.
 
So that said, you are going to put your first two panels together with rights sides facing. Sew from the bottom edge up to the point using a 1/2" seam allowance. Do the same with two more panels. Now put your doubled panels together with right sides facing and sew half of the rainbow together. At this point, try it on and determine if four will suffice or if you need another panel. If it's big enough to fit your noggin, continue sewing the rainbow. If you need the 5th panel, sew that to the series of four and finally sew up the remaining seams so you have what looks like a hat.
 
As you can see from Colleens photo, she decided to fold up the edge of the hat and it fit her perfectly. A couple of other students (sorry I don't have photos)ended up folding the extra edge in and stitching it down. If you decide to do this, be careful not to stretch as you sew or it looks pretty stretched out once you are done. You could even try hand sewing the edge under to prevent this from happening, we found.