Thursday, January 27, 2011

Seamless Infinity Scarf Tutorial

There are a bunch of how-to's out there on how to stitch an Infinity Scarf. But most of them require a big ol' visible seam where you sew the ends together. This is totally unnecessary and here is a quick easy way to make one without the unsightly seam. 


Fabric: Use fabric that is pretty stretchy. If this is going to be a winter scarf, choose a fabric that is also fairly cozy. We have found that spandex fabric is totally fine, but it's just not as nice to wear cause it tends to lay pretty flat, although if you are a year round scarf wearer, spandex would be great! I personally love to use a fuzzy knit or a heavier jersey knit, but I am from the northeast and right now we are getting hit with a pretty brutal winter and my infinity scarves have been part of my winter uniform.

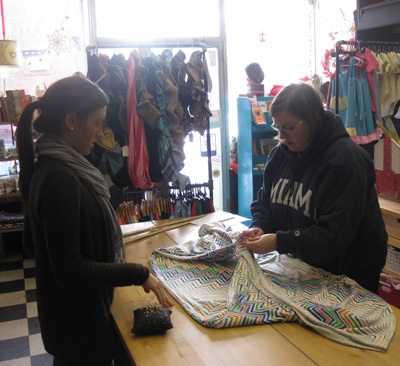
Using a flexible measuring tape, determine how long you want your scarf to be. Drape the tape around your neck to determine the length. Usually you would want it to double around your neck without choking you. 

Once you have determined length, cut the fabric to the length you desire, but leave the width uncut for now. 

Drape this piece of fabric around you as you would wear your infinity scarf. Does it seem too bulky? If so, cut the width to where it doesn't seem too bulky anymore? 

Do you want it chunkier? That's fine too, you'll just need more yardage. You'll want to cut another piece of the same or contrasting fabric with the same stretchiness the same size as your original piece of fabric. Sew the two pieces of fabric together (right sides facing) along the length. Use a zig zag stitch if your machine does not have a stretch setting.

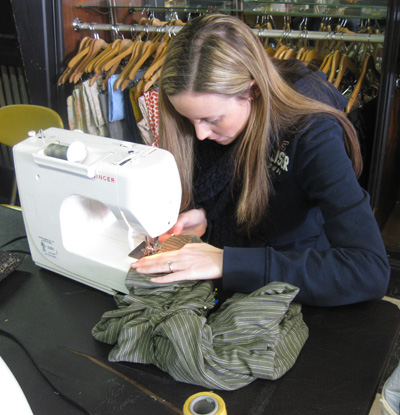
Now, once you have your length and width determine, fold the entire piece of fabric in half lengthwise with right sides facing and pin to secure it. Use LOTS of pins when working with stretchy fabric. Much easier! 
Again, using either the stretch setting on your machine or the zig zag stitch, sew the side you pinned (the non-folded side) together using a 7/8" seam allowance. (You want to use a pretty big seam allowance with a stretch fabric because it tends to roll on the ends and it just makes thing easier) But leave 2" on each end un-sewn.

Turn the tube of fabric right side out and pin your ends together (right sides facing). Because you left 2" on each end un-sewn,(as described in the last step)it makes it easier to sew your ends together. 


Next, sew the ends of the scarf together. 


Turn the seam in, so that the right side is showing. You should have a 4" opening that is not sewn. You can either top-stitch this closed with a sewing machine (which will be more visible) or just hand stitch the 4" opening shut, which will be easier to hide.

That's it! 


Need a little more direction?

Come to our 1-hour class on February 19th, 2011 from 3-4pm.

Here are all the details.

Tuesday, January 18, 2011

Recycled Sweater -> Hat & Mitten Set

This past Saturday, we hosted the hat & mitten set workshop at the studio. Everybody brought inan old sweater they don't wear anymore (or in Colleen's case, and old sweater that her co-worker doesn't wear anymore). We then turned these old, unwearable sweaters into a much more wearable winter hat & mitten set.

Here is Colleen's before:


(I guess it's not technically her before, as the photo was shot after she cut the sleeves off to use for her project...)

What then happened was really pretty simple:

First make a pattern. You are going to trace one hand on a piece of paper with the thumb at a 30-degree angle from the fingers. Draw a mitten shape around the outline of the hand, adding 1/2 inch. 

Next, cut out the pattern and pin it onto both layers of the sweater. Cut out the pattern to create two mitten shapes.

Now, with right sides facing, pin the mitten cutouts together, then with a sewing machine, sew them together, leaving a 1/4-seam allowance. Begin sewing at the cuff along the outside edge of the mitten, making sure not to stretch the fabric. For smooth curves, pick up the foot, and rotate the mitten as you sew.

Finally, to prevent fraying, sew around the mitten again, leaving a 1/8-inch seam allowance. Turn the mitten right-side out, and press. Repeat these steps for the second mitten.


Now for the hat, we did use a pattern, but it's a super simple one that I wound up finding online. The hat uses four panels that look like this:


Here are the directions I found on craftstylish.com.  I used these instructions to make my pattern and my first hat. 

"To determine the width of your panels, divide the head circumference by 5, then add 1 inch for seam allowance (1/2 inch each side). My head measures 22 inches around, so dividing it by 5 gave me 4.4, which I rounded up to 4-1/2. Adding 1 inch gives me 5-1/2 inches. Add 1 inch to your length measurement. Mine was 8-1/2 inches, so I have 9-1/2 inches for my total length."
 
But what I found is that depending on how much stretch you have in your felted sweater, you may not need all five panels. I have a pretty big melon and only used 4 panels of this size, sewn together.
 
So that said, you are going to put your first two panels together with rights sides facing. Sew from the bottom edge up to the point using a 1/2" seam allowance. Do the same with two more panels. Now put your doubled panels together with right sides facing and sew half of the rainbow together. At this point, try it on and determine if four will suffice or if you need another panel. If it's big enough to fit your noggin, continue sewing the rainbow. If you need the 5th panel, sew that to the series of four and finally sew up the remaining seams so you have what looks like a hat.
 
As you can see from Colleens photo, she decided to fold up the edge of the hat and it fit her perfectly. A couple of other students (sorry I don't have photos)ended up folding the extra edge in and stitching it down. If you decide to do this, be careful not to stretch as you sew or it looks pretty stretched out once you are done. You could even try hand sewing the edge under to prevent this from happening, we found.

Tuesday, January 11, 2011

Hoboken Guide @ Design Sponge

A fellow business owner here in town passed along a link to a Hoboken City Guide on the Design Sponge Blog. I am soooo honored to be a part of this piece, as I absolutely love Design Sponge!

"Welcome to Hoboken. A vibrant New Jersey town just a hop, skip and jump over the river from Manhattan. Hoboken was made famous as the birthplace of Frank Sinatra, the filming location of the Marlon Brando movie On The Waterfront and the music venue “Maxwell’s” where Bruce Springsteen filmed the video for “Glory Days.”

Hoboken is also the town of many firsts, including inventions like freeze-dried coffee, bubble wrap and ice cream, as well as the first organized baseball game and the first brewery. It boasts the most bars and restaurants in one square mile of its town’s boundaries, and the indie/designer/art scene is on its way up due to many artists and musicians living here. It is also home of the infamous Cake Boss from the Lifetime show."

And here is what they had to say about us, under the category Art, Craft Supplies & Galleries:

"M. Avery Designs — Also home of the Hoboken Handmade Collective. If you love fabric, this is the place to visit. They also host classes and socials and offer open studios for use of their sewing machines. All items in the store are handmade and gorgeous. 266, 7th Street (at the corner of Willow Ave.)"

Read more at Design*Sponge  

Friday, January 7, 2011

Adorable Kids Sewing Project

I am always looking for fun ways to teach kids to sew in our Fashion Lab Kids Hand Sewing & Crafting classes. Today I came across these super cute animal sewing cards on a blog written by a graphic designer in California and she made it beyond easy! She's got PDF's of all four of these adorable animal designs that you can print out onto sturdy paper and get the kids stitching lickety-split!

Guess what we'll be doing in class on Tuesday?!?

Monday, January 3, 2011

Mommy Sewing Class - Free Intro Class in January

Mommy Sewing Lab is our latest and greatest daytime sewing class for moms and anyone that wants to learn to sew baby & kid stuff. This class is for complete beginners who would like to learn the basics and/or intermediate stitchers who would like to improve their skills and meet other people with similar interests. We'll focus on learning how to make baby items, kids clothing, baby quilts and much, much, more. Bring in your ideas, and we'll make them!

Come sew in our relaxed environment, with instructors here to help you with your latest sewing project.
New moms are welcome to bring their (non-walking) infants. There is private space in the back of the studio for nursing.
 
It's an on-going class that will be happening:  

Every Wednesday 2-3:30pm


and anyone can start at any time


Here are the details:

Introductory drop-in Class is free in January 2011 - You are just responsible for supply costs (usually about $5 if you don't bring your own fabric)

Purchase a Six Class Pass for $120

Come on the days that you can make it. You have 3 months to use your classes.Please note: Card expires 3 months from purchase date.

Complete beginners will take our Basic Sewing Overview at their first class to learn to operate the sewing machines. You'll make your very first project, a nursing cover, at your first class and all supplies are included for this project. Everyone will have the chance to make bigger and better (baby & child related ) projects as they improve their skills more and more as they keep coming to class.�

Check out more details on website.

New Meetup - Fabric Flower Craft-Along

I know it's barely winter, but I am already dreaming of spring....

Let's all get together for our next Fashion Lab Meetup to make some fabric flowers. There are literlly hundreds of great tutorials out there for making adorable fabric flowers. For most of them all you need are fabric scraps & cool buttons.

Come learn how to make fabric flowers and share with fellow meetup members, your favorite techniques for crafting fabric flowers.

Bring all the fabric scraps you have laying around your house. I will provide all the tools and sewing machines (if we even need them) as well as snacks :)


Here is a great tutorial to get your inspired:

http://kindawonderful.typepad.com/pink_paper_peppermints/2008/05/31-crafty-flo-3.html

Where: M Avery Designs Studio 266 7th Street Hoboken NJ 07030
When: Saturday January 29th, 2011 2:30-4:30pm
RSVP and/or Join our Meetup Group:
http://www.meetup.com/fashionlab/calendar/15899558/?from=list&offset=0

New Sewing Classes in 2011

Happy New Year!

We are just now finishing up our poster listing all our sewing classes for young and old in Winter 2011.

Check it out: