Wednesday, August 31, 2011

What is Fashion Draping?

We are getting so excited about the return of our Beginners Fashion Draping Lab happening on Sunday afternoons starting on on September 11th! But it occurred to me recently that perhaps some people aren't exactly sure what "draping" is. So I thought I might take a second to clarify a bit.

In a nutshell, fashion draping is the process of taking a sketch of a clothing design and turning it into a pattern that can then be made into the actual garment. Because our bodies are in 3-D and patterns are created in 2-D, the process of draping is what you do on the dress form to create the flat pattern pieces that are eventually cut out of the fabric.

Maybe I am making this more confusing that it needs to be. It's actually a pretty simple process that our instructor, Alisha Forler is pretty darn good at. And she's excited about helping you learn how to do it too.

But before you take the class, take a second to read this excellent article from Designer Nexus explaining the process and why people who are interested in designing their own clothes should learn how to drape.


Check out the full article from their website here.

What is Fashion Draping and Why Should
Apparel Designers Learn How to Drape?

Posted on Apr 05, 2011
 
Fashion draping is an important part of fashion design. Draping for fashion design is the process of positioning and pinning fabric on a dress form to develop the structure of a garment design. A garment can be draped using a design sketch as a basis, or a fashion designer can play with the way fabric falls to create new designs at the start of the apparel design process. After draping, the fabric is removed from the dress form and used to create the sewing pattern for the garment.

Fashion draping and fitting are usually done with muslin (an inexpensive, unbleached, loosely woven cotton) to resolve any design and fitting issues of a garment before cutting the pattern in real fabric. However, it is important to drape using a fabric that has similar drape characteristics (the way it falls and folds) as the real fabric of the finished garment. Muslin comes in a variety of weights, and inexpensive synthetic fabrics can also be used in fitting and draping for apparel design.

Fashion designers drape garments in sections i.e.: front bodice, back bodice, front skirt, back skirt etc. and only the right side of the garment (when worn) is draped, unless the apparel design is asymmetrical.
The general process for how to drape for fashion is as follows:
  • Pieces of muslin are cut and prepared. This includes measuring, tearing, blocking, pressing, and marking grain lines and other important reference lines.
  • Now the actual “draping” begins. The fabric is pinned to the dress form and positioned to form various darts, tucks, gathers, etc., which give shape and fit to the garment.
  • Once the desired design is achieved, the muslin is marked while still on the dress form to indicate where the seam lines, darts, etc. are located on the fabric.
  • When marking is finished, the muslin is removed from the dress form and laid flat on a table for “truing”. Truing is the process of using rulers and design curves to connect, smooth out and finalize the markings.
  • Once truing is complete, seam lines are added and excess material is cut away.
  • The muslin is then pinned together (with all darts pinned) and placed back onto the dress form to check for fit accuracy and to drape any additional parts of the garment.
  • Once all pieces are the garment are draped, they are all pinned together and placed on the dress form to check for fit accuracy.
  • When the apparel designer is satisfied with the look and fit of the pinned garment, the muslin is removed from the dress form, pressed flat, and all seam lines, grain lines, markings, notches, etc. are transferred to paper, creating the sewing pattern for the garment.

Why Should Fashion Designers Learn How to Drape?

While the majority of companies in the fashion industry no longer use draping as part of the design process, draping is a key skill which allows apparel designers to understand what creates a great fit and how to achieve it. If a garment sample fits poorly, a designer who is familiar with how darts and seams give shape to garments can spot what is creating the fit issue and advise the factory how to correct the problem.

However, the art of draping isn’t completely lost; in high fashion, couture fashion houses, evening, and lingerie companies most garments are created through draping. When draping a garment, the designer can immediately see what her apparel design will look like on the body, and immediately correct any fit or design problems before putting anything down on paper. In addition, some apparel designs are just impossible to make via flat patternmaking and need to be draped first. And some fabrics need to be experimented with on a dress form to see how they behave.

While draping for apparel design may seem like a daunting and tedious approach to creating patterns, it’s actually one of the more creative parts of the fashion design process. Apparel designers can experiment with fabric, and decide where to place darts, tucks, and other design elements. Playing with the way fabric folds and hangs on the body is a fun way to create new fashion designs that you wouldn’t have thought of sitting in front of a sketchpad!

Saturday, August 27, 2011

Vintage Pattern Primer - From Elegant Musings

Just found this great blog with a really informative post on reading vintage sewing patterns.

As you can see from my classes, I absolutely love to sew from the vintage sewing patterns, but it can be tricky as the language in them is different from modern patterns.

Huge thanks to the blog Elegant Musings for taking the time to post about some excellent tips when sewing from vintage patterns.

Here is the original blog post.

Trace all your pattern pieces. Some people don’t bother, but it’s helpful to have traced the pattern pieces (complete with all the notches, dots and other markings) onto a sturdy paper. This allows you to not only tweak a “master pattern” to your fitting needs, but also preserves the fragile original. I use inexpensive banner paper (about $5/roll) from the office supply store. Some dressmakers use non-fusible interfacing, tracing paper or Swedish Interfacing. Many patterns from the decades prior to the 1950s are unprinted as well, which means that unlike our modern patterns, there are no markings on them beyond cut out notches and holes for dots. You have to learn to decipher them a bit (this is where the piece schematic on the instruction sheet/layout guide is invaluable!), and tracing them and marking all these things in a more visual way helps loads.


Have a good sewing reference book handy. My favorite is a 1970s edition of The Vogue Book of Sewing I picked up second hand. Vintage patterns tend to be a bit more detail oriented and complex, not only in construction but technique, and some aspects can be a bit vague (I am in the midst of sewing a 1940s skirt, and the instructions stated to “insert slide fastener (zipper) by enclosed instructions”, leaving no clue about how to do it in the body of the instruction pamphlet. Although I know how to put a zipper in, it’s these little things that aren’t always spelled out.). It’s best to have a thorough manual to look things up when you have a question, or want to find out if there is a better/faster way to do something.
Pay attention to the pattern markings. On average, modern patterns do not usually have as many markings (though I think this is due in large part to being printed, unlike earlier patterns which relied on a series of large and small dots to map out details and grainlines), so it’s tempting sometimes to skip over these when starting out. Don’t! Take the time to mark things after you cut them out, before you sew.

FIT! I cannot stress this enough! Sizing varies greatly in vintage patterns: a 1930s size 12 is not the same as a modern 12 (it’s usually the equivalent of a modern size 2!). Proportion is also something to consider: many vintage patterns (particularly those pre-1960s) account for how foundation garments shaped women into the “ideal” figure of a particular decade. In 30s patterns I find the hips are usually very slim, since the silhouette was more sleek and smooth through the torso/hip area. In the 50s, many patterns are huge in the bodice area, or the darts are placed to create a very high, pointy bustline (which would work with a 50s bullet bra, but not a modern one). You need to learn to catch these things early on and adjust them before cutting out your muslin (or fashion fabric). Trust me: it saves a lot of head scratching and frustration!

If a pattern is something that is comprised of many pieces, cut on the bias, looks tricky, or just gives me the heebie jeebies about fit, I make a mock up or “muslin” of at least the bodice first (I can usually fudge my way through the skirt in a dress). I keep a bolt of plain, unbleached muslin on hand for this, but any inexpensive fabric (or something recycled–like old sheets) works. If your pattern calls for a “specialty” fabric, be sure to make a muslin in a less expensive version of that fabric, since material weight and drape does affect fit greatly. Oh, and for things like slacks, boned bodices, etc., I always make a muslin. These garments vary quite a bit from decade to decade!


A subcategory of fit that should be mentioned: often you fall head over heels for a pattern that isn’t quite your size, and presents you with the conundrum about making it up. It’s quite possible to have your cake and eat it too in this instance though! Pattern grading is an invaluable skill to have when working with vintage patterns, and is actually rather easy to master. Some resources on pattern grading:
Instructions should be at least studied. Admittedly I don’t always follow the instructions; it depends on the project and how complicated the design is. However, at least reading over the instruction sheet before embarking on the project–even if you don’t intend on following it to the letter–will give you some vital clues to using a vintage pattern. For instance: many times seam allowances on vintage patterns differ quite a bit from modern ones: sometimes the main seams are 1/2″ and the side seams are 3/4″ in the same pattern! Another example would be side seams: some vintage patterns do not have you sew the side seams until the skirt and bodice are attached; in some instances this makes certain steps easier than sewing those side seams before the skirt and bodice are sewn at the waist.

Basting is your friend. Many older pattern instructions indicate this throughout the pamphlet, and it’s a great way to test fit as you go too. Although it can be a bit of a pain, it’s easier to rip out basting than smaller stitches!
patternprimer02 
 
 
Pay attention to fabric specifications. Many times (but I won’t say 100% always), what makes a successful garment sewn from a vintage pattern is the fabric you choose. While some styles (like blouses, shirtwaist dresses, casual skirts, etc.) can be done in quilt weight cottons, not every design is suited to this medium weight material. Take a look at the pattern’s specifications for fabrics: are they drapey and fluid, heavy weight, stiff, or light and diaphanous? Many fabrics available decades ago are no longer manufactured, or very hard to find. However, there are what I like to call the “basics” readily available: silk chiffon, crepe (rayon, wool and silk being the most popular), gabardine (of various fibers), cotton voile and lawn, wool gauze, tweed, etc. Some may not be available at your local “big box” fabric stores, but will require hunting down from online retailers. In the end though, a little detective work is worth it!

Pay attention to fabric specifications. Many times (but I won’t say 100% always), what makes a successful garment sewn from a vintage pattern is the fabric you choose. While some styles (like blouses, shirtwaist dresses, casual skirts, etc.) can be done in quilt weight cottons, not every design is suited to this medium weight material. Take a look at the pattern’s specifications for fabrics: are they drapey and fluid, heavy weight, stiff, or light and diaphanous? Many fabrics available decades ago are no longer manufactured, or very hard to find. However, there are what I like to call the “basics” readily available: silk chiffon, crepe (rayon, wool and silk being the most popular), gabardine (of various fibers), cotton voile and lawn, wool gauze, tweed, etc. Some may not be available at your local “big box” fabric stores, but will require hunting down from online retailers. In the end though, a little detective work is worth it!

Pick out patterns that you know will flatter you when you start out. Having an intuitive sense of what is going to look good in the end really helps with the process of using vintage patterns. When I started out, I made the mistake of trying patterns that I thought would look good on me, but in reality I should have known that they weren’t the most flattering styles. The results were less than happy: I didn’t like sewing with vintage patterns because I thought they were “dumpy” and I just didn’t fit into them. It was until a few tries that I started to catch on to not only fit (which is tied up in this), but also styles that looked good on me. Studying your figure shape and determining what will look best on you is key. But even if you pick a decade that isn’t your “best” (for me, it’s the 30s), you can learn to fit things in such a way as to make them tailored to your figure needs.


Pick out patterns that you know will flatter you when you start out. Having an intuitive sense of what is going to look good in the end really helps with the process of using vintage patterns. When I started out, I made the mistake of trying patterns that I thought would look good on me, but in reality I should have known that they weren’t the most flattering styles. The results were less than happy: I didn’t like sewing with vintage patterns because I thought they were “dumpy” and I just didn’t fit into them. It was until a few tries that I started to catch on to not only fit (which is tied up in this), but also styles that looked good on me. Studying your figure shape and determining what will look best on you is key. But even if you pick a decade that isn’t your “best” (for me, it’s the 30s), you can learn to fit things in such a way as to make them tailored to your figure needs.


Wednesday, August 24, 2011

More Vintage Dress Lab Please

I don't know about you, but I can't get enough of these vintage patterns. The looks of the 60's, 70's & 80's just keep getting recycled in todays fashions. It's so easy to make wearable dresses today using the patterns for yesterday. I would have to say this is what makes our Vintage Dress Lab continue to be one of our most popular Fashion Lab Series Classes.


I went through the treasure trove of my vintage pattern collection today and picked out 4 fresh (so to speak) vintage patterns to be added to the upcoming Vintage Dress Lab that is happening on Tuesday nights in October. The dresses added to the line-up reflect the fall season a bit better, as well.

If you haven't already taken this class, fear not. If you've got some sewing experience under your belt (ie, you're comfortable on the sewing machine and you have some pattern reading experience) you can take this class easily. You may not complete four dresses in the 4-week course, but you'll have access to all four patterns and if you give it some extra time (open lab hours - which are free with this class!)four dresses are totally do-able.

If you have already taken this class, come take it again! Four new, never done before projects means that there is never a project repeat! No matter how many times you take this class, you'll always make new dresses and learn new skills. I promise!


The other really cool thing about this class you are forced to learn how to size patterns to fit your own body. Vintage patterns typically come in one size only. It's not like the patterns today that have multiple sizes in one envelope. So depending on the size of each of the patterns you choose to do in this class, part of what you will be learning is how to make adjustments to the patterns so they fit your body measurements. You'll see just how simple and un-intimidating this process really is.

Here is the link to all the details of the class.


Monday, August 22, 2011

The Early Bird Gets the Worm (Or in this case, a 15% discount on a sewing class)

We've started a new program this fall at M Avery Designs allowing students to sign up early for classes and get a discount.

The rule works as follows:
  • Sign up for a class at least 1 month before the start of the first class and you get a 15% off discount. 
  • Right now, the early bird discounts only work with the Fashion Lab series classes.
  • If you for the early bird discount past the 1 month cut off date, you are responsible for paying the difference at your first day of class.
We have some exciting Fashion Lab series classes coming up this fall.

Here they are: 


Fashion Draping Lab
Learn to Drape your Own Patterns Class
September 2011
Details

Mommy Weekly Sewing Lab
Classes Every Monday & Wednesday 2-3:30pm
First class is always free - Start Anytime
Details
 
Vintage Dress Lab
4-Week Vintage Dress Class

October 2011
Details
 
Beginner Sewing Boot Camp
4-Week Learn to Sew Class

September 2011
Details
 
Hat Lab
4-Week Hat Making Class

October 2011
Details
 
Home Decor Lab
4-Week Vintage Dress Class

October 2011
Details


Thursday, August 18, 2011

Fall Class Schedule Update


We are very excited to announce that the fall class schedule has been posted online!

We have done something a little different this year and divided up the class into different sections including:

Make it & Take It Workshops - These are project based workshops where you learn to make a specific things from start to finish and take it home with you after class.
Fashion Lab Series Classes - These are classes that usually take place over a series of classes that meet once or twice per week. Projects completed will depend on the pace that you work. These classes usually come with open lab time to work outside of class. 
Skills Classes - These are classes that focus on core sewing skills used in most sewing projects and range from beginner to advanced. 


We super excited about all the new classes including: button workshop, pattern workshop, dog jacket workshop, curtain workshop, zipper bag workshop, fabric flower workshop, to name just a few.

We have also brought back some requested classes including mini-quilt workshop, applique bunting/banner workshop & the draping lab.

If you'd like to take a look at the schedule with all the classes in one place, check out our Schedule at a glance. You can even print this one for your fridge.

Wednesday, August 17, 2011

Nursing Cover Tutorial

Mommy Sewing Lab - Sewing Project: Nursing Cover

Here is a quick tutorial of the project you will work on in the introductory Mommy Sewing Lab. It's a great way to get the hang of sewing and even if you're not currently nursing, they make great handmade baby shower shower gifts.

Supplies
* 1 yard fabric of your choice
* Two O or D rings
* 12" of boning

1. Cut a 35" x 30" piece from your fabric. This will be the main part of the cover. Set aside.

2. Cut a 4" wide strip along the length of the remaining fabric.

3. Fold the 4" piece in half lengthwise, right sides together, and pin.

4. Sew down the length on the side that is not folded with a 1/4" seam.

5. Turn the strip right-side out.

6. Flatten strip with the seam down the middle and press flat

7. Cut the strap into two pieces. One should be about 26" long. The other end should be about 8" long.

8. Thread one end of 8" piece through both D rings. Fold end over 1/4" and press. Fold over another 1/4" and press.

9. Stitch the hem along the edge, then again closer to the D rings to keep them in place.

10. Stitch side hem along outside of fold from top to bottom.

11. Repeat on opposite side, then along bottom. Leave the top unfinished.

12. Fold the top edge over 1/4" then a second time 3/4" and pin in place.

13. Stitch along the folded edge to creat a 3/4" tunnel to put the boning into.

14. Slide the boning to the middle of the cover and make a stitch on either side so it can't slide around.

15. Attach the straps on either side of the boning with a box stitch.

Anatomy of a Sewing Machine

Found this great, really basic "Anatomy of a Sewing Machine" resource Craftzine published back in April 2007. It was written by Christine Haynes and Kent Bell.

This handy little feature showcased the illustration below, done by Kent, and the corresponding descriptions below. Useful when you're just getting started working with sewing machines as well as when you're troubleshooting. 

I was drawn to it because of the graphic (adam thinks I should get a tattoo of it), but upon reading it, found it really really useful. So here it is. Can also be found online here.


1. Pedal -  The speed of the machine is controlled by the foot pedal.

2. Slide plate - Slides open to reveal the bobbin.

3. Bobbin - One of the two threads used to make a stitch is stored in the bobbin, which is located under the needle and throat plates.

4. Feed - These little metal teeth pull the fabric through so that it can be stitched.

5. Throat plate - Stays in place while the needle penetrates through a hole to pick up the bobbin thread underneath.

6. Presser foot - Interchangeable with other specialty feet, it holds the fabric in place.

7. Needle - Most projects will utilize one of four types of needles. The sharp point needle is used most often with woven fabrics. The ballpoint needle is ideal for knits; the wedge point needle is used for leather and vinyl; and twin or triple needles are
used for decorative topstitching.

8. Foot pressure dial - Correct foot pressure results in even feeding of the fabric. Some machines automatically adjust tension and pressure to the fabric. Always check tension and pressure on a scrap of fabric before starting to sew. Generally, the lighter the weight of fabric, the lighter the pressure needed.

9. Stitch tension dial - The stitch tension dial sets the amount of tension on the threads while sewing. Too much tension results in too little thread fed into the stitch, causing the fabric to pucker. Too little tension results in a loose stitch.

10. Bobbin winder thread guide - On a machine with an external bobbin winder, the thread loops around this guide between the spool and winder.

11. Stitch selection dial - This is where you choose between the many different stitches: straight, zigzag, and other decorative stitches. Can also be done digitally.

12. Needle position - If you are sewing a zipper or doing other specialty stitching, you might need to move the needle from the center position to a left or right position.

13. Spool pin - Spool of thread sits on the spool pin. Some machines have more than one for decorative stitching. 
14. Bobbin winder - The empty bobbin sits on this winder to be threaded. When winding bobbins, always start with an empty bobbin so the thread will wind evenly.

15. Flywheel - This wheel spins as you push down the pedal. Most machines disengage the flywheel when winding bobbins.

16. Stitch length dial - The stitch length dial is on a "per inch" scale from 0 to 20 per inch, a metric scale from 0 to 4mm, or a numerical scale from 0 to 9.

17. Stitch width dial - When you use decorative stitches and zigzag stitching, this dial can determine the width of the stitch.

18. Reverse stitch button - If you want to secure your stitch at the beginning and ending, sew a few stitches in reverse by pushing this button down.

Tuesday, August 16, 2011

Peter's 30 Sewing Dos and Don'ts - Borrowed from Burdastyle

I just came across this blog entry over at the Burdastyle Website and I cannot agree more. This list covers all the things that I've painstakingly learned in my 20+ years of sewing. If you're new to sewing, I suggest you heed this advice. It will save you loads of time and anguish! No need to have one of those "I feel like throwing my sewing machine out the window" moments that I used to have when I was first sewing.


When native New Yorker Peter Lappin bought his first sewing machine two years ago to hem a pair of thrift store jeans, little did he know he was initiating a journey that would bring him fame and fortune. While awaiting his fortune he stays busy writing “the world’s most popular men’s sewing blog,” Male Pattern Boldness, and now contributing to BurdaStyle.


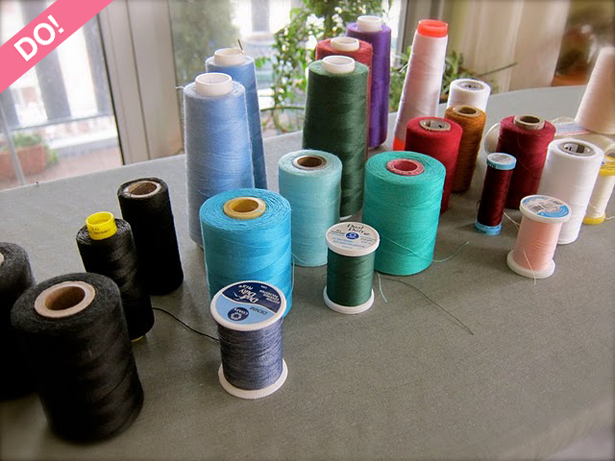
Peter’s SEWING DO's
1. DO sew only projects you’re excited about.
2. DO start an important project with a fresh sewing needle.
3. DO clean your sewing area and the bed of your sewing machine thoroughly (I use rubbing alcohol) before sewing with light-colored or white fabric.
4. DO give yourself a break between projects.
5. DO keep your sewing area clean — or cleanish.
6. DO consider sewing with a vintage sewing machine, if only for the experience (you might prefer it).
7. DO keep a spare sewing machine (you’ll stumble on a cheap one at a thrift store eventually).
8. DO pre-shrink your fabric if your fabric is apt to shrink in the wash.
9. DO press as you go.
10. DO learn how to maintain your sewing machine.
11. DO organize your sewing notions so you know where to find them next time you need them.
12. DO invest some time figuring out thread tension for your sewing machine. (It’s basically just two disks and a spring.)
13. DO create a dedicated sewing space.
14. DO learn from your mistakes.
15. DO share your sewing knowledge with others.
BONUS DO!
16. DO talk up sewing when you can — young people need to know it exists.


Peter’s SEWING DON’Ts
1. DON’T sew when you’re feeling exhausted.
2. DON’T rush. Another day won’t make a difference and you’ll be wearing your project (hopefully) a long time.
3. DON’T sew for others unless the idea brings you joy.
4. DON’T buy the cheapest new sewing machine you can find at Walmart, Kmart, etc.
5. DON’T use cheap interfacing.
6. DON’T fall for every bell and whistle available on a new sewing machine; you’ll never use most of them.
7. DON’T iron with a dirty faceplate.
8. DON’T beat yourself up is your garment doesn’t come out the way you’d hoped.
9. DON’T sew under poor light.
10. DON’T put water in your iron if you’re ironing a fabric that’s water-stainable (ask me how I know!).
11. DON’T keep every last fabric scrap for the fantastic quilt you will (never) make someday.
12. DON’T forget to clean out the fuzz beneath your throat plate periodically.
13. DON’T overlook refurbished machines; they’re just as good as new imo.
14. DON’T set unreasonable standards for yourself.
15. DON’T force yourself to finish a project you’ve lost passion for.
BONUS DON’T!
16. DON’T hoard sewing notions!

So what do you think? 
Is there anything you’d include on your do and don’t list Peter has missed here?
Feel free to add some of your own in the comments section below!